Extending the upper A-arm mount when lowring a RC

lbstone

Full Access Member
Joined
Nov 18, 2006
Messages
427
Reaction score
0
Location
Connecticut
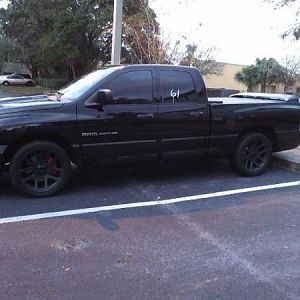
Just curious how some people have done this when lowering their RC's and by how much. I'm starting mine on Friday and have been doing a ton of research making sure I've got everything ready. I printed out a couple of tips in the DIY section but I haven't really seen anyone comment on how to extend these holes exactly and by how much. I was thinking of using a drill bit and just drilling out a section starting about half an inch over from where the factory hole ends. Then I was going to use a aggressive sort of dremmel bit thats about the same diameter of the hole to smooth it out a bit before shooting it with a bit of black primer. But this wont work if I only need to extend the hole by less then 3/4's of an inch. I do suspect this might be too much as I have Gary's 1"-2" drop. I'm thinking I only need to gain about half an inch which would lead me to using just the dremmel bit which I would imagine would take forever. Plus I dont want the hole to be to be to wide. I imagine trying to control a dremmel bit hooked up to an impact gun would be rather difficult and cause the hole to be all jacked up. I cant have that. Any suggestions or any other advice before me and my buddy tackle this. Thanks in advance.
 
You need to extend the 4 upper a-arm slots outward towards the tire. Leave about 3/4" of meat left at the end of the brackets you should be fine. I cant remember how much I took out but make sure you take out enough otherwise it will all have to come apart again. I have 3/4" of metal left at the end of the brackets though. I just used a large drill bit moved it back and forth then smoothed the edges and hit the bare metal with paint.

Be sure to have a grinder with a thin blade on it to grind the front weld on the bumpstops. Hit them with a hammer bend them down and grind off the rear welds. Make sure all of the bare metal is painted and the metals grindings arent on the frame otherwise it will rust.
 
Stone brother, go to northern hydraulics get you a die grinder, and then Ithink all they have is the stone bits, the steel ones are kinda high.
but take it and grind approximatley 1/2 inch out. and have a blow gun available also, to blow the steel dust out of everything.And use safety glasses, the dust can get into your eyes.
If you can find a steel grinding bit they are the best, but I think mine ran like $75 or more, but you can knock it out in 10 minutes.

withthe stone bit ,you can kick it out in about 30 or so, but the stone bits will wear quickly but they are cheap. but a die grinder works best bud.
 
how much lowerin ya'll talkin about? have the ground force kit, 1/2 , installed it aligned just fine.
 
Put one of those rocks in your bed, that will lower it!

How much are you lowering it? More than 2/4"? ---Disregard, I see 1/2 drop.
 
Last edited:
What is really needed is a Spindle Kit :rock: that way there would be no modifications needed, just install and enjoy the stock travel :D :D :D
 
Thanks for all the great replies, just what I was looking for. Dominick, I'm glad you told me to grind toward the tire, I was thinking I had to go toward the engine for some reason. Just how I was visualizing it in my head it! I haven't taken a close look yet but I'd like to think I woulda figured it out once she was on the lift (I hope)!!

Hey Stinker, my buddy who's garage we're doing it at told me he's got a die grinder. I'm picking up the cutting wheel and bits later today. I got an old wheel so I can match it up but his grinder has the wheels getting screwed into the top of the grinder. I guess I'll be checking out the grinder to see what type of bit I'm gonna need. If he doesn't have a die grinder, I'll either use my drill or pick up an attachment that has a chucked bit to hook up to his impact wrench. That things got plenty of RPM's and power!!! I'm not gonna buy a die grinder just for this job but thanks for all the info, I was figuring about half an inch needed removing. So, you dont think I can get away with using a drill bit and drilling a fraction of an inch off from where the upper control arm hole stops, just enough for the bit to bite (I have these nasty titanium bits that bite great into metal) then send her in. I figured this would be good for 1/2 to 3/4 of an inch, depending on the size of the bit I use. What do you think?

Bone, I had the 555 lb stone dropped off at my other buddies place of business (the thing had to be ordered and shipped) because the shipping rates were cheaper. We then had to get it to my training facility. We used his big tractor forklift to stick it in the back of his 03 Dodge Cummins 3500, the thing dropped a good 1 1/2 to 2". It was kinda sweet to watch!! The truck sat perfectly level, they way it should look :D
 
lbstone said:
Thanks for all the great replies, just what I was looking for. Dominick, I'm glad you told me to grind toward the tire, I was thinking I had to go toward the engine for some reason. Just how I was visualizing it in my head it! I haven't taken a close look yet but I'd like to think I woulda figured it out once she was on the lift (I hope)!!

Hey Stinker, my buddy who's garage we're doing it at told me he's got a die grinder. I'm picking up the cutting wheel and bits later today. I got an old wheel so I can match it up but his grinder has the wheels getting screwed into the top of the grinder. I guess I'll be checking out the grinder to see what type of bit I'm gonna need. If he doesn't have a die grinder, I'll either use my drill or pick up an attachment that has a chucked bit to hook up to his impact wrench. That things got plenty of RPM's and power!!! I'm not gonna buy a die grinder just for this job but thanks for all the info, I was figuring about half an inch needed removing. So, you dont think I can get away with using a drill bit and drilling a fraction of an inch off from where the upper control arm hole stops, just enough for the bit to bite (I have these nasty titanium bits that bite great into metal) then send her in. I figured this would be good for 1/2 to 3/4 of an inch, depending on the size of the bit I use. What do you think?

Bone, I had the 555 lb stone dropped off at my other buddies place of business (the thing had to be ordered and shipped) because the shipping rates were cheaper. We then had to get it to my training facility. We used his big tractor forklift to stick it in the back of his 03 Dodge Cummins 3500, the thing dropped a good 1 1/2 to 2". It was kinda sweet to watch!! The truck sat perfectly level, they way it should look :D

If you can get the drill bit in there buddy , that would really cut the time down:D
sounds like ya got plenty of equipment to do the job bro:rock: :rock:
Just dont puch too hard with the drill bit bo:(


you may jsut end up drillin into the rear bumper with those big ass arms!:D lololololol
 
try using a 90 degree die grinder with a #10 rotary file bit. thats what i used and it was quick. the 90 degree die grinder works best...
 
davo19 said:
try using a 90 degree die grinder with a #10 rotary file bit. thats what i used and it was quick. the 90 degree die grinder works best...
I checked Sears today, they had NOTHING as far as cutting wheels and bits? Any suggestions, I'll be going to The Home Depot and a Tools Plus Warehouse tomorrow. D-day starts friday, the front will be done Saturday!
 
I used a standard carbide cutter on my air drill. Remove the inner fender well to make it easy on you. I ended up with maybe a 1/2 of metal remaining till the end. Mine took quite a bit to get camber/caster back to spec. If your the anal type you'll want to primer and paint the exposed bare metal. No reason to give rust a head start!
 
I posted the end result from lowering my truck here

I picked up a Tungsten Carbide cutting bit as picture below to extend the upper A-arm mounting holes. While doing the passenger side, I pulled off the brake caliper and rotor in addition to the inner fender. This gave me plenty of room to see the upper A-arm mounts. I noticed that the current mounting location for the upper mount was approximately in the middle of all the holes. Before grinding, I decided to mark all the current locations for the bolts using metal marker (glorified white-out). I then took all the upper A-arm bolts out and dropped the entire spindle out of the way. I could see that the upper mount had approximately .5" of material left on the front and rear of the mounting holes. I wasn't too comfortable removing any material leading me to believe some trucks have different upper A-arm mounts then others. I should've took a picture of the upper A-arm mounts but this didn't cross my mind. To assure proper camber, I used a camber tool and measured the camber while the truck was in the air and on the ground before and after the install. After installing the lowered front springs, I bolted the upper A-arm back into the location it was from the factory. This yeilded the same reading on the camber tool!! After the drop the truck tracks perfectly and feels as though it doesn't need an alignment. As noted in my install thread, I will let the truck sit over the winter while the front springs settle before installing some adjustable swaybar endlinks from JMB and getting an alignment.

BTW, I had really no issue removing the bump bump stops. On both sides I forgot to remove them until I got the lowered spring back in and the upper A-arm all bolted and torqued up. What we did was, using an impact grinder with a cutting wheel attached, I cut the rear weld. This took maybe 60 seconds. I then bent the bump stop all the way down using a 3' long ply bar. Next, using the same pry bar, from the front of the truck I lined it up with the bump stop and used the pry bad an and extension as I hammered the bump stop back up and into place. The last weld was now brittle as I just rocked the bump stop back and forth before it ripped right out. I then ground down the front weld with the grinder. This took all of 5 minutes! Once we figured everything out, the entire driver side front-end took maybe 30 minutes start to finish!
 

Latest posts

Support Us

Become A Supporting Member Today!

Click Here For Details

Back
Top