Another quarantine day

Srt10650

Full Access Member
Joined
Sep 30, 2016
Messages
360
Reaction score
306
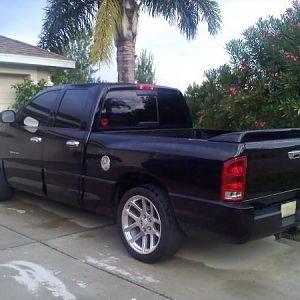
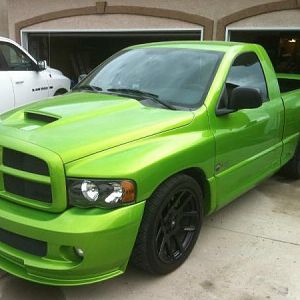
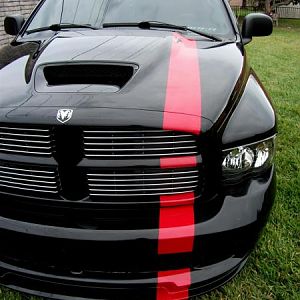
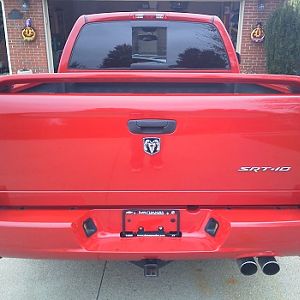
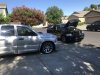
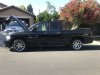
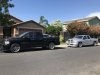
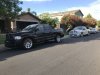
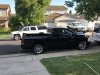
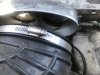
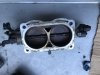
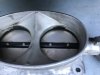
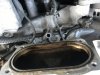
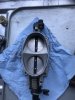
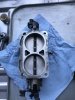
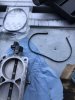
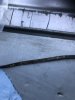
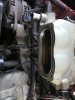
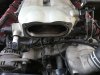
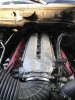
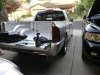
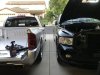
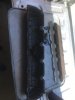
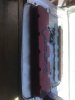
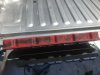
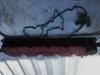
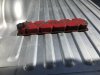
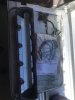
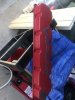
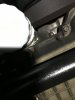
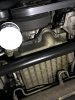
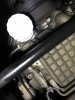
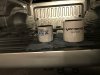
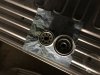
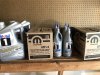
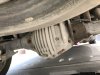
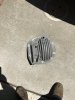
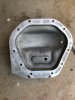
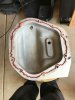
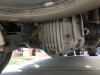
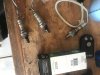
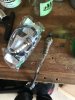
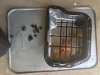
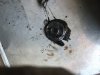
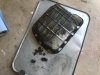
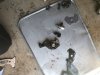
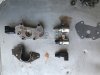
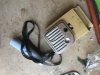
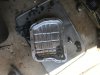
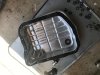
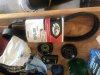
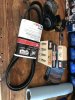
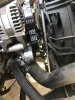
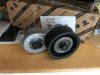
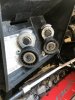
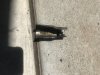
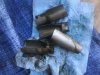
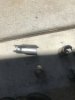
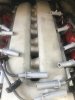
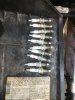
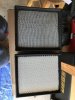
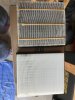
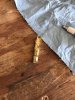
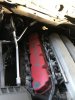
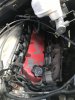
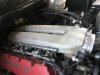
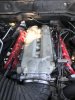
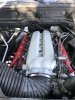
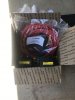
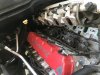
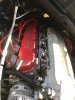
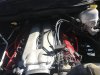
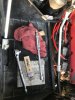
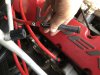
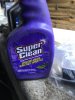
A few weeks ago a fellow member contacted me to get some work done on his truck. He had recently purchased it from Arizona, truck was good looking but needed some work done. Truck had about 90k miles and we didn’t know any of the maintenance from the previous owner. He had some work done from a shop in Arizona before he drove it up to California. The shop did some shady work, over filled the oil 10qts, wrong weight 5W40, did a transmission flush, replaced upper control arms and lower ball joints. The control arms and ball joints were good, so we decided on a full tune up and all the fluids changed out. Below are some pictures of the truck and work done.
 

Attachments

  • 582A1A32-F2BB-47EF-BAFB-83BBE615D8BB.jpeg
    582A1A32-F2BB-47EF-BAFB-83BBE615D8BB.jpeg
    343.8 KB · Views: 15
  • 9D64ABFC-A28A-4BA8-8B5C-2C6034BF5615.jpeg
    9D64ABFC-A28A-4BA8-8B5C-2C6034BF5615.jpeg
    444 KB · Views: 14
  • 8958BD0A-221D-4299-A231-2E146D873D1B.jpeg
    8958BD0A-221D-4299-A231-2E146D873D1B.jpeg
    337.5 KB · Views: 14
  • E0F6047F-10C4-4A42-B1C3-1B658EF903A0.jpeg
    E0F6047F-10C4-4A42-B1C3-1B658EF903A0.jpeg
    416.3 KB · Views: 13
  • AEE6DCAA-E52D-4F29-8589-AE54C3ED8C2F.jpeg
    AEE6DCAA-E52D-4F29-8589-AE54C3ED8C2F.jpeg
    457.6 KB · Views: 13
I started by removing the throttle body and cleaning all the gunk/oil out. Sometimes the throttle body blades tend to stick with all the build up which can affect idle. Throttle body gasket was all dried out from the engine bay heat and that Arizona heat. Throttle body cleaned up nice, replaced with a new gasket and bolted it up to specs.
 

Attachments

  • 7B62F595-D4DF-411C-9EFF-E40FD5D06D8E.jpeg
    7B62F595-D4DF-411C-9EFF-E40FD5D06D8E.jpeg
    254.5 KB · Views: 10
  • 8399367B-35EA-41C7-9D86-D30FA8A7D5AE.jpeg
    8399367B-35EA-41C7-9D86-D30FA8A7D5AE.jpeg
    309.5 KB · Views: 9
  • 95A0813E-209C-4782-BA83-1652B5D60939.jpeg
    95A0813E-209C-4782-BA83-1652B5D60939.jpeg
    178.9 KB · Views: 9
  • 1EBBB07E-2D24-48A3-8543-520C2CA09826.jpeg
    1EBBB07E-2D24-48A3-8543-520C2CA09826.jpeg
    259 KB · Views: 9
  • FD1825AA-0115-4BF6-8C44-F025863E4C74.jpeg
    FD1825AA-0115-4BF6-8C44-F025863E4C74.jpeg
    230.3 KB · Views: 9
  • 9ED22E0A-F21C-4D5A-A0E8-D144F349107F.jpeg
    9ED22E0A-F21C-4D5A-A0E8-D144F349107F.jpeg
    256 KB · Views: 9
  • E3EE56E3-E955-434A-B043-404BFD8CCEDD.jpeg
    E3EE56E3-E955-434A-B043-404BFD8CCEDD.jpeg
    314 KB · Views: 9
  • FCB18417-82FB-42F6-9552-D9BCF82D02EB.jpeg
    FCB18417-82FB-42F6-9552-D9BCF82D02EB.jpeg
    174.2 KB · Views: 9
  • 365143BA-367A-4961-B50B-A62C49B9E021.jpeg
    365143BA-367A-4961-B50B-A62C49B9E021.jpeg
    282.5 KB · Views: 9
  • DC26AD64-36A6-42EB-9652-FE2C94745249.jpeg
    DC26AD64-36A6-42EB-9652-FE2C94745249.jpeg
    299.4 KB · Views: 9
Next was to replace the valve cover gaskets which had been leaking and to clean up the valve covers from all the gunk/oil. Cleaned everything out, replaced with new gaskets and torqued to specs.
 

Attachments

  • A645C240-000E-4973-AE8A-24B0355D38B2.jpeg
    A645C240-000E-4973-AE8A-24B0355D38B2.jpeg
    320.9 KB · Views: 12
  • 4D999EE4-EA38-4CCC-981F-1CA15B63484E.jpeg
    4D999EE4-EA38-4CCC-981F-1CA15B63484E.jpeg
    238.8 KB · Views: 10
  • 9A49BC52-3519-4B9B-BF54-899C812D4682.jpeg
    9A49BC52-3519-4B9B-BF54-899C812D4682.jpeg
    256.1 KB · Views: 10
  • 4A034E88-0E29-4DEE-A2F8-439EFC7222BA.jpeg
    4A034E88-0E29-4DEE-A2F8-439EFC7222BA.jpeg
    308.2 KB · Views: 11
  • 52E247F3-3755-4F09-B5CF-0AF1020334CC.jpeg
    52E247F3-3755-4F09-B5CF-0AF1020334CC.jpeg
    287.8 KB · Views: 10
  • 790A8854-11F9-4C28-B6C3-7EC732343258.jpeg
    790A8854-11F9-4C28-B6C3-7EC732343258.jpeg
    303.2 KB · Views: 12
  • 011C6F9A-EE1E-4043-B488-D274E086CE85.jpeg
    011C6F9A-EE1E-4043-B488-D274E086CE85.jpeg
    200.6 KB · Views: 11
  • 67BF43F8-5142-48D0-B382-FD214E5FECE8.jpeg
    67BF43F8-5142-48D0-B382-FD214E5FECE8.jpeg
    180.1 KB · Views: 10
  • 38E28E90-7026-44B4-B4AF-0BD99796A9A5.jpeg
    38E28E90-7026-44B4-B4AF-0BD99796A9A5.jpeg
    226.8 KB · Views: 12
More pictures of the valve covers getting cleaned up with new gaskets. They cleaned up really nice, nicer than before.
 

Attachments

  • 06DEF886-FAEF-4CE8-B52B-B84EE7CE6D12.jpeg
    06DEF886-FAEF-4CE8-B52B-B84EE7CE6D12.jpeg
    230.1 KB · Views: 10
  • 964375AB-681C-4765-9276-239776978C0E.jpeg
    964375AB-681C-4765-9276-239776978C0E.jpeg
    236.7 KB · Views: 11
  • 5EBCBCB6-EE20-4667-B495-AF0FE98606EA.jpeg
    5EBCBCB6-EE20-4667-B495-AF0FE98606EA.jpeg
    238.8 KB · Views: 9
  • 8BD56996-0FBA-4C34-8E03-C69957FEBDFC.jpeg
    8BD56996-0FBA-4C34-8E03-C69957FEBDFC.jpeg
    250.2 KB · Views: 10
Next was to fix the oil issue that was done by the shop in Arizona. I drained all the 5W40 oil that they added 10qts of. Removed the wrong oil filter that they put, you can see it’s way too small for the truck. It was actually leaking a little bit. Replaced the filter with the correct viper filter and topped her off with the correct 0W40 8.5qts.
 

Attachments

  • B1079355-1085-4DF3-A063-A4C6D54987AE.jpeg
    B1079355-1085-4DF3-A063-A4C6D54987AE.jpeg
    205.4 KB · Views: 10
  • D5A8001B-4BDA-42DE-A454-A3EC55985F1C.jpeg
    D5A8001B-4BDA-42DE-A454-A3EC55985F1C.jpeg
    288.4 KB · Views: 10
  • F9F7A879-6853-4D02-82FF-656232BF0DD0.jpeg
    F9F7A879-6853-4D02-82FF-656232BF0DD0.jpeg
    210.4 KB · Views: 10
  • 827A9C68-D099-4957-97D9-F769E1C89FC8.jpeg
    827A9C68-D099-4957-97D9-F769E1C89FC8.jpeg
    204.1 KB · Views: 10
  • 44AF0754-D026-47D7-BBF3-80C44D105B43.jpeg
    44AF0754-D026-47D7-BBF3-80C44D105B43.jpeg
    285.2 KB · Views: 10
  • 9422697A-77E6-4765-BBE5-66F54DEDD3A2.jpeg
    9422697A-77E6-4765-BBE5-66F54DEDD3A2.jpeg
    371 KB · Views: 10
Next was the rear differential, gasket was leaking and the gear oil was old. Cleaned everything out, new rtv gasket, bolts torqued to specs and new 75w140 with limited slip friction modifier added.
 

Attachments

  • 1717BC54-4F7C-494D-9416-37E692B6245C.jpeg
    1717BC54-4F7C-494D-9416-37E692B6245C.jpeg
    235.7 KB · Views: 10
  • 993B4325-18D2-4BA2-B239-1725F7CE85CA.jpeg
    993B4325-18D2-4BA2-B239-1725F7CE85CA.jpeg
    500.9 KB · Views: 10
  • F2954BE3-6179-45BB-9E2A-765F602EC468.jpeg
    F2954BE3-6179-45BB-9E2A-765F602EC468.jpeg
    306.4 KB · Views: 10
  • 7E3EED61-A864-4A1D-83EB-CB1FCACAD2C4.jpeg
    7E3EED61-A864-4A1D-83EB-CB1FCACAD2C4.jpeg
    265.6 KB · Views: 9
  • A3D2E238-4587-4547-9787-5D9BB4A9FBBF.jpeg
    A3D2E238-4587-4547-9787-5D9BB4A9FBBF.jpeg
    232.4 KB · Views: 10
We decided on new O2 sensors front/rear because the truck had thrown some O2 sensor codes and pretty sure they were 15yr old O2 sensors.
 

Attachments

  • E7B8B1AA-C0C0-4CE9-9DC8-27DADB1B0E18.jpeg
    E7B8B1AA-C0C0-4CE9-9DC8-27DADB1B0E18.jpeg
    282.8 KB · Views: 7
  • 20EE78AC-831D-4096-BC10-AE61EBDF8286.jpeg
    20EE78AC-831D-4096-BC10-AE61EBDF8286.jpeg
    309 KB · Views: 7
48re was up next. The shop in Arizona had done a flush, which is definitely a no go. I looked/smelled the fluid and look/smelled old to me. I wouldn’t be surprised if they never even messed with it. Magnet was covered in metal shavings.Truck also had a stutter from 1-2 gear under light throttle. I dropped the pan, cleaned everything out, adjusted front/rear band to specs, replaced governor pressure sensor with a new bigger Borg Warner, replaced with a new transducer, new filter, new gasket, bolts torqued to specs and topped off with new mopar ATF.
 

Attachments

  • A25B040D-BFC3-41AC-93F1-A18FE5AD2DCD.jpeg
    A25B040D-BFC3-41AC-93F1-A18FE5AD2DCD.jpeg
    235.3 KB · Views: 10
  • 8675D560-4FC3-47E8-AB2C-4236B8828845.jpeg
    8675D560-4FC3-47E8-AB2C-4236B8828845.jpeg
    312 KB · Views: 10
  • EFF3FCED-F165-464A-883E-0C62CD709D94.jpeg
    EFF3FCED-F165-464A-883E-0C62CD709D94.jpeg
    279.5 KB · Views: 10
  • CAE0D79B-1BD8-4E86-8034-283CEAB5A90C.jpeg
    CAE0D79B-1BD8-4E86-8034-283CEAB5A90C.jpeg
    287.6 KB · Views: 10
  • 93D7B0FE-44B6-4D90-97DF-88EE4B3E48B7.jpeg
    93D7B0FE-44B6-4D90-97DF-88EE4B3E48B7.jpeg
    274.3 KB · Views: 9
  • 919F8344-8F47-4B3D-8FED-B0B194534CAA.jpeg
    919F8344-8F47-4B3D-8FED-B0B194534CAA.jpeg
    265.7 KB · Views: 10
  • 7101BD2D-18F9-4CCA-9D85-30DF9A5E2CAF.jpeg
    7101BD2D-18F9-4CCA-9D85-30DF9A5E2CAF.jpeg
    269.1 KB · Views: 10
  • C70B6231-620A-4E85-9EEE-58D71F1CF253.jpeg
    C70B6231-620A-4E85-9EEE-58D71F1CF253.jpeg
    296.2 KB · Views: 10
  • B30ED259-AD0D-4013-9DAE-A974DBE6F209.jpeg
    B30ED259-AD0D-4013-9DAE-A974DBE6F209.jpeg
    269.5 KB · Views: 9
Next was to replace the idler pulley, belt tensioner, and belt with new components. Belt was showing signs of some cracking and everything else was aged.
 

Attachments

  • A1338ACB-D17B-4EDC-88B6-A62F8EC2D89D.jpeg
    A1338ACB-D17B-4EDC-88B6-A62F8EC2D89D.jpeg
    267.3 KB · Views: 10
  • 532F88B3-763C-4B78-B863-70FEDECF4663.jpeg
    532F88B3-763C-4B78-B863-70FEDECF4663.jpeg
    356.3 KB · Views: 9
  • 9820B79B-EBB5-4132-A8AD-B1457BFB2570.jpeg
    9820B79B-EBB5-4132-A8AD-B1457BFB2570.jpeg
    315.4 KB · Views: 10
  • 557BA739-6678-4B70-83BD-3C42DBD58E68.jpeg
    557BA739-6678-4B70-83BD-3C42DBD58E68.jpeg
    195.5 KB · Views: 10
  • 840D9361-9E43-4C42-B801-39F55AFA83E9.jpeg
    840D9361-9E43-4C42-B801-39F55AFA83E9.jpeg
    323 KB · Views: 10
Next was to replace the spark plugs and clean out the metal spark plug wire boot heat shields. Heat shields were dirty from the road gunk and the leaking valve cover gaskets. The spark plug wire booted were dirty also so I cleaned them out the best I could. New champion spark plugs were added, gapped to specs, anti seize added and dielectric grease added. They both cleaned up pretty good.
 

Attachments

  • 0A8F31DF-831E-4A09-9786-8B14BB64CBD2.jpeg
    0A8F31DF-831E-4A09-9786-8B14BB64CBD2.jpeg
    481.8 KB · Views: 9
  • BE56A4C8-955E-454D-979F-44095CD11749.jpeg
    BE56A4C8-955E-454D-979F-44095CD11749.jpeg
    302.3 KB · Views: 9
  • 8A39617C-0631-4403-8D50-4219966F9B45.jpeg
    8A39617C-0631-4403-8D50-4219966F9B45.jpeg
    327 KB · Views: 8
  • 2895CE3B-4F28-49B8-AE90-8FAA818A9045.jpeg
    2895CE3B-4F28-49B8-AE90-8FAA818A9045.jpeg
    269 KB · Views: 8
  • 1062E61E-AB37-444A-9930-C608EFA033F1.jpeg
    1062E61E-AB37-444A-9930-C608EFA033F1.jpeg
    242.4 KB · Views: 9
  • 400215C2-0549-43FC-AACA-04C2F32AFB7A.jpeg
    400215C2-0549-43FC-AACA-04C2F32AFB7A.jpeg
    375.2 KB · Views: 8
Last edited:
Next I replaced the air filter with a new one, the old one definitely needed to be replaced. I didn’t want to up sale him on a K&N drop in because he eventually wants to put a cold air intake in the truck.
 

Attachments

  • CBEED308-448F-482E-9886-C0E8E9A30CBD.jpeg
    CBEED308-448F-482E-9886-C0E8E9A30CBD.jpeg
    444.2 KB · Views: 7
  • 0B565744-7B79-4082-B0F9-C1D51D7F9850.jpeg
    0B565744-7B79-4082-B0F9-C1D51D7F9850.jpeg
    387.7 KB · Views: 7
One of the spark plug wires had the terminal come off the boot. I made a temporary fix by adding a terminal while we waited on more parts.
 

Attachments

  • B7D61085-1D19-42C5-8932-A61315565C4D.jpeg
    B7D61085-1D19-42C5-8932-A61315565C4D.jpeg
    345.4 KB · Views: 9
Cleaned the engine bay the best I could while I waited on parts. Definitely cleaned up nice.
 

Attachments

  • 73933A8E-A799-4881-8AA4-F9F97847E12B.jpeg
    73933A8E-A799-4881-8AA4-F9F97847E12B.jpeg
    320.9 KB · Views: 14
  • BDBE67A3-CE2D-43D0-B1D8-3344C2B59739.jpeg
    BDBE67A3-CE2D-43D0-B1D8-3344C2B59739.jpeg
    267.2 KB · Views: 13
  • 83D29885-3276-4C46-8AB2-C637D91B7B38.jpeg
    83D29885-3276-4C46-8AB2-C637D91B7B38.jpeg
    269.5 KB · Views: 13
  • A2A298D5-23CC-46ED-ACC3-B23DA8040F3D.jpeg
    A2A298D5-23CC-46ED-ACC3-B23DA8040F3D.jpeg
    256.1 KB · Views: 13
  • 4FDE1412-A41A-42EC-84C7-1F3C850A30E8.jpeg
    4FDE1412-A41A-42EC-84C7-1F3C850A30E8.jpeg
    299.2 KB · Views: 14
  • 81B85B16-25AC-449C-A0BE-FD420BA9406C.jpeg
    81B85B16-25AC-449C-A0BE-FD420BA9406C.jpeg
    387.4 KB · Views: 15
More parts came in, so I also replaced the coils and the spark plug wires. I had forgotten why I hated to remove the intake manifold. But once I got to the rear boltS I quicky remembered why. We went with JTSVP spark plug wires and screamin demon coils. Clean all the ports and taped them up. Replaced the coils and each spark plug wire individually. I also decided to replace #8 spark plug again, since we were previously getting a misfire. New intake manifold gaskets were m added and everything torqued to specs.
 

Attachments

  • 6E76BF00-5C1E-4813-93CD-1E39AAE35B10.jpeg
    6E76BF00-5C1E-4813-93CD-1E39AAE35B10.jpeg
    274.2 KB · Views: 14
  • 46D429FA-7F6E-41CF-B037-8DB14FE5CA3D.jpeg
    46D429FA-7F6E-41CF-B037-8DB14FE5CA3D.jpeg
    290.7 KB · Views: 15
  • A6590E5F-5330-4973-A207-60CABCD8713D.jpeg
    A6590E5F-5330-4973-A207-60CABCD8713D.jpeg
    248.8 KB · Views: 14
  • 049069C3-21FD-41A0-A4BA-84D122A32626.jpeg
    049069C3-21FD-41A0-A4BA-84D122A32626.jpeg
    259.7 KB · Views: 14
  • 5DC63593-9410-4F0E-AC22-FEBE8E33D2AF.jpeg
    5DC63593-9410-4F0E-AC22-FEBE8E33D2AF.jpeg
    377.3 KB · Views: 14
  • 09F38637-4D9E-4F53-9F8D-BC2EBFC8DA2E.jpeg
    09F38637-4D9E-4F53-9F8D-BC2EBFC8DA2E.jpeg
    245.3 KB · Views: 13
Last edited:
Everything was done over 3 weekends due parts and both of us having families and work. I appreciate him giving me a call and I’m glad I was able to help out. Really cool guy that I consider a friend now and a fellow viper owner!
 
More pictures of the valve covers getting cleaned up with new gaskets. They cleaned up really nice, nicer than before.
Two gorgeous trucks! Tell your buddy to get his valve covers powder coated, I'm going to have mine done soon.
 

Latest posts

Support Us

Become A Supporting Member Today!

Click Here For Details

Back
Top