Srt10650
Full Access Member
- Joined
- Sep 30, 2016
- Messages
- 360
- Reaction score
- 306
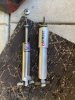
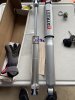
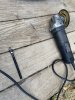
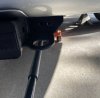
These are the front Viking double adjustable shocks installed.


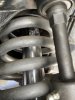
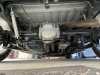
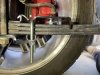
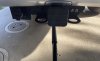
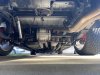
Let us know how they feel after the break in period. I see you have CalTech traction bars, I do as well, and love em. Do you happen to have the P/N for the sway bar? I'd like to add one to my truck as well. Hard for me to read the brand name on it.These are the rear Viking double adjustable shocks installed.
Let us know how they feel after the break in period. I see you have CalTech traction bars, I do as well, and love em. Do you happen to have the P/N for the sway bar? I'd like to add one to my truck as well. Hard for me to read the brand name on it.
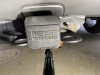
Thanks for the info! Guess I'll go with Belltech. Wonder why the QC didn't come with the sway bar????Rear Sway bar is a Hotchkis sway bar, part number is #2265 and the only bad this is they are now discontinued. Your only options are a belltech rear sway bar part #5555 or a OEM factory rear sway bar from a RC SRT10.
Thanks for the info! Guess I'll go with Belltech. Wonder why the QC didn't come with the sway bar????


I would guess it handles better at higher speeds in a corner. I had one added to my last QC with the 5.7, made a big difference.My only guess would be that they didn’t plan for us to want better handling on a 4dr truck. Just did a little research and the f150 supercharged Harley Davidsons didn’t have a rear sway either. Couldn’t really find anything for the Silverado SS, but my guess would be they didn’t have one either.
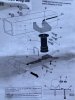
I'm assuming that's for a set of four??I wanted to give my feedback regarding the Viking double adjustable shocks, all I can say what a difference! Way better than before, I like the adjustability these have. They have 19 settings for both compression and rebound. With a few clicks you can have a super soft suspension or super hard suspension. I currently have the front ones at 9C/12R and the rears at C7/R10. I haven’t really messed with the settings too much, but so far I am happy with this. I based these settings on a chart(attached) they provided with the shocks. I might mess with them more down the road. For the money you really can’t beat them, if you guys have followed the thread you guys know I’ve been on a budget. I did some research before I pulled the trigger on these. For double adjustable shocks depending on what you run is between $750-$2100. Below are the prices I researched
1. QA1 single adjustable - $810.45(shipped), for this price it was a no brained and I went with the Viking double adjustable.
Double adjustable shocks
1. Viking double adjustable- $756.00 (shipped)
2. QA1 double adjustable- $1,015.96 (shipped)
3. JTSVP/JRI double adjustable- $2,158.91 (shipped)
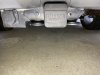
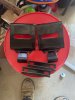
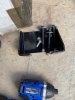
Next up is the Air lift slam air rear helper bags, I’ll update the thread as the progress goes along.
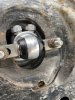
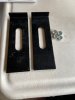
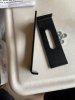
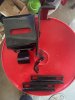
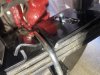
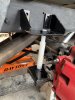
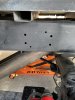
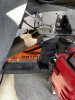
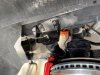
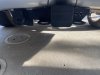
I see your bottom helper spring is removed. I had to do the same when I lowered mine, and installed the traction bars. They kept hitting the bars, plus it lowered the rear a tad more. My truck is raked, not level like some I've seen. Looks kinda sexy, LOL!Had some time today and decided to start with the helper bags install. Old center pin in the leaf spring wouldn’t come out, so had to get the old angle grinder. You have to remove it to add the spacer to hold the L bracket and flip kit saddle. L bracket goes between the flip kit saddle and the leaf spring. Bought new ones at Kragen, nice because they have a flat head screwdriver slot on on top. Here’s the progress so far.
I would guess it handles better at higher speeds in a corner. I had one added to my last QC with the 5.7, made a big difference.
I'm assuming that's for a set of four??
I see your bottom helper spring is removed. I had to do the same when I lowered mine, and installed the traction bars. They kept hitting the bars, plus it lowered the rear a tad more. My truck is raked, not level like some I've seen. Looks kinda sexy, LOL!
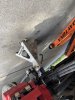
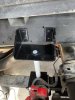
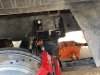
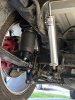
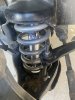
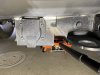
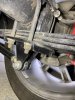
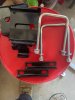
Is it just me, or is your brake line touching the air bag?Had some extra time today so I finished up the driver side. I did end up drilling another hole for the driver side valve stem on the passenger side of the hitch. Looks pretty good, I should be able to provide some feed back by next week regarding the ride quality. Here are some more pictures of the progress so far.
Is it just me, or is your brake line touching the air bag?