I will try to get it posted to my YouTube and then include the URL. I don’t post videos normally, so it will be my first. Once I figure that out i will post a link.
Onward with install!
I will need to go back through this thread and make a few edits. Learned the hard way the upper intercooler pipe needs to go in BEFORE the radiator and AC condenser. So let me rewind to my Nov 1st post.
Once you get the lower intercooler pipe in, now is a good time to remove the upper crossmember. There are 4 bolts holding this in, I removed 3 and just pivoted the crossmember out. This makes getting the radiator and fan assembly in SO much easier after you get the upper intercooler pipe in.
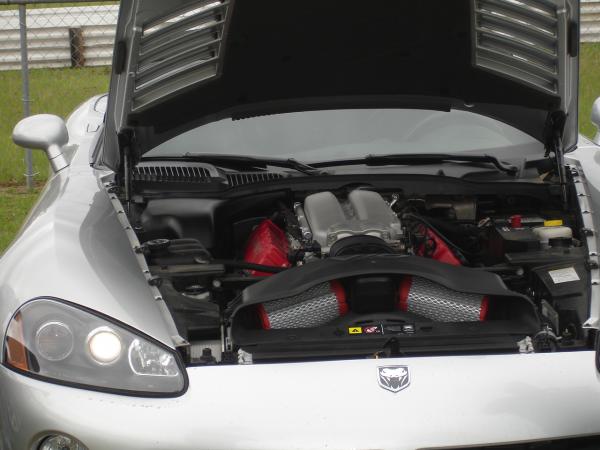
Upper intercooler pipe is straightforward. I did have to trim the rubber joiner (about an inch) to get the pipe as close to the throttle body as possible and to leave as much room for the radiator/fan assembly. Put the rubber joiner on the throttle body first, then cinch your first clamp down. Slide on the second clamp, install the upper intercooler pipe and only snug up the second clamp. You want this a little loose so it can move a little as you’re trying to install the intercooler. Tightening this down can be one of the last steps you do.
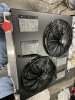
If you have the dual electric fan setup it’s easiest to install the fans to the radiator while it’s out of the truck. Put the lower tabs in the slot and tighten up the 2 mounting bolts to the back/engine side of the radiator. Now it’s one piece to put into the engine bay. The radiator has 2 posts facing down on the sides - those fit into the body/frame on either side of the lower crossmember. Once you have it placed into position, you can re-install the upper crossmember. 2 bolts hold the radiator into place (same way it came out). Now you can re-install your AC condenser to the front of the radiator. (All this is in the Nov 1st post).
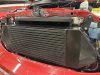
The intercooler is a bit of a pain, it definitely takes 2 people. It’s not light, and you have to do a couple things simultaneously. First off, place your rubber joiners on the ends of each intercooler pipe - slide 2 clamps over each pipe. These should be roughly 40” apart from the outer edges and sit a couple inches above the lower crossmember. Do some measuring of your intercooler and the spacing on the pipes before you try and get it into place.
Once you’re comfortable with where the pipes are, grab the intercooler with a buddy, haul it over to the front of the truck and get those joiners onto the intercooler. It’s best if you snug up the clamps now, that way as you position the height and center the intercooler you won’t keep pulling the joiners off. Get the mounting forks lined up with the upper crossmember where the AC condenser USED to mount. The intercooler uses these tapped holes in the crossmember to mount. JMB provides 4 self-tapping screws that you will use on the lower tabs of the intercooler. Drill those into the lower crossmember (I drilled small pilot holes before so these go in a bit easier). Once the placement is right, have your buddy hold it into place while you get those lower screws in. Once you have 2 self-tapping screws in they should support the weight of the intercooler. (I ran into some slight alignment issues here and had to improvise the upper mounts a little - pics below).
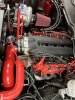
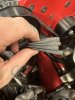
Once the intercooler is in, install your blowoff valve into the top of the upper intercooler tube. This is pretty self-explanatory. There’s a clamp ring that fits over the grooves on the pipe/blowoff valve. Get this into place and tighten it down.
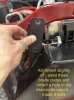
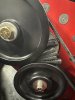
Remember that little plug we used to cap the port under the intake manifold? Yea…pull that out - this is where I decided to route the vacuum hose for the blowoff valve. You CAN run it back to the brake booster, but I wanted a cleaner look so I ran it to the port under the intake manifold. IF you run to the booster, you MUST T into the line BEFORE the check valve on the brake booster. If you T in after the check valve you will run into issues with the blowoff valve operating appropriately. (The check valve is the little circular knob looking thing on the brake booster) - pic below. The other end of the vacuum line hooks up to the barbed fitting on top of the blowoff valve.
Once you hit this step, you can give her a test start-up. Turn your key on-off 3-4 times to engage the fuel pump and build some pressure in the fuel line. You may need to feather the gas a little on the first start-up. Let it run for a minute or two and LOOK, LISTEN and FEEL.
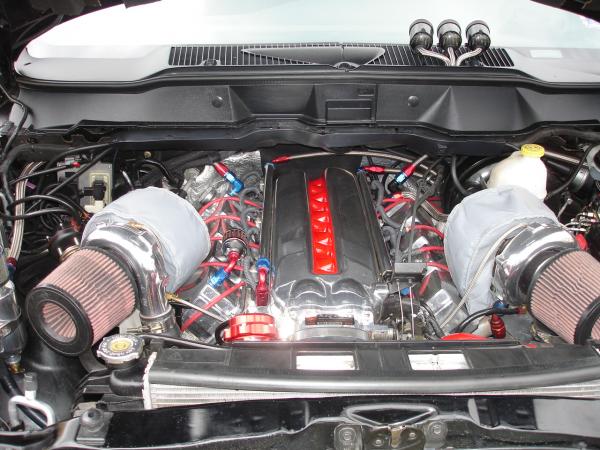
Look at your gauges, look in the engine bay - make sure everything looks good. Listen to the WHINE, but also listen to your motor. Make sure you hear the airflow through the intercooler (no leaks), listen for any vacuum leaks, and listen to make sure everything is firing normally. While sitting in the truck, make sure everything feels normal. Any aggressive rumbling, rocking or rattling is no bueno. Note: I did notice the truck rocking a little more that usual - this is likely due to the pull on the SC which is not centered in the engine bay. A little more rocking is normal, a lot of rocking is not.
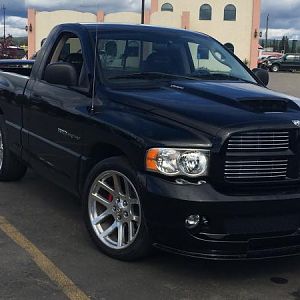
Now - look in the mirror and appreciate that big ass smile you have on your face. The whine is loud, the airflow is loud and the blowoff valve sounds like an 18 wheeler releasing its air brakes. It’s all awesome…
Fill up your radiator (takes 18 quarts of coolant), check your belts for tension, make sure everything is tightened down (clamps and any bolts) - your install is done
")
I hope this helps the next person that comes along. There may be little things here and there I didn’t go into detail on or inadvertently omitted. If you have any questions whatsoever feel free to reach out to me on this thread.
If I think of any more handy tips I will post them below.
Thanks for following along!