2006 Headlight Removal ???

JR_PRO

Full Access Member
Joined
Dec 29, 2006
Messages
167
Reaction score
0
I am changing to some Silverstars and need tips on headlight removal. I did a search and found a few threads on headlight removal but those threads were all for 2005 models. Is the headlight removal on a 2006 model the same as a 2005 model or is it different? Thanks in advance.
 
It's rather easy, and if you want the Right (drivers side) headlight can be accessed without removing the whole headlight assembly,,, if you reach down and twist the light counter-clockwise you can remove it and then pull back the red tab and replace with a Silverstar.

As for the Left (passenger side) you'll need a 10mm with an extender. There are 3 bolts in total. After you pop the hood you'll see a Black plate just to the right of the headlight assembly and there will be two Bolts there,, remove those. Then down by the tire you'll see a "plastic plug" in the wheel well, remove that and you'll be able to see the last bolt,, it's very tricky and you will most likely drop it.. :D it can be a pain in the a.. but with some patience it's easy.

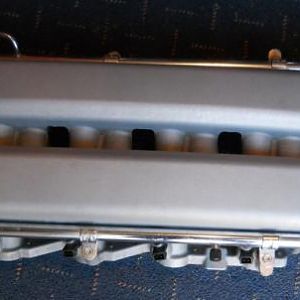
Now for the hard part,,, the assembly is a pain to remove. I found that a good hard pull on the top left corner (top right for the drivers headlight) usually gets it out. It has two plastic "guides" that always like to catch but like i said a good hard pull on the top corner will get it loose.

Hope this helps!
Shane
 
Old thread but I'm looking at doing some custom VHT spray work on mine. Can one get to the "amber" indicator light piece or is it sealed off, even when the headlight assemblies are removed? I'm going to paint it black or spray/cover it with a few coats of VHT Nite Side spray so it isn't as visible, too in your face on 06 models. So, it's either leave the headlights in, mask it up well and spray 3 or 4 coats directly on the plastic case OR remove the headlight, disassemble the headlight and spray the amber piece directly. Any help is appreciated.


Cheers,
Carl

Here is a little photoshop work, before followed by after - MUCH better.
Something I thought about doing a long time ago. I think it will look awesome. ;)

BeforeVHT.jpg

AfterVHT.jpg


:rock:
 
Thank you very much Sir, that is exactly what I needed. Link saved to favs. I will go pull them out tomorrow (truck = at shop) bring them home and get them done. Awesome, can't wait. I will post photos once my truck has been customized (lowering kit, VHT stuff, etc). :)

Cheers John,
Carl
 
Good deal, also do a search here. I think a fellow member did something similar and posted up the procedure/process.
 
Thanks John but I did a search and this is how I found this thread and noted it was old (Jan/07).
I didn't see the other one but sometimes keywords can throw off a good search lol. Will try again soon. :)
 

Latest posts

Support Us

Become A Supporting Member Today!

Click Here For Details

Back
Top