kingcrunch
Full Access Member
Guys,
sorry i did not reply to this thread for quite a while.
There has been quite some progress but not as much as i would like.
After i got the Challengers wiring harness modified far enough to get to the vehicles lighting system, i began to question if that's the route i want to go.
Why?
Because in 2015 Dodge switched to a halogen projector light and LED taillights.
Looks cool, but is hard to retrofit or modify to accept regular incandescent bulbs.
In the end after a lot of thinking, buying Challenger head- and taillights to dissect them (yes, i bought lights to make them kaputt to get to the internal circuit boards to understand how stuff works and how i could integrate them) i decided to go a different route.
It ended in buying this stuff:
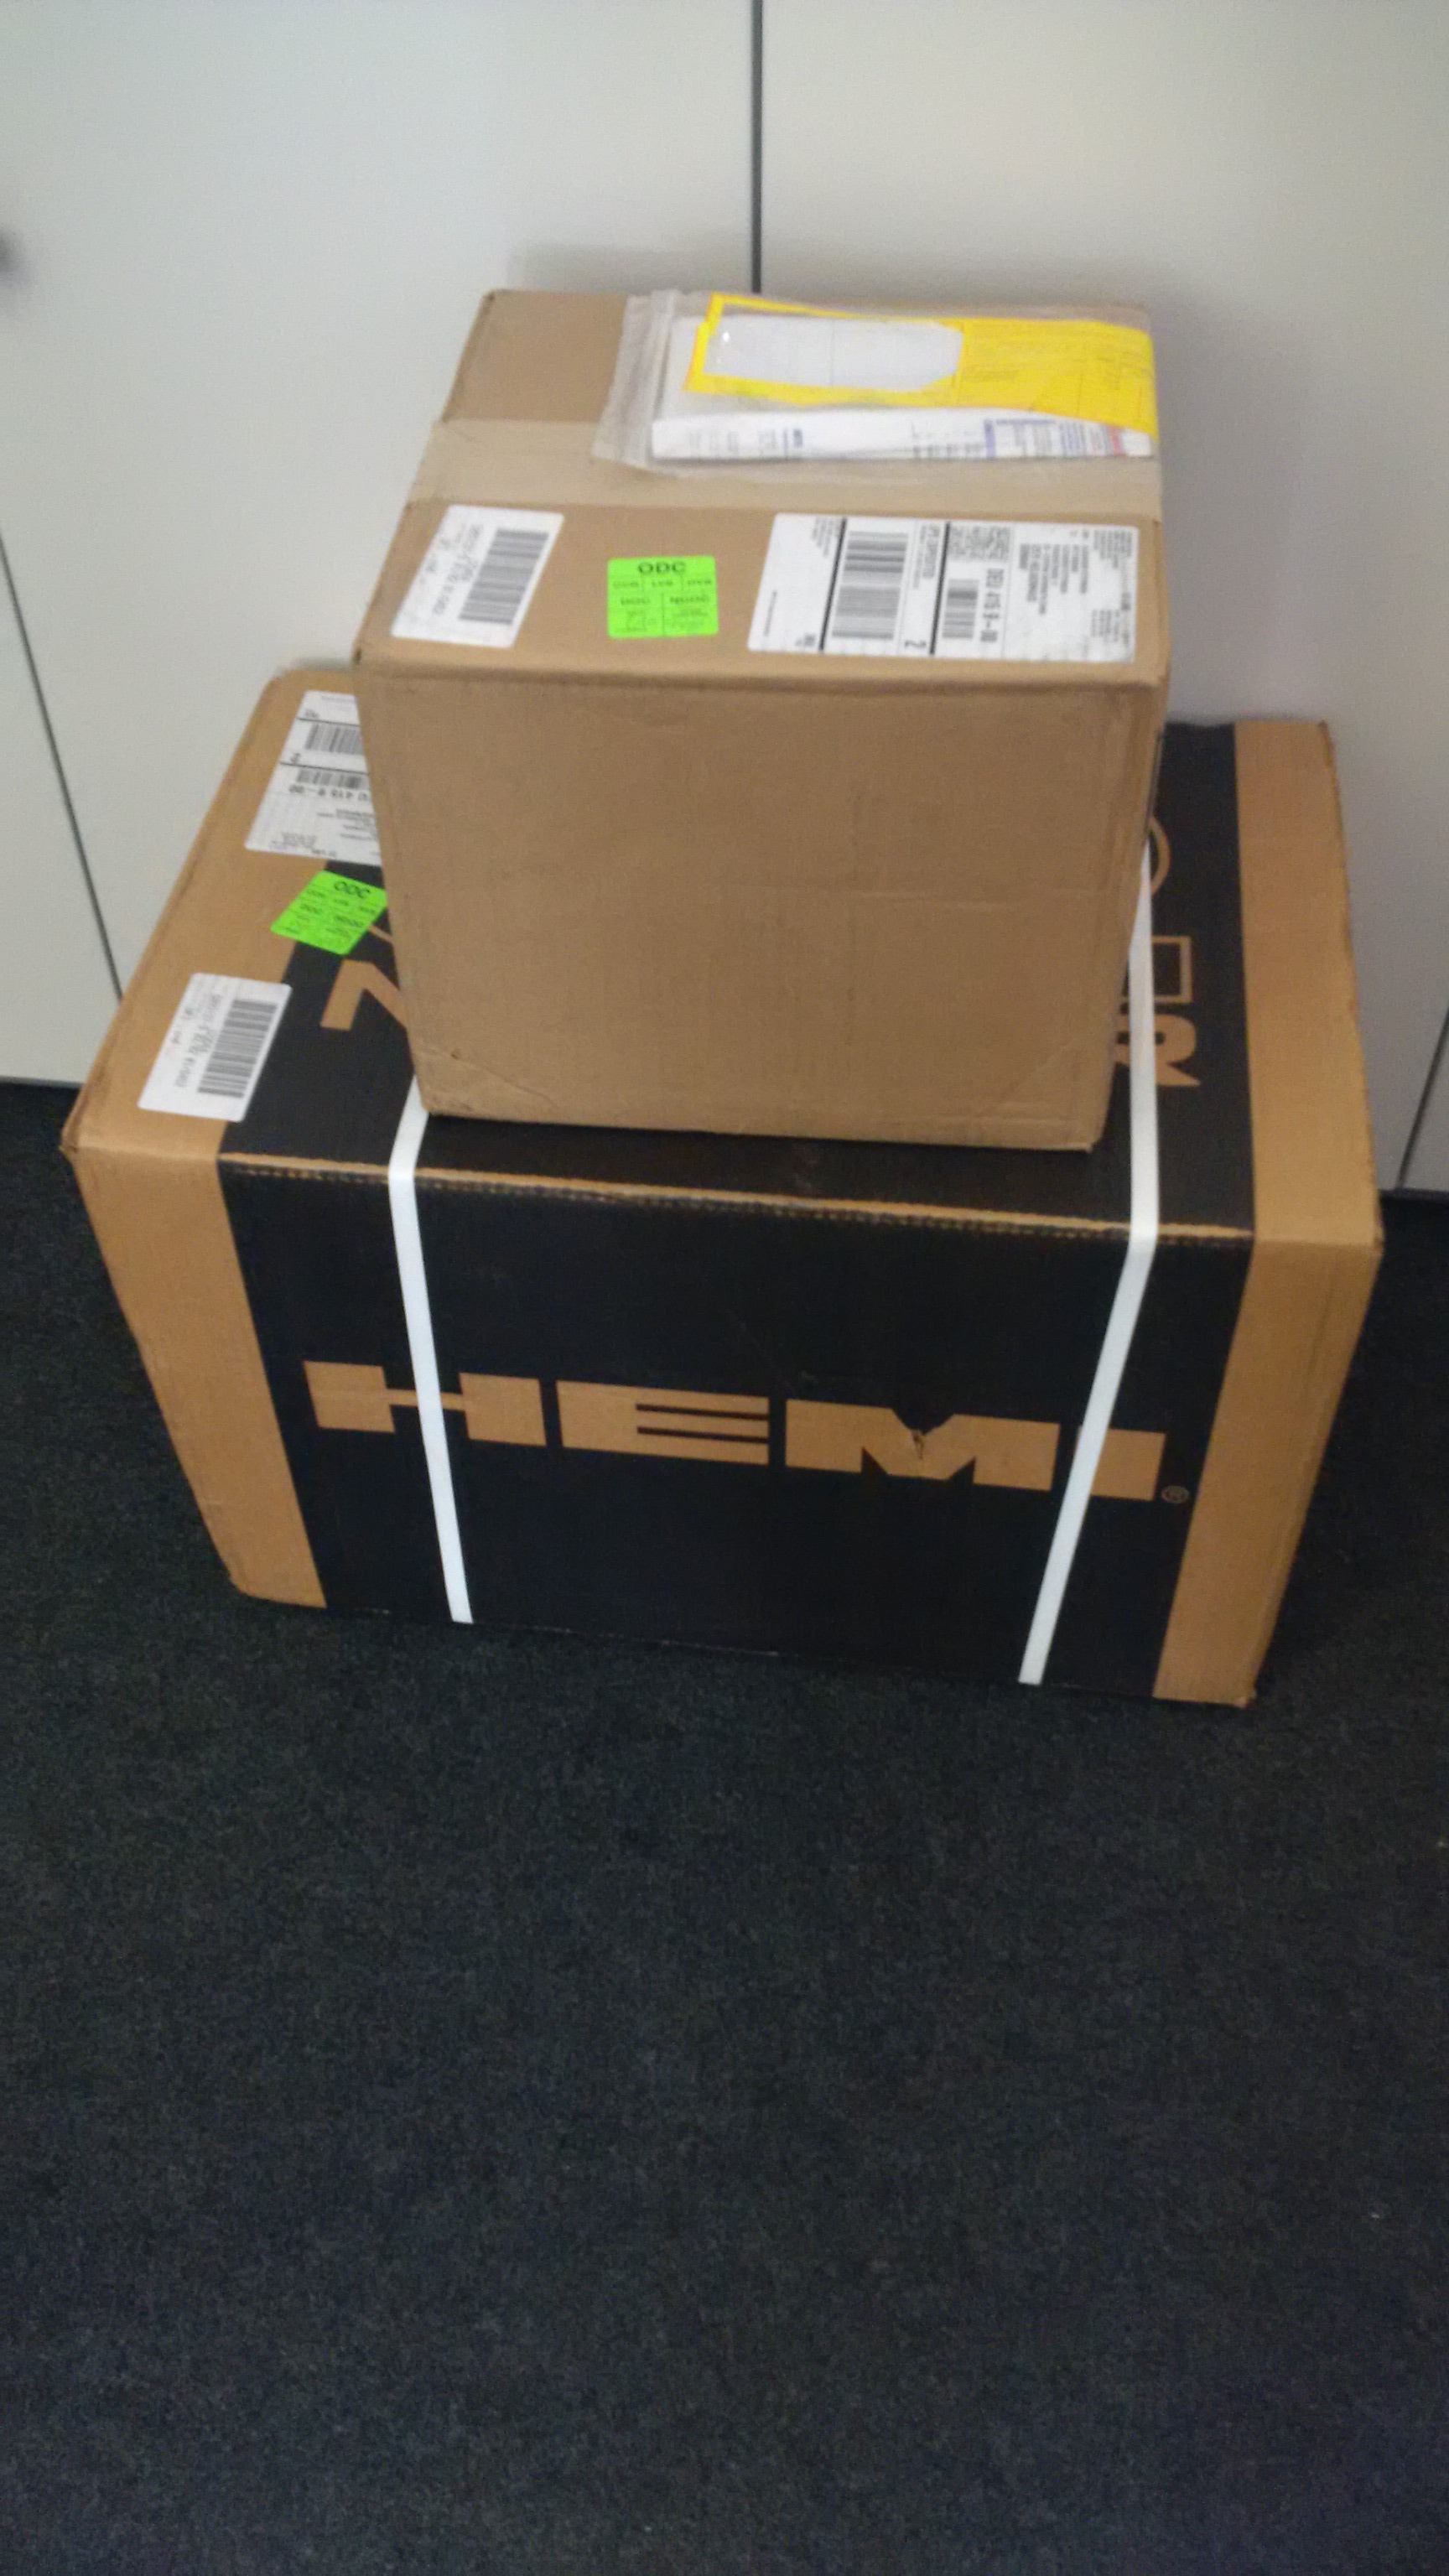
What you are seeing here is Mopars standalone wiring harness for the 2015+ crate Hemis and a Racepak IQ3 street dash.
The vehicle will retain a refurbished stock wiring harness.
Easier to maintain and fix if it breaks down.
So now i have a big box of Challenger electrical guts to sell and nobody wants them... yet.
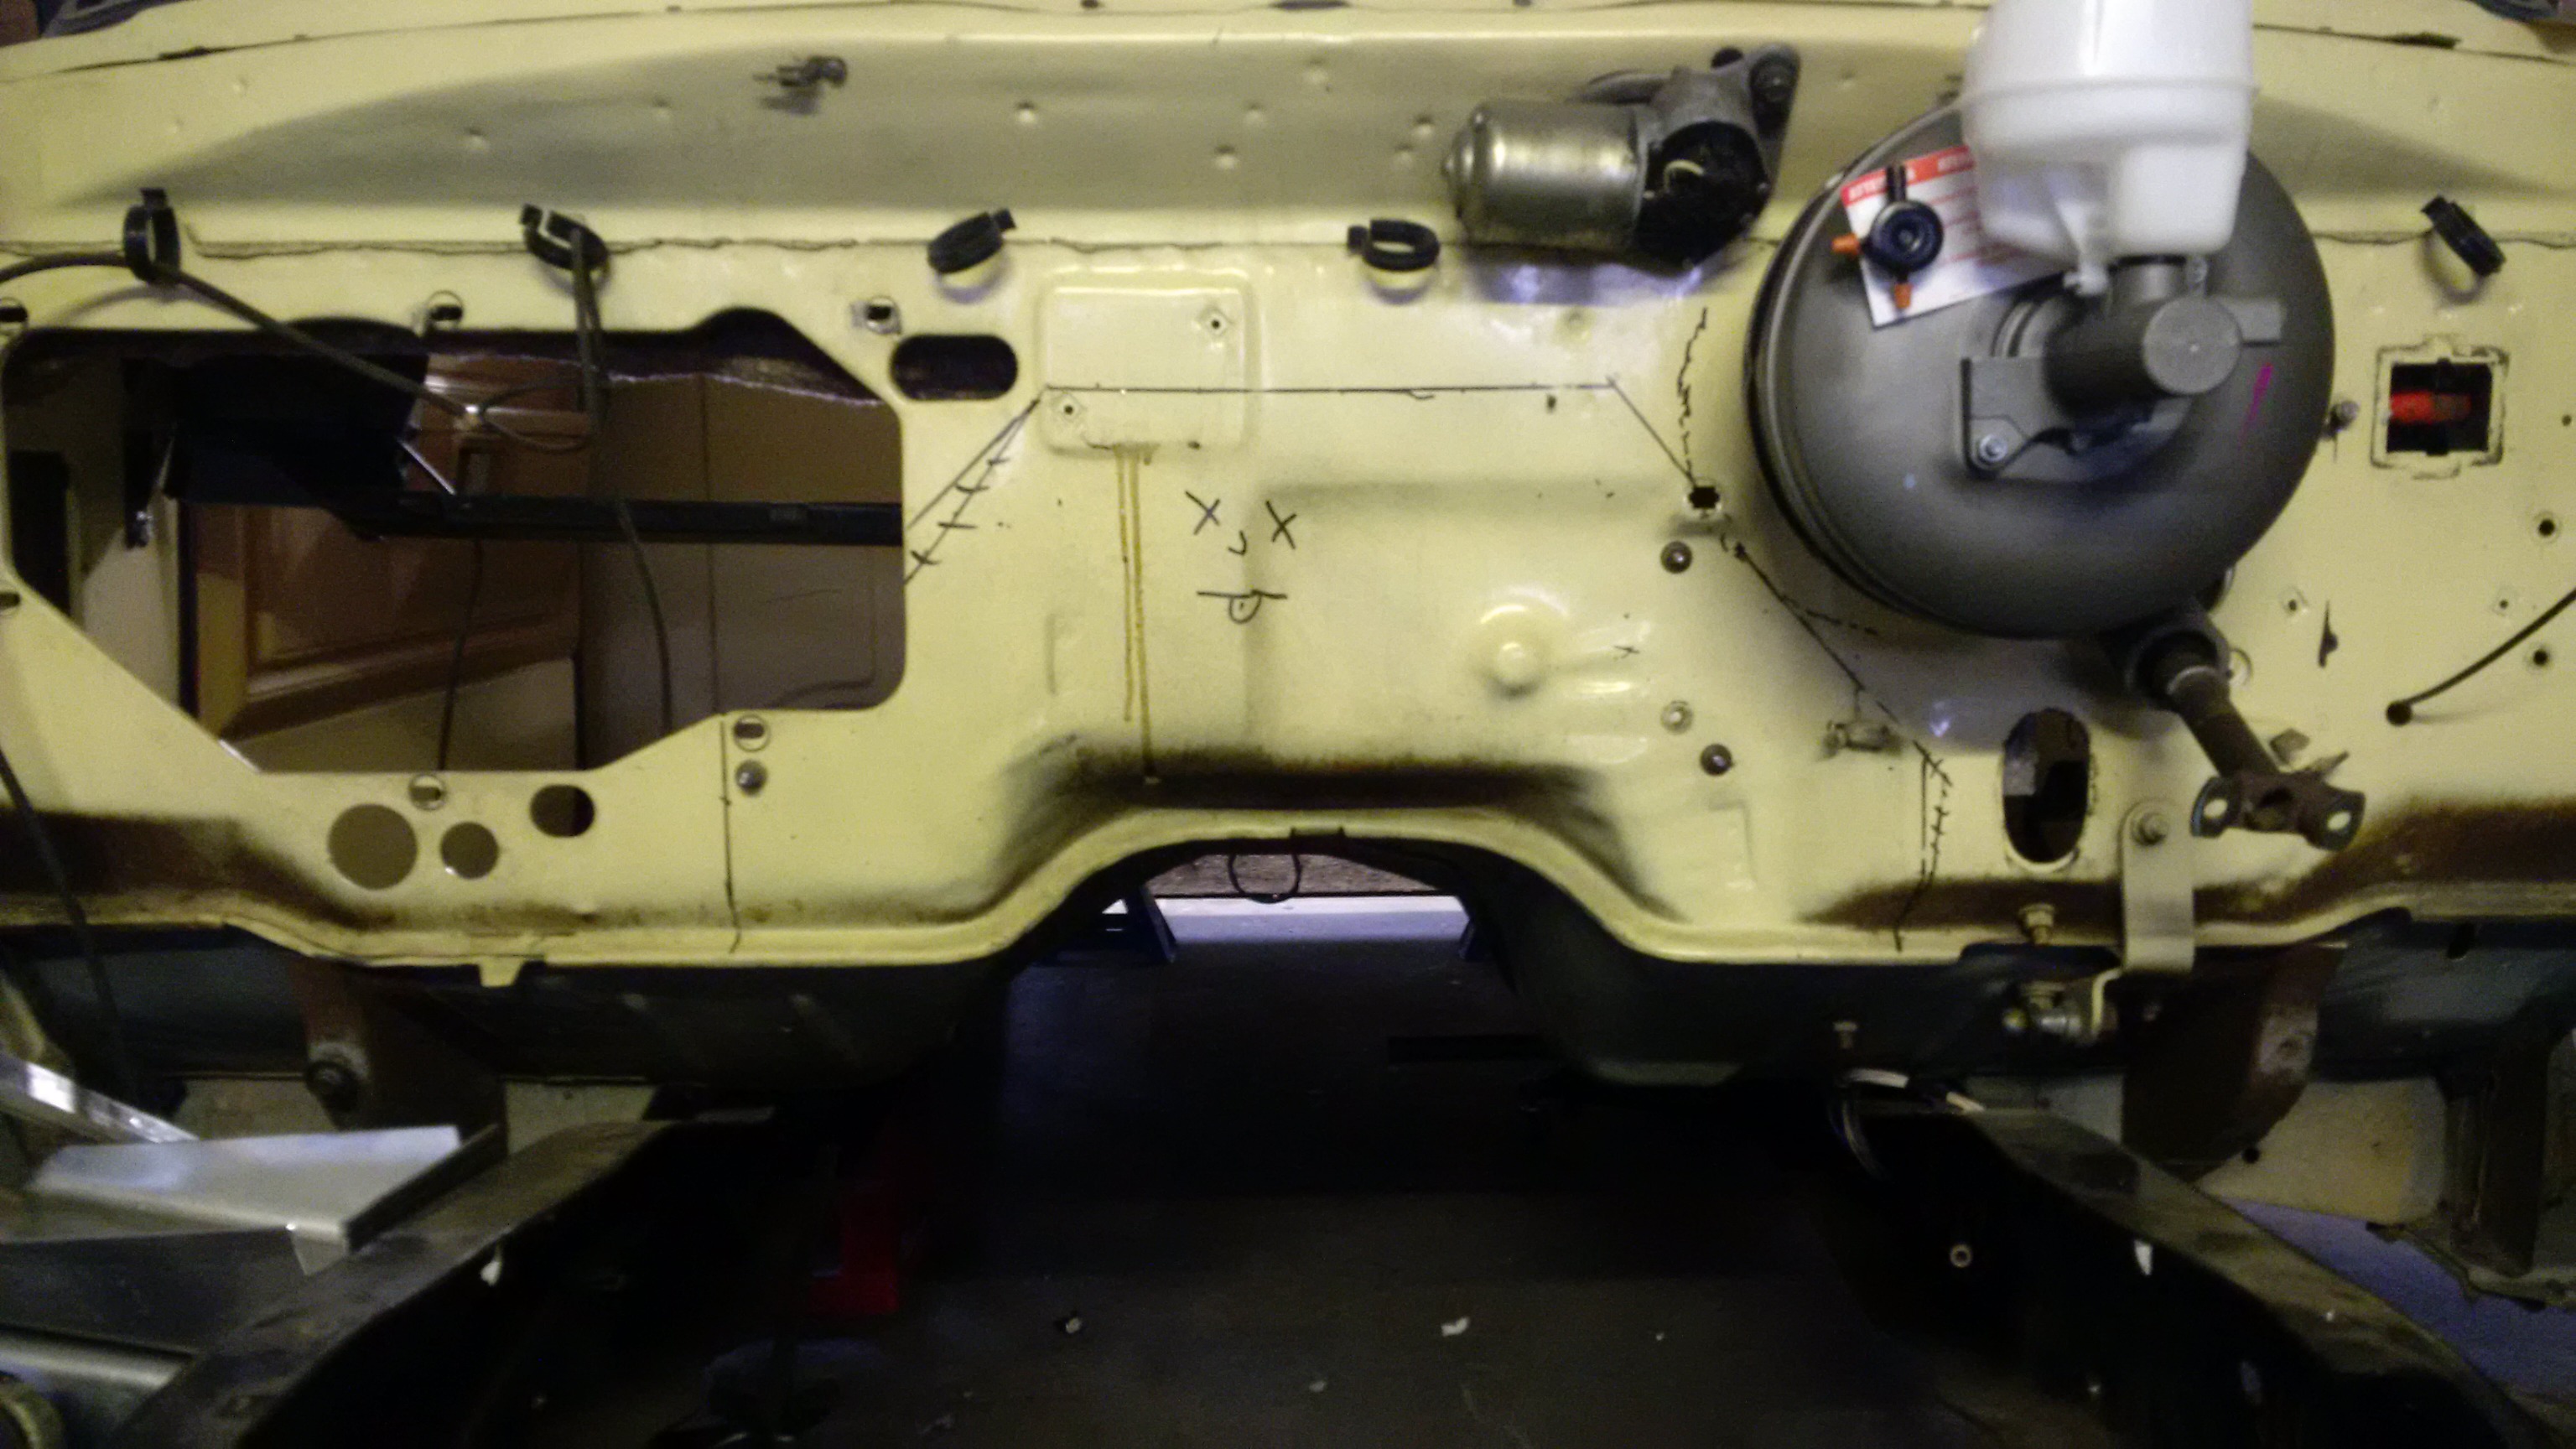
After that, i really went to town with cutting and gutting the front of the truck.
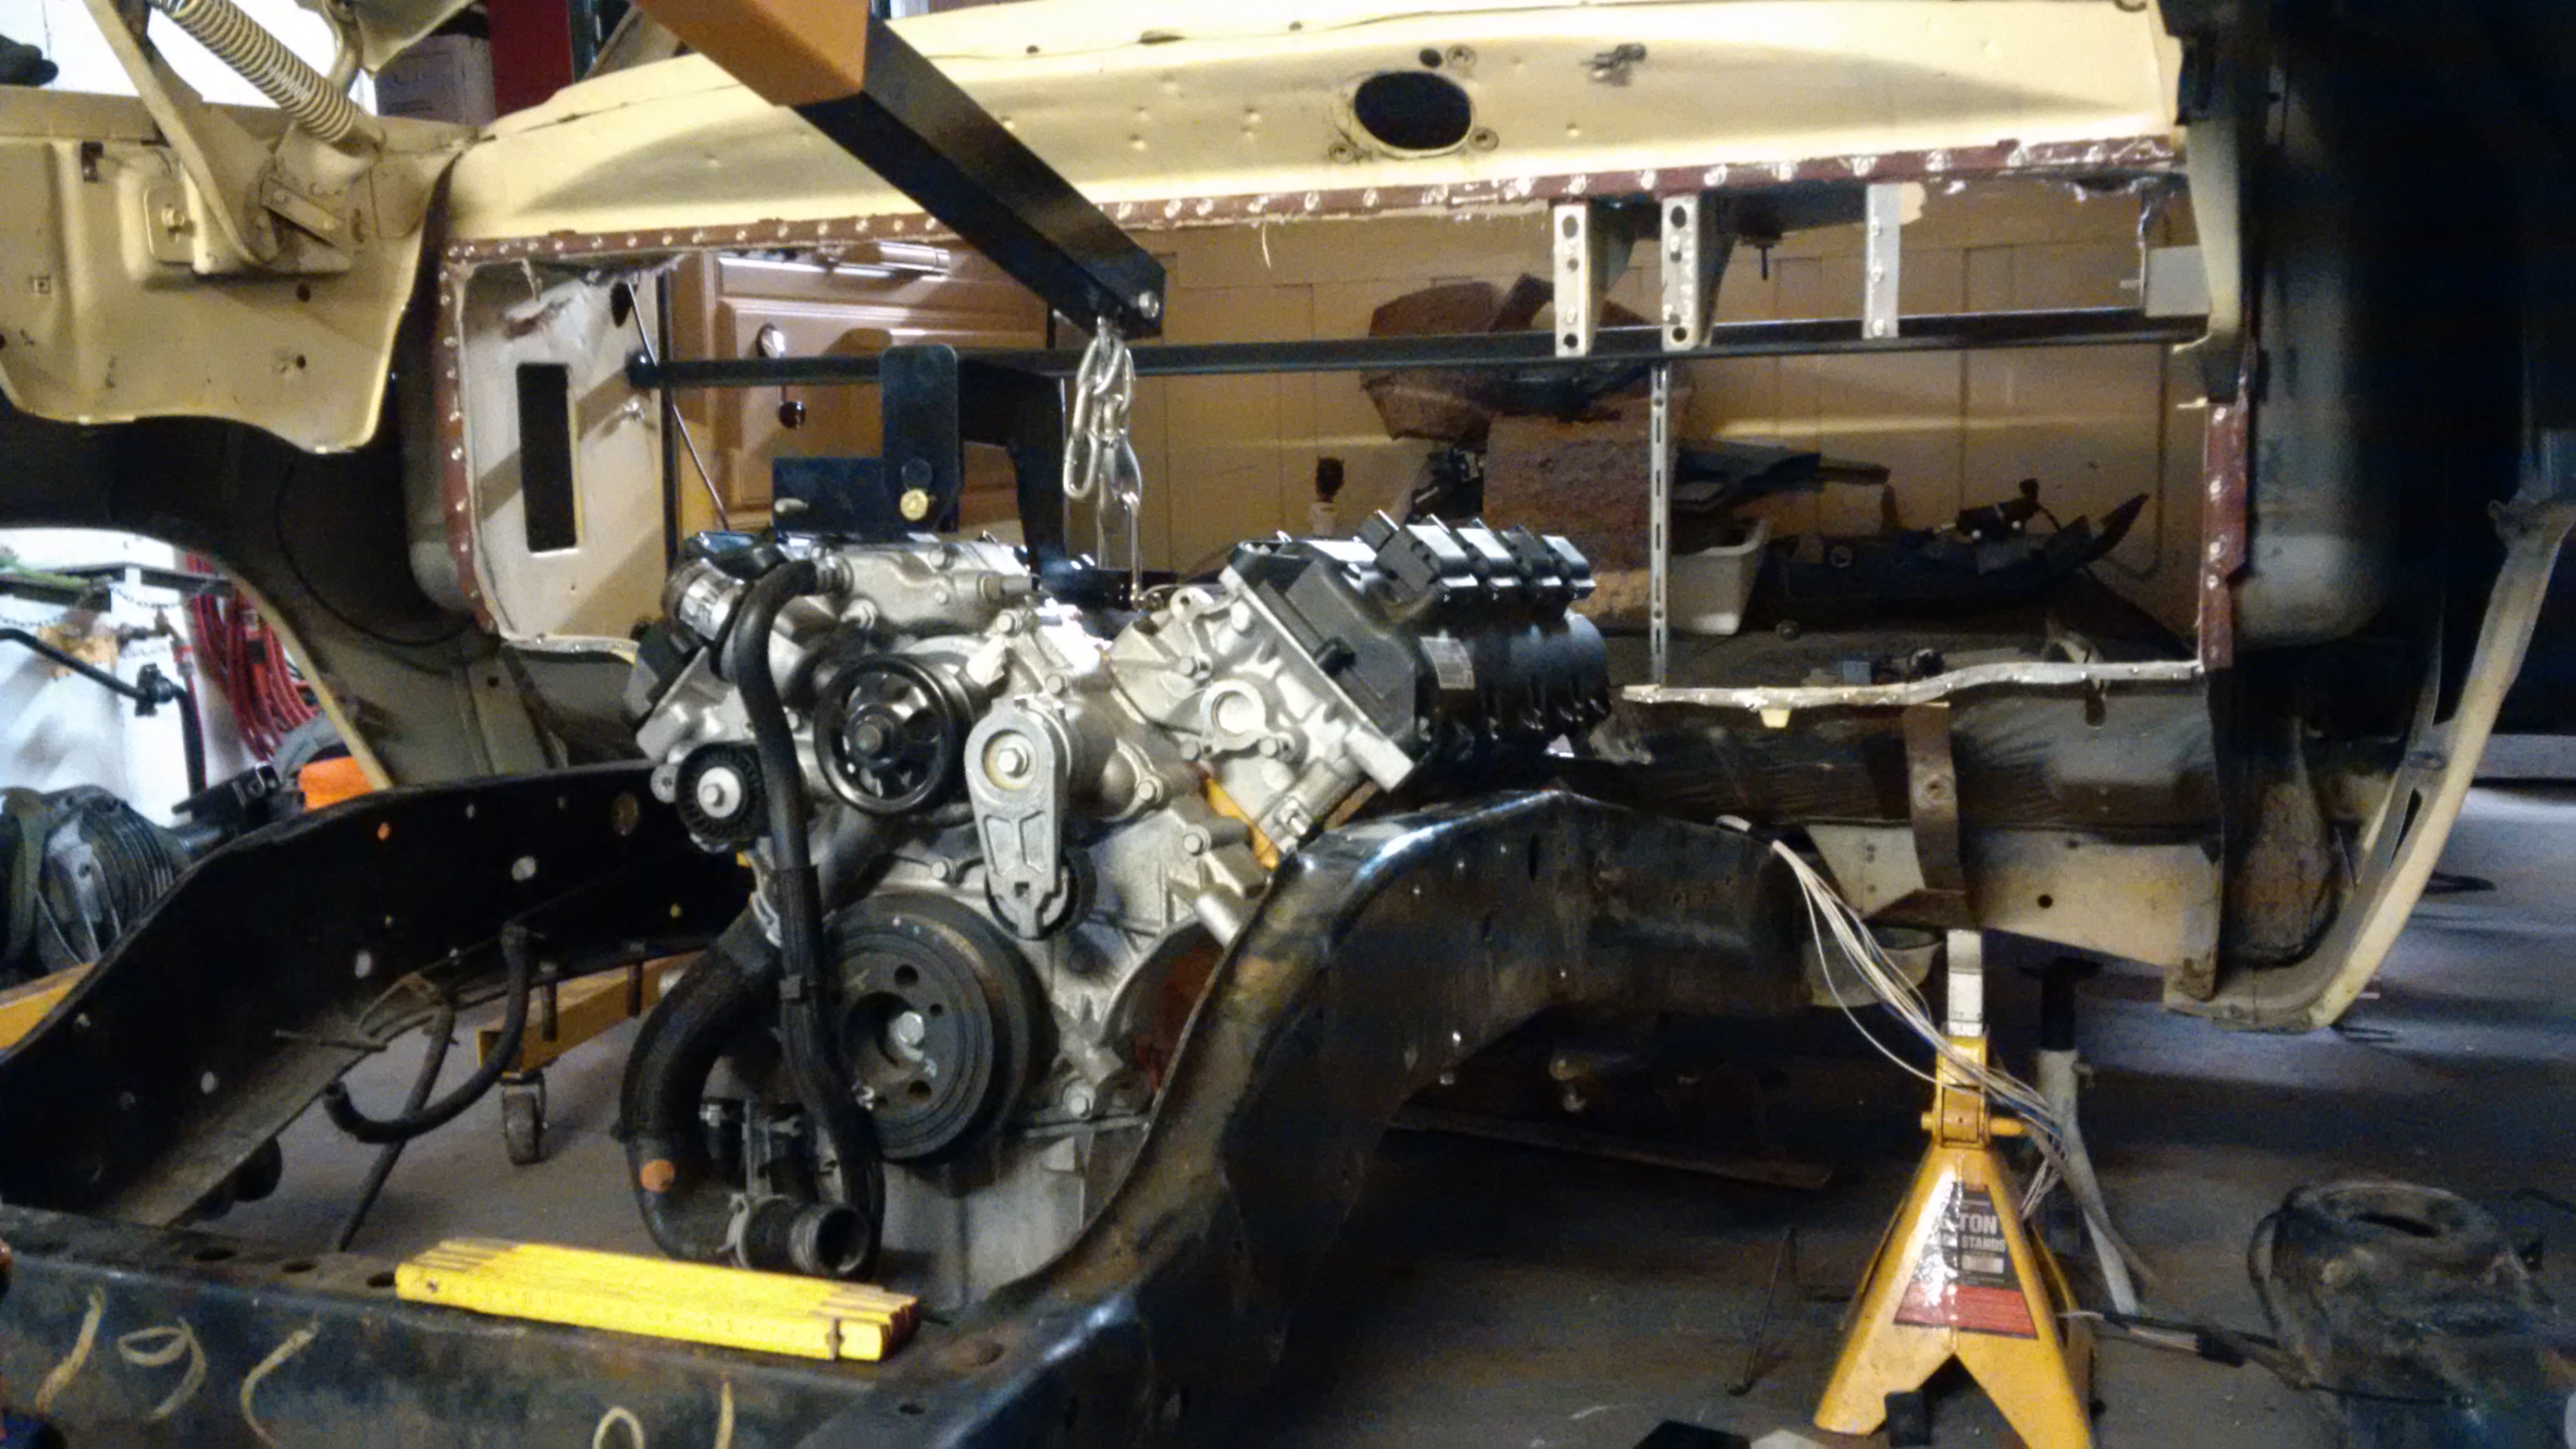
THAT needs to be shoehorned in THERE:
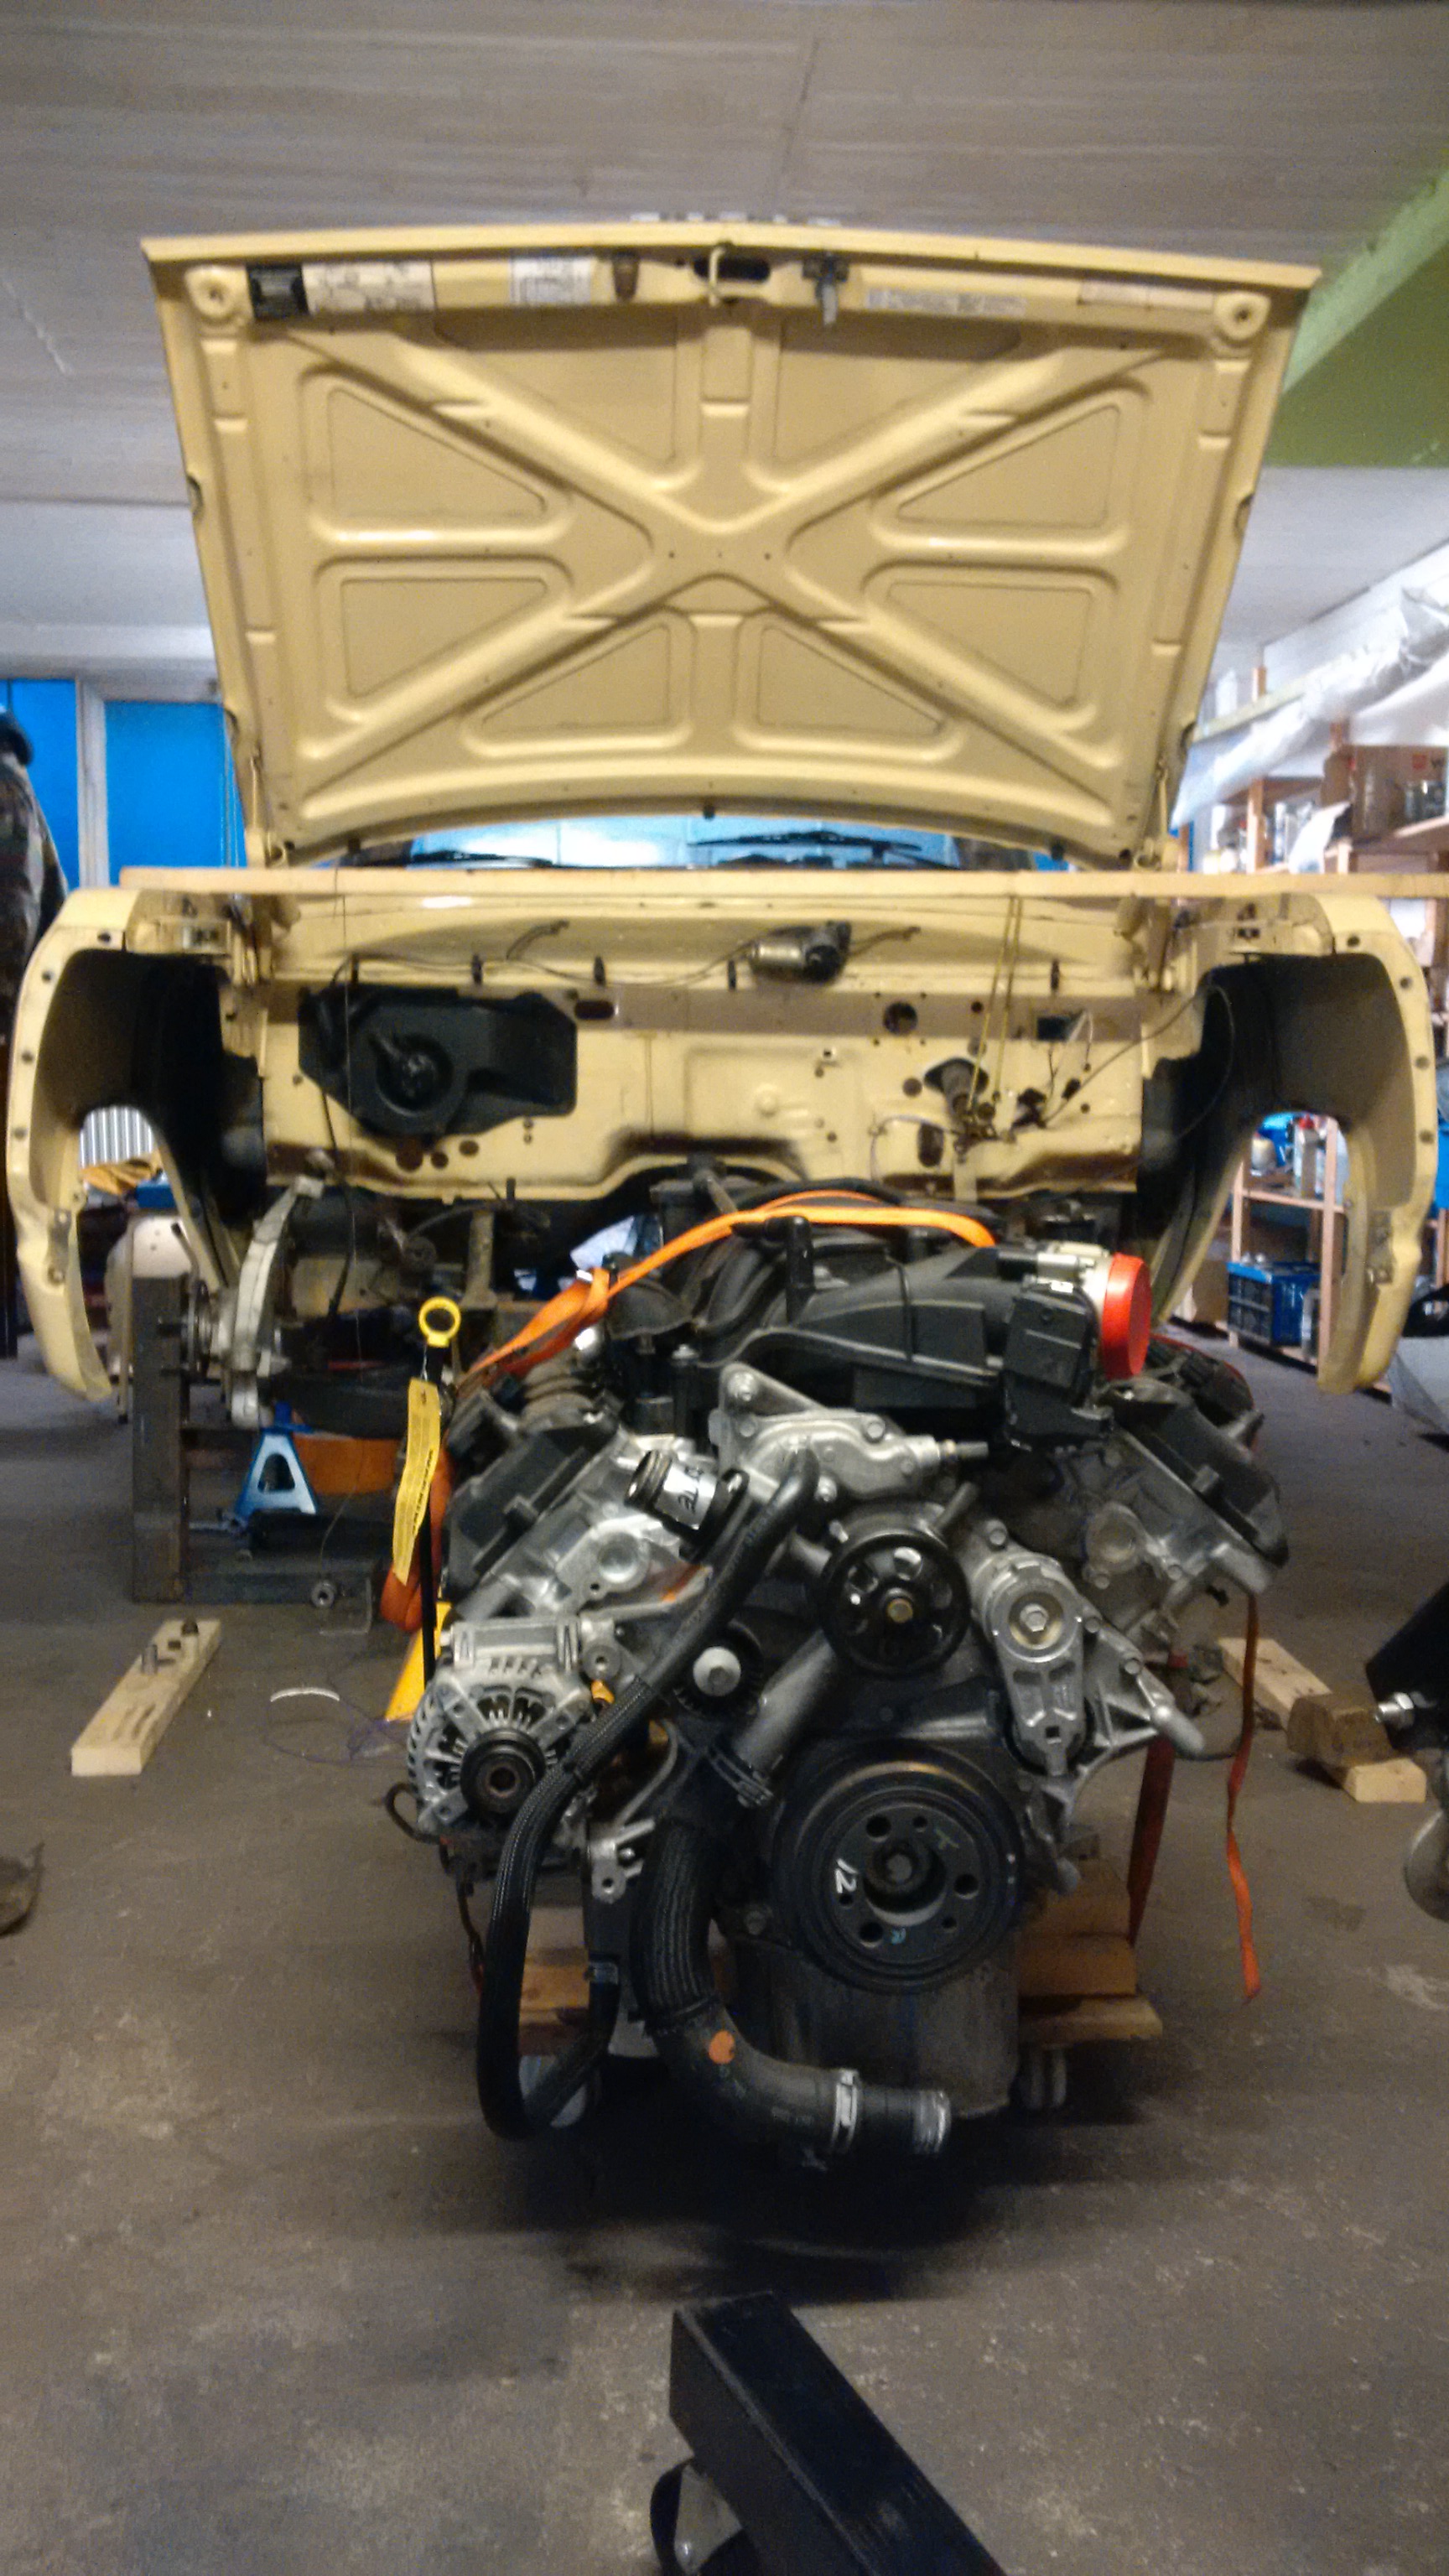
And it's reeeeaaally tight when you want that engine to sit low between the frame rails.
Like inaccessibly tight:
No, i'm not grinding on the frame to make that fit.
I'm moving the engine around.
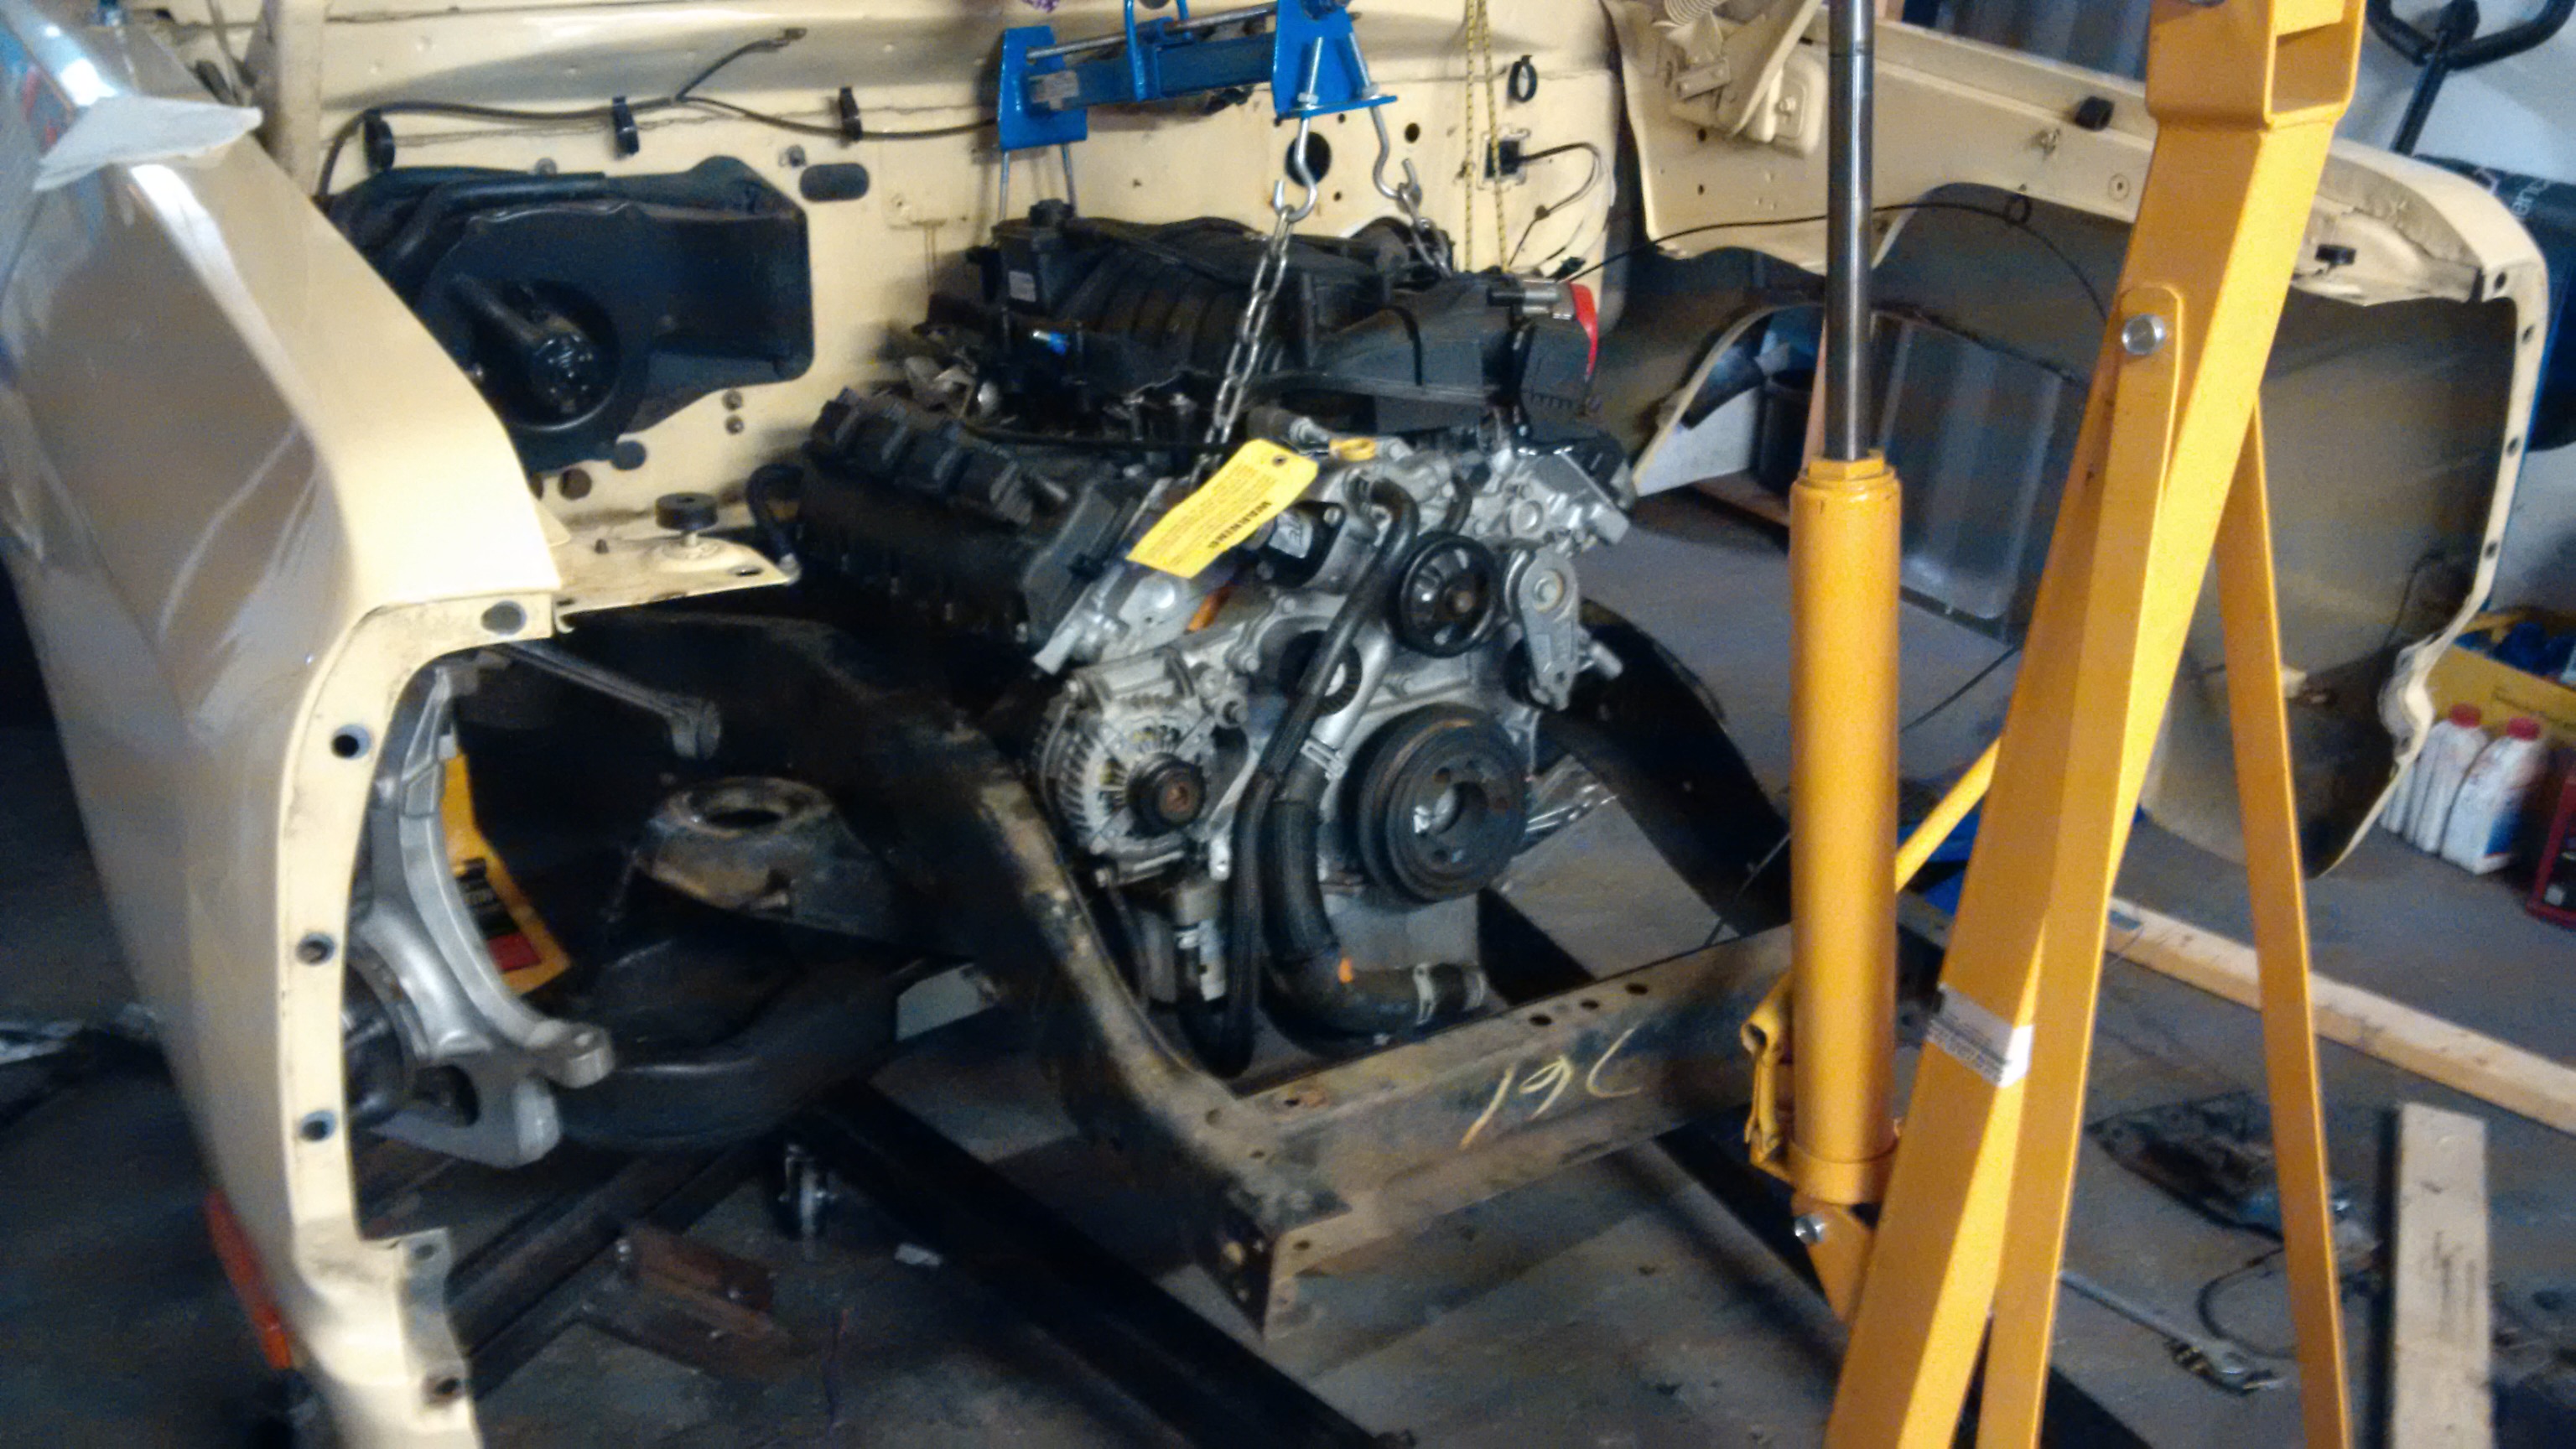
Here's interference:
Here's interference gone:

Now that engine "drops right in" (i am still laughing, 10 minutes after writing that).
I can now even install the OEM headers without removing the engine.
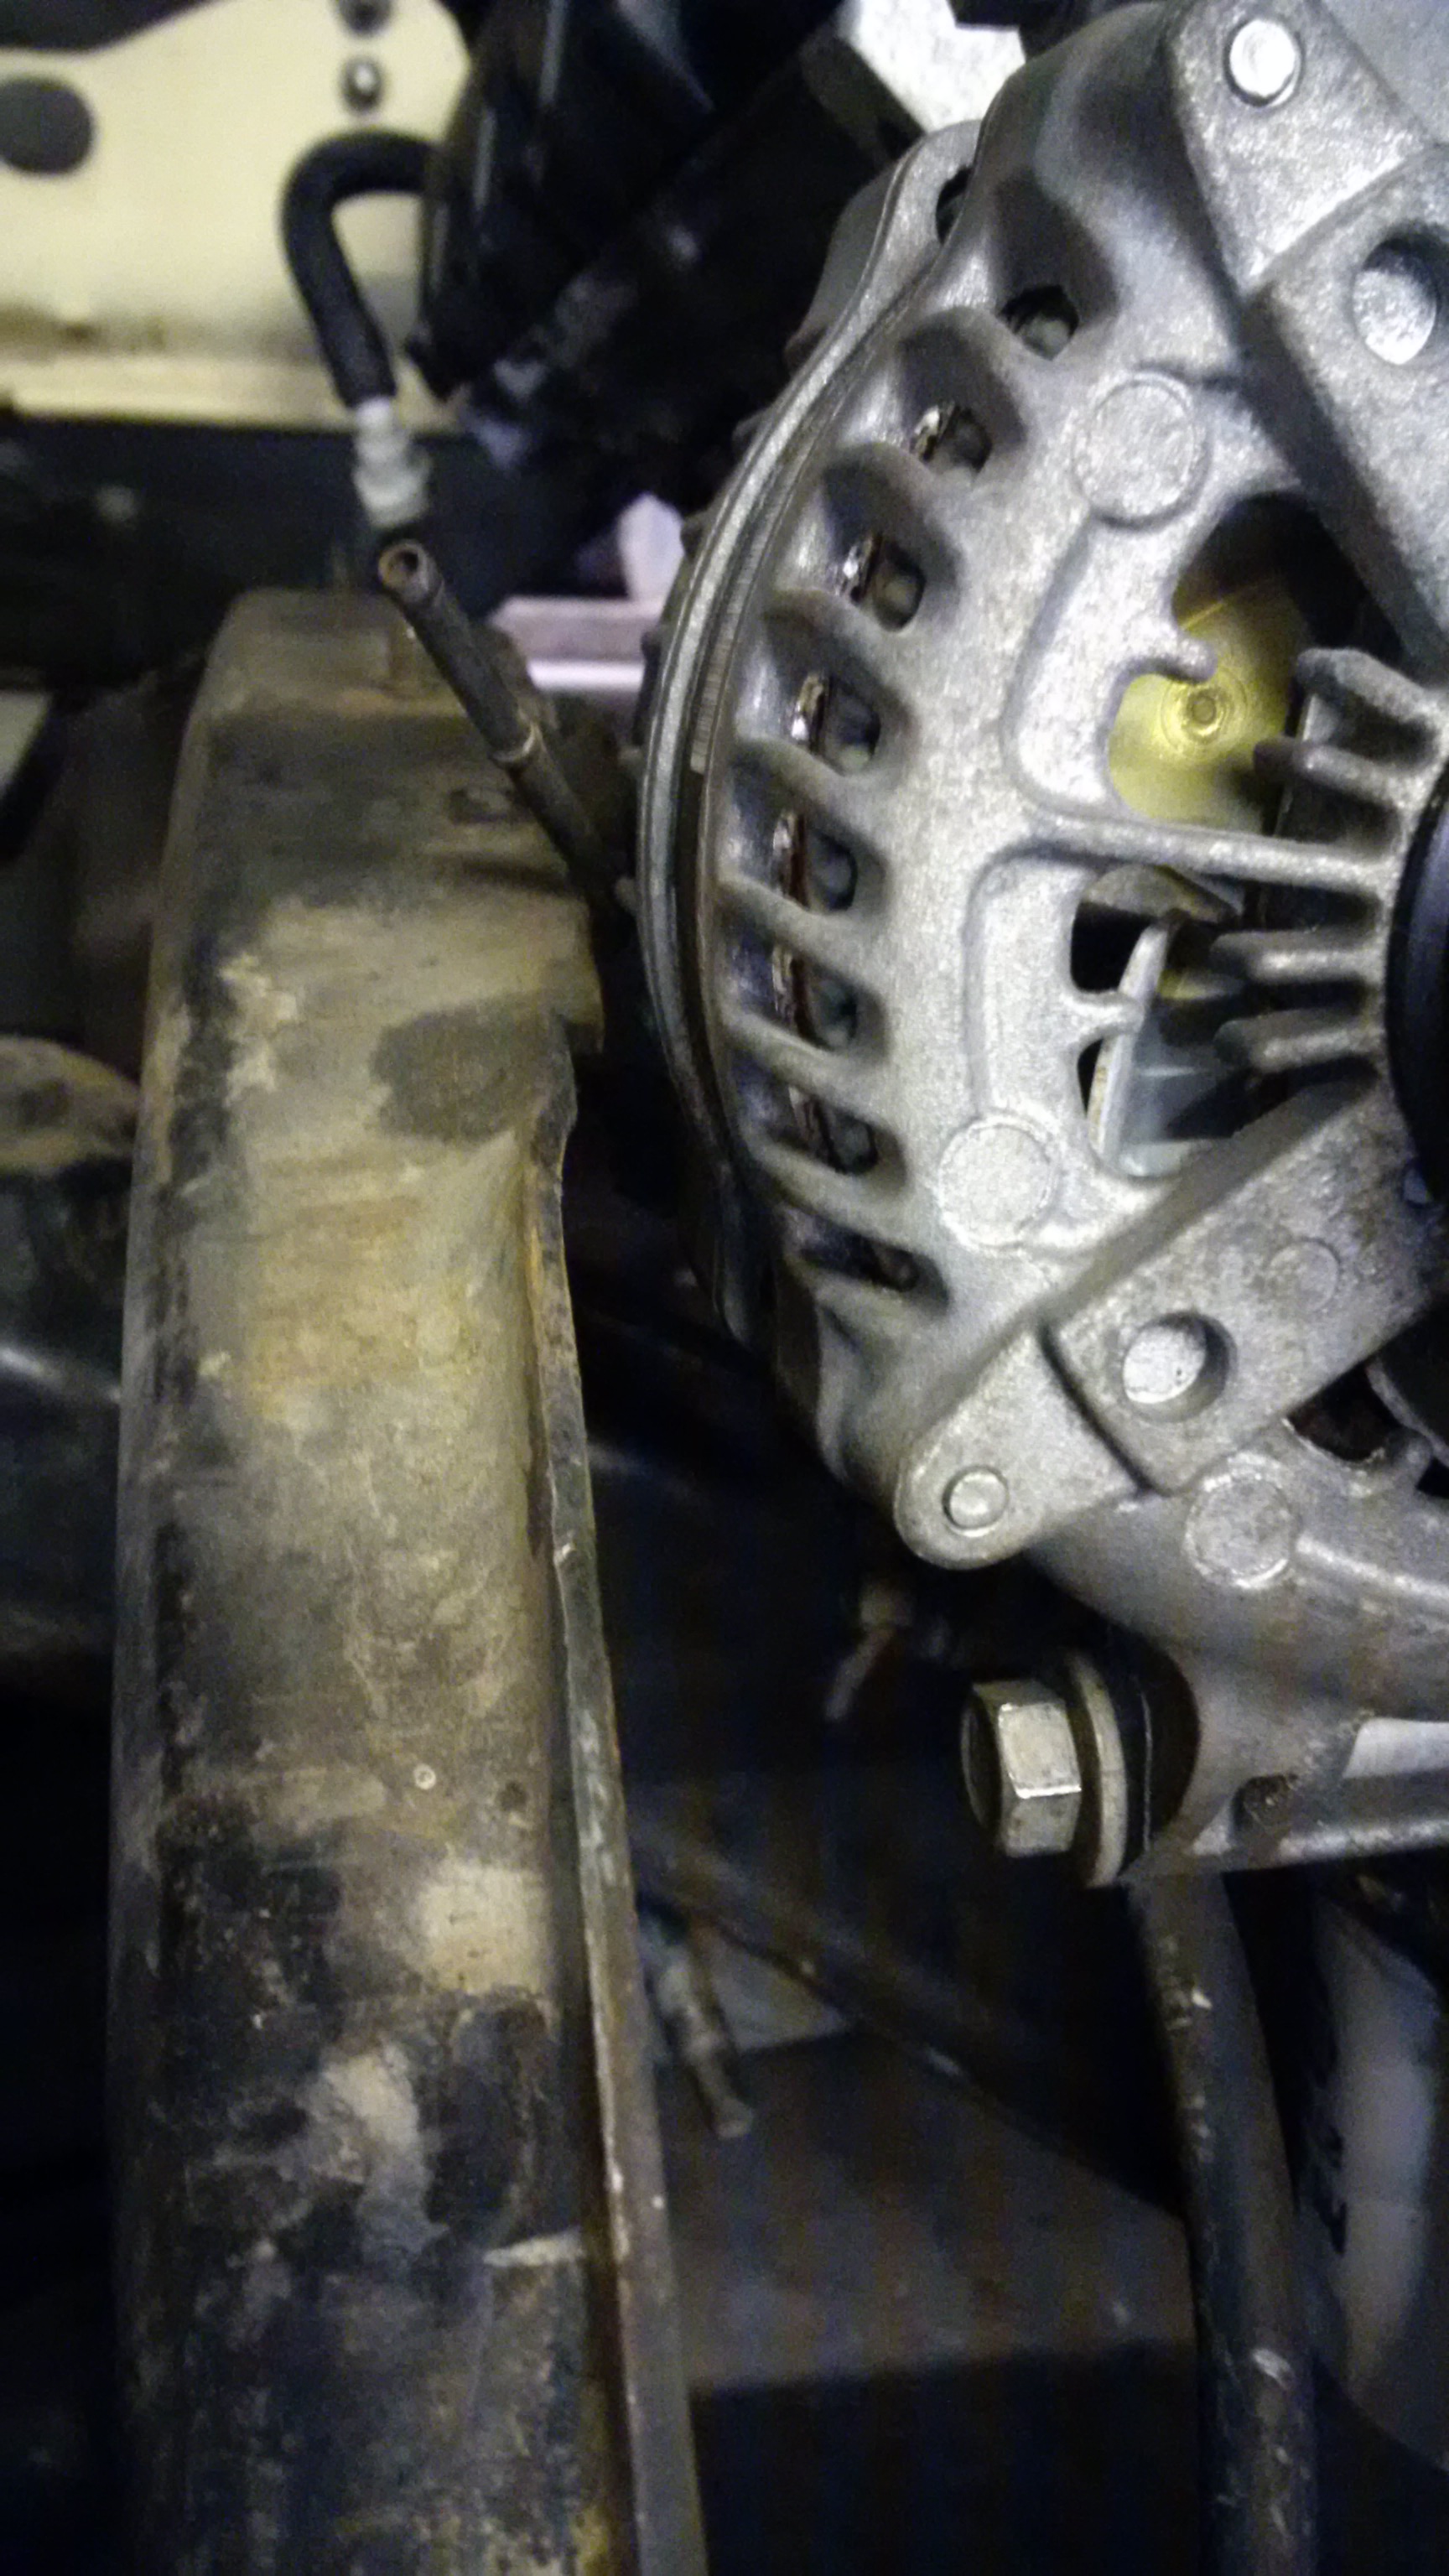
They drop right inside the frame rail:
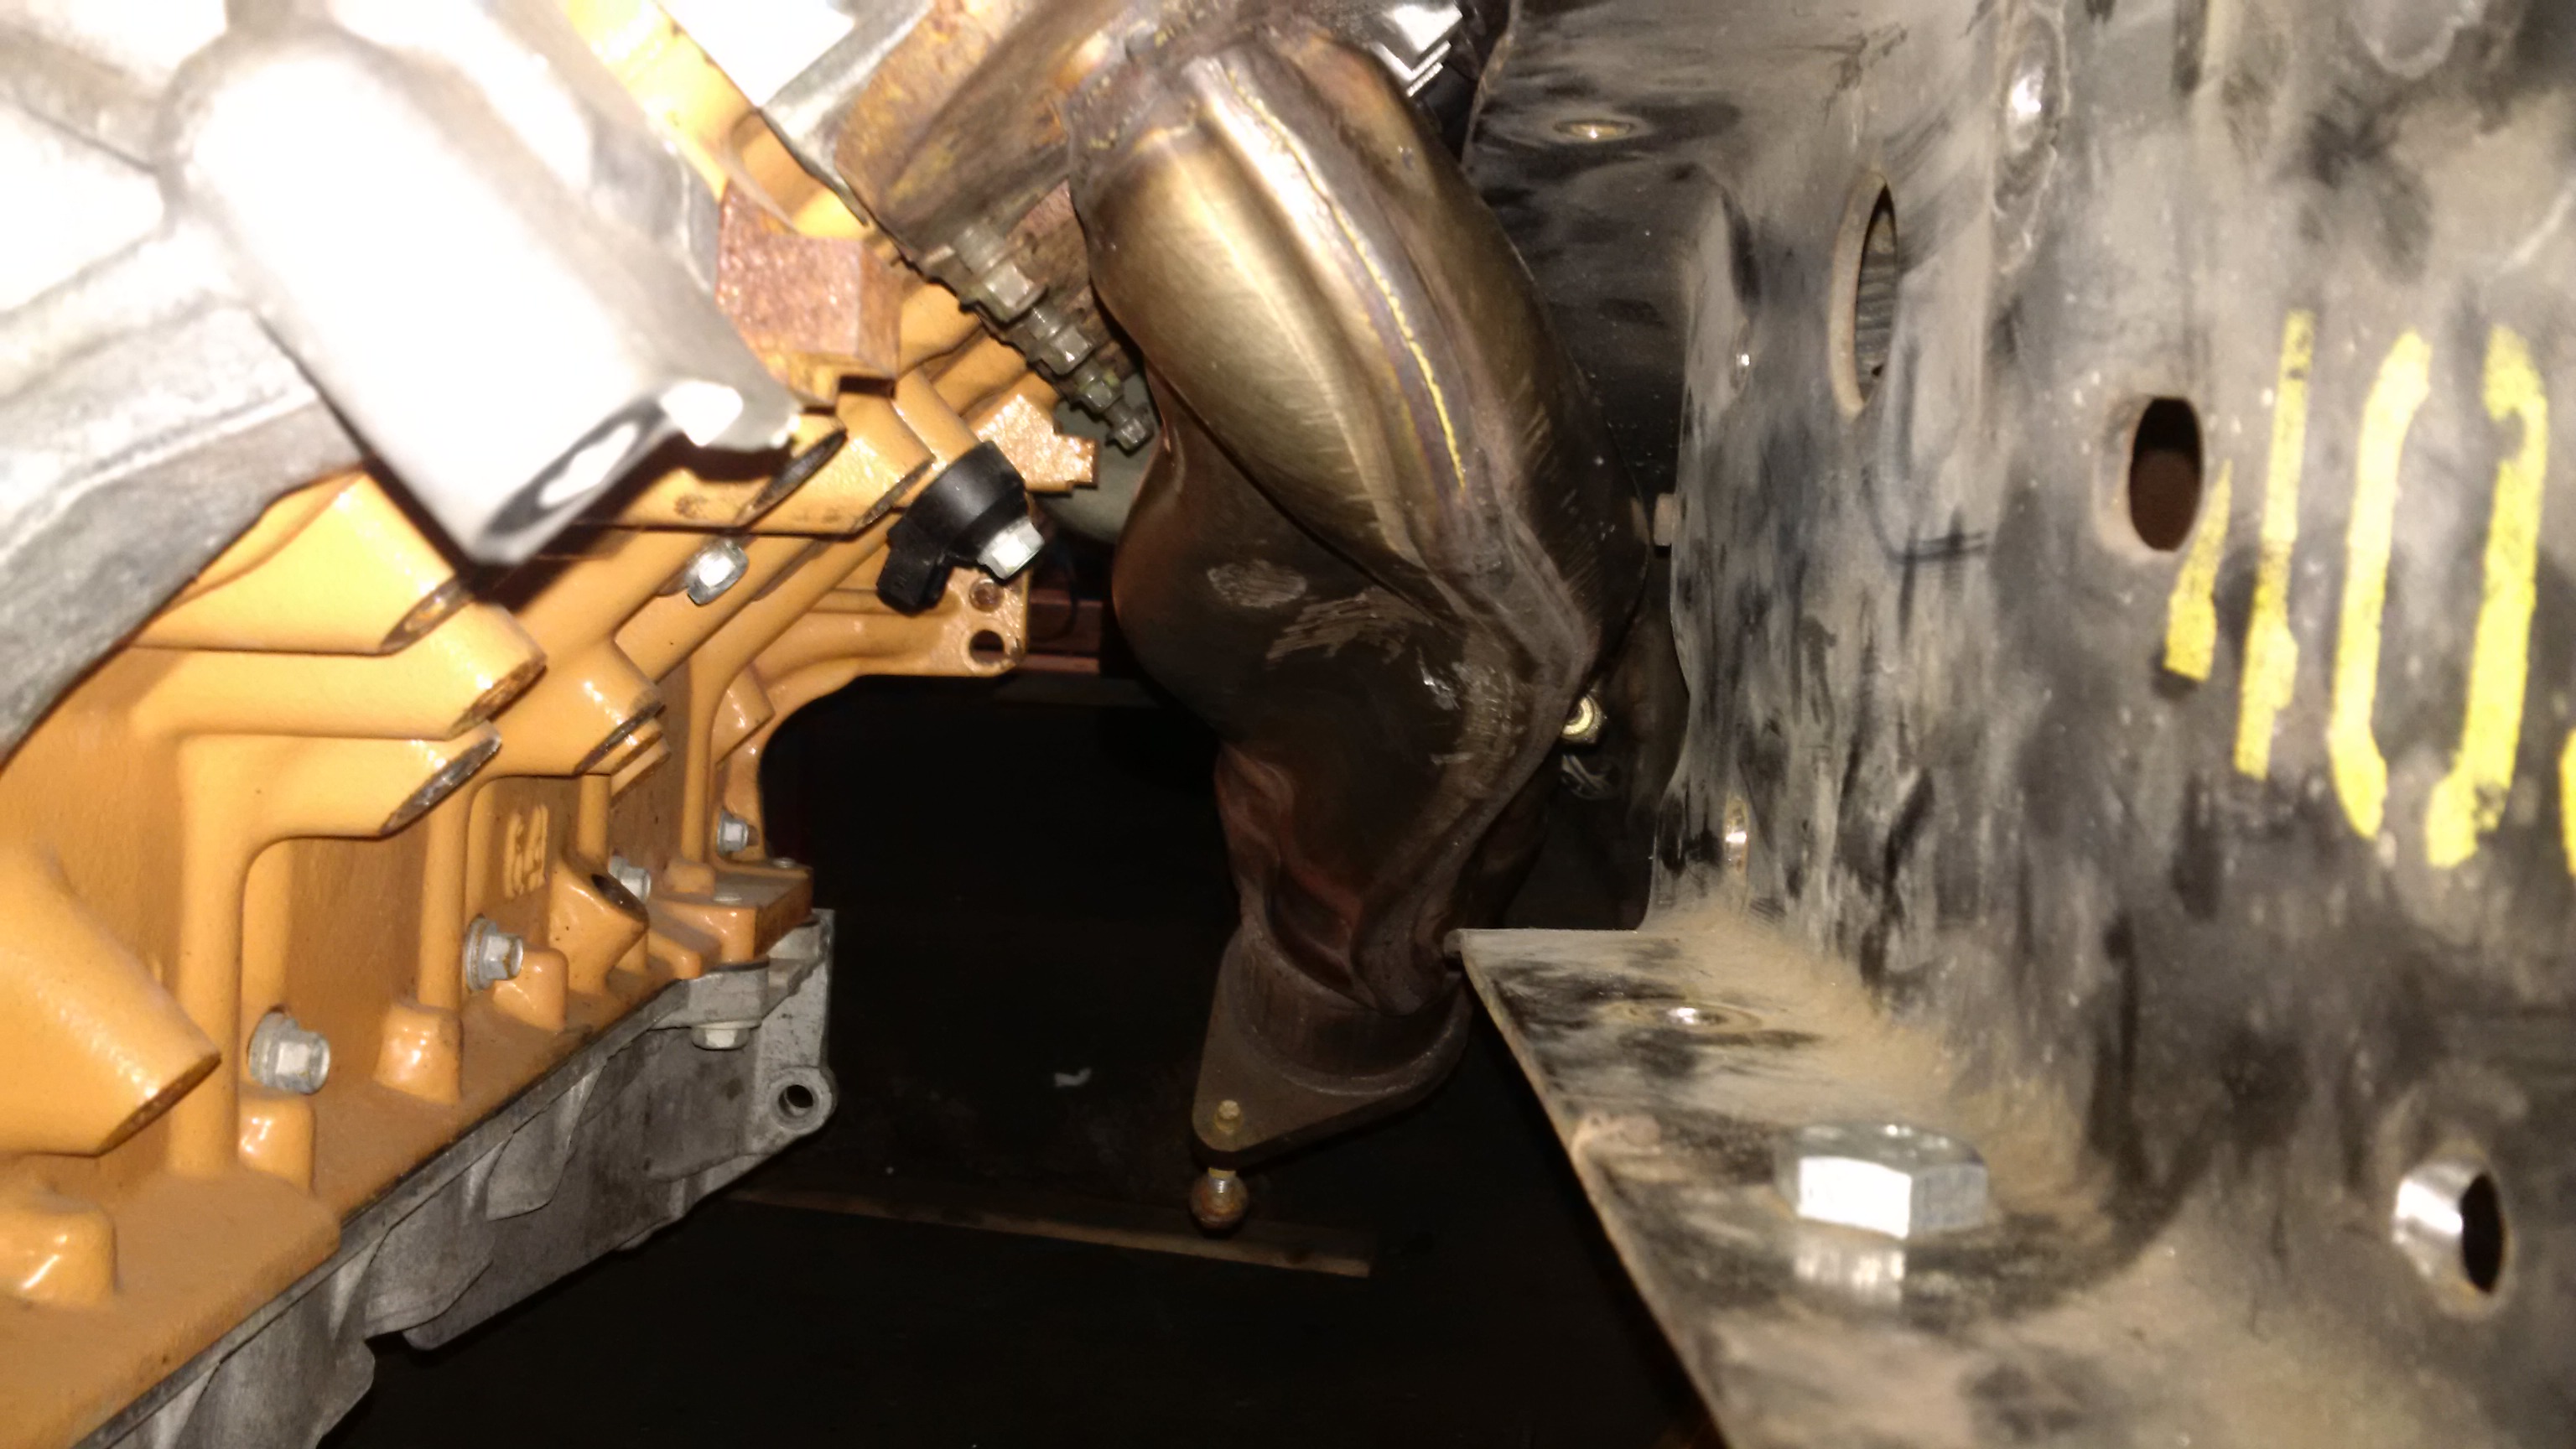
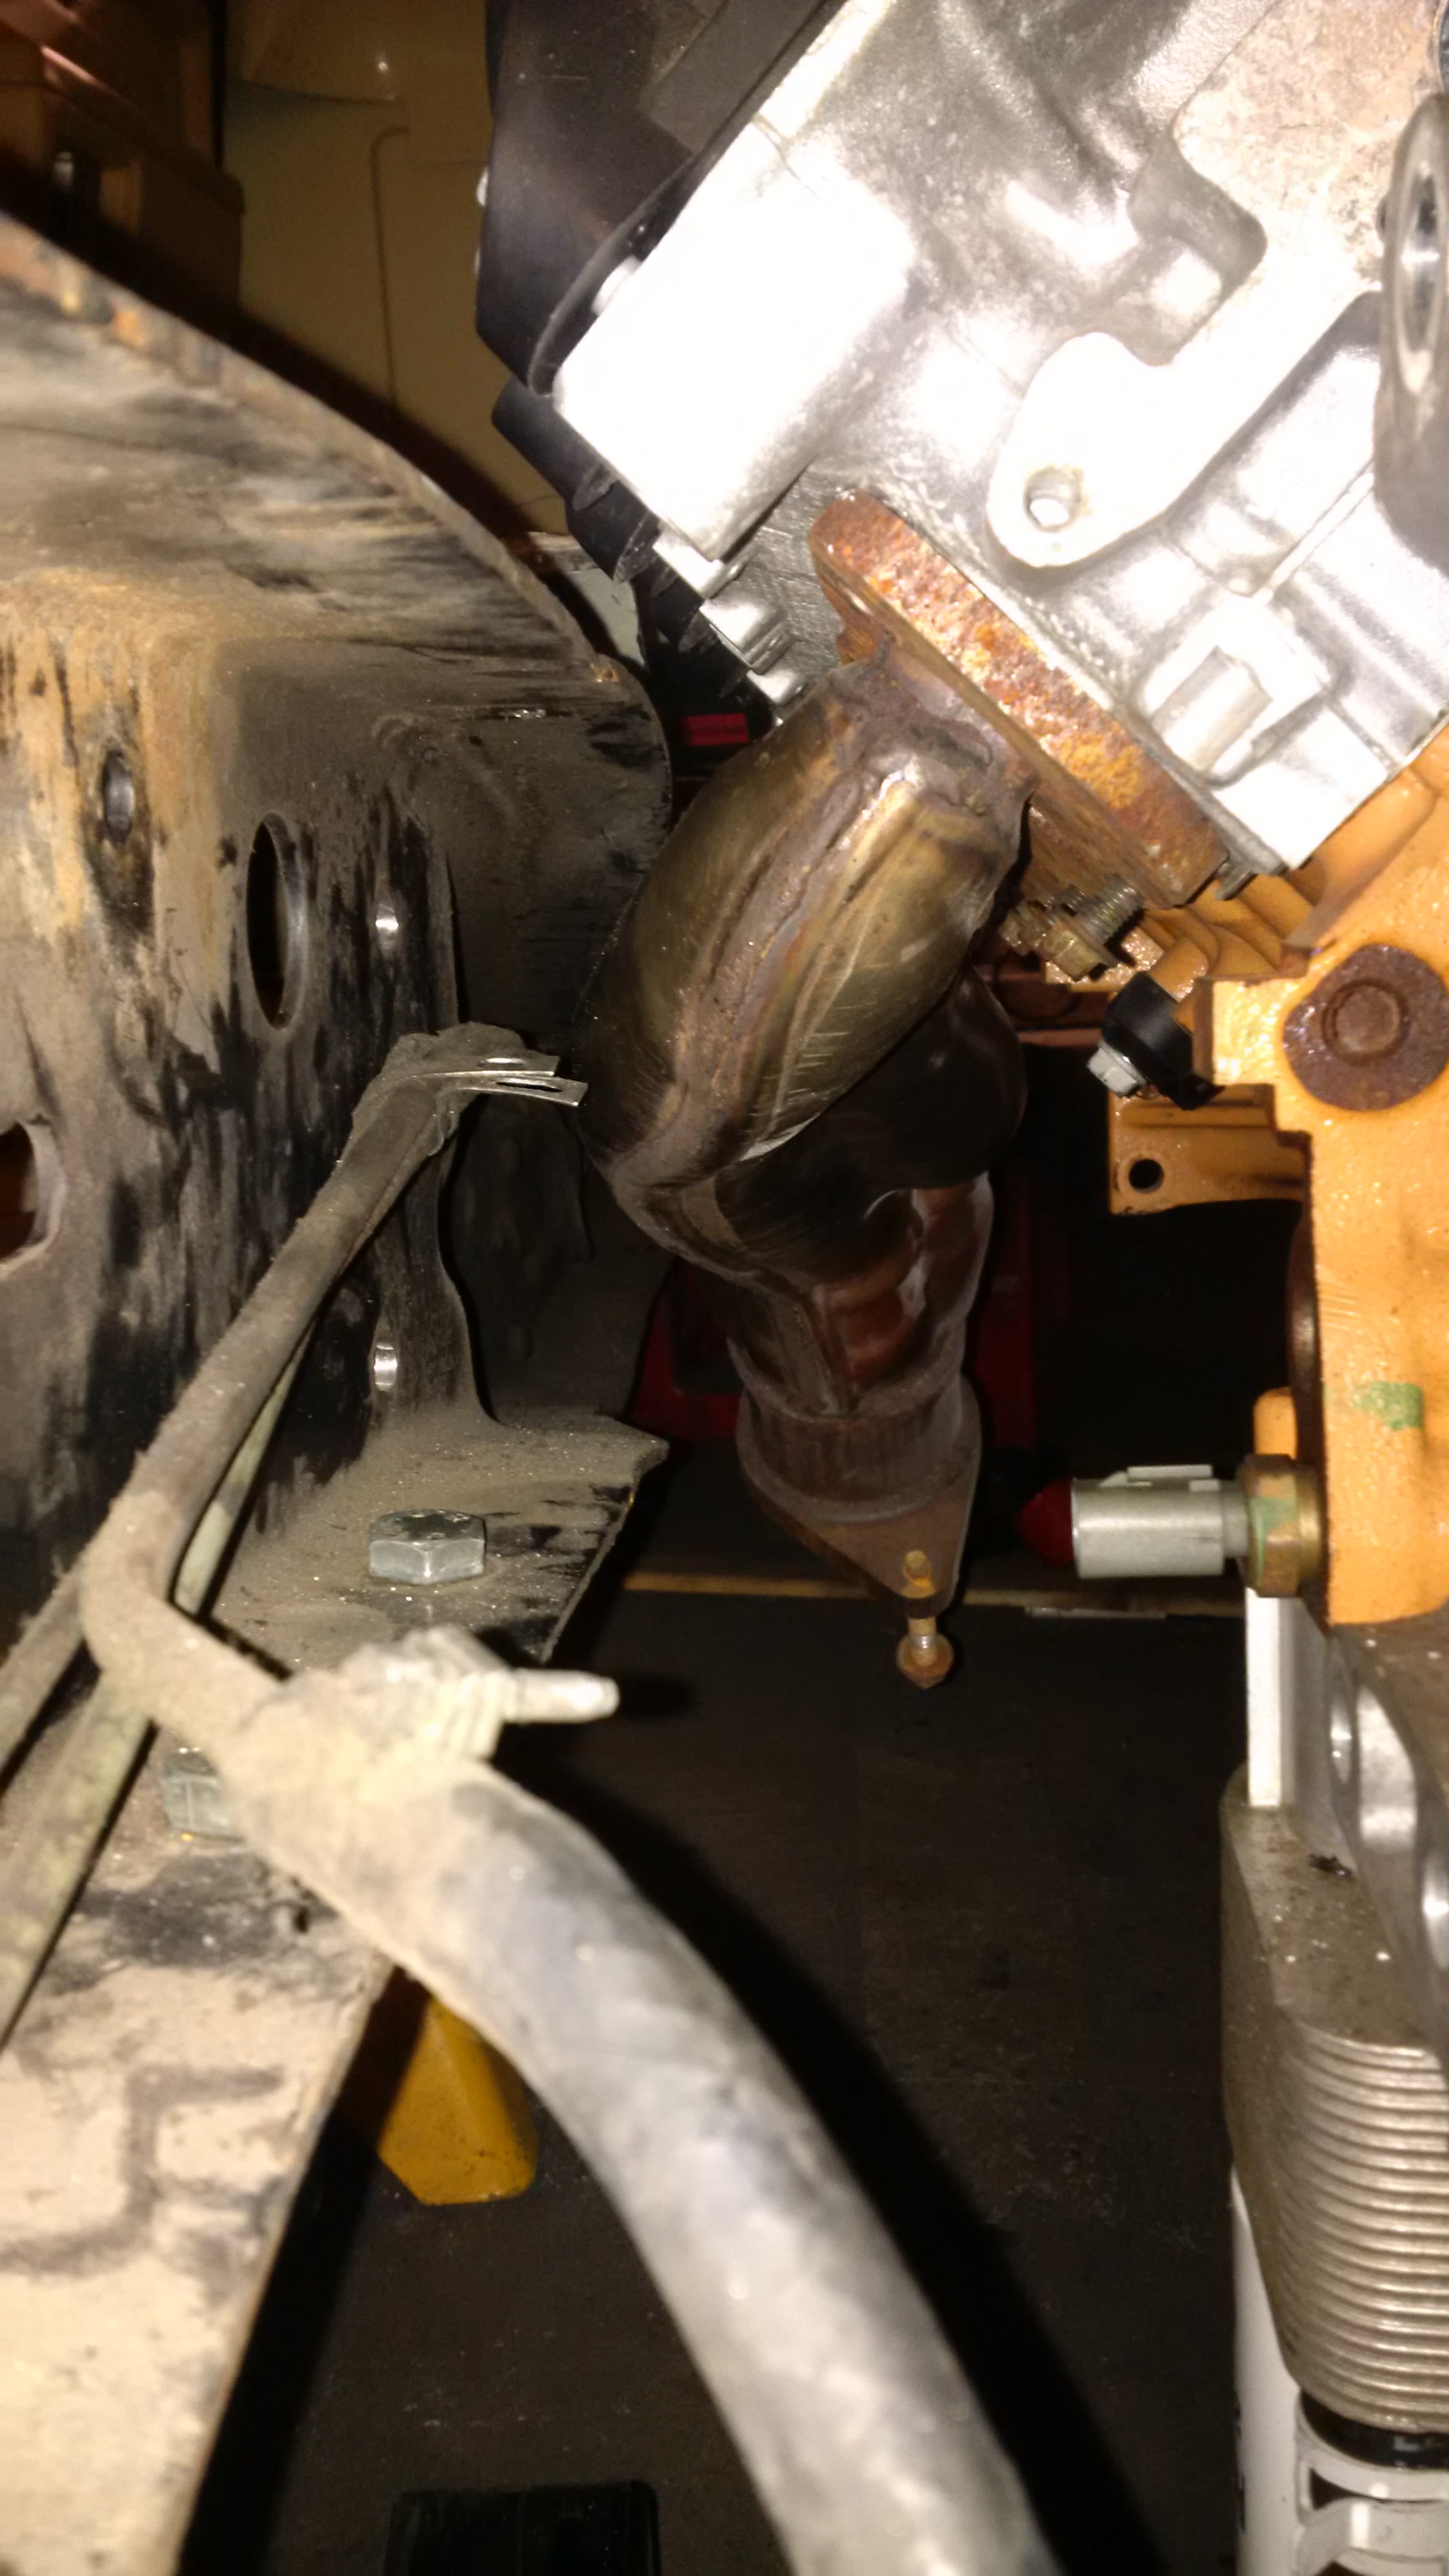
Although this looks really tight, i can easily fit my hand between the headers and the frame rail everywhere.
Here's an inside shot of that mess:

Other things have happened as well:
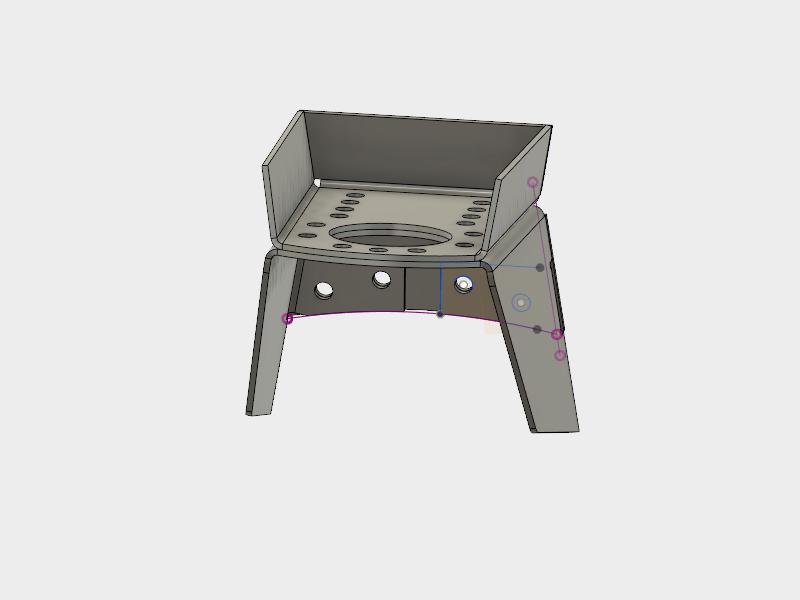
- i "designed" (Cardboard Aided Design) the coil bucket, spring perch whatever you want to call it and made a prototype.
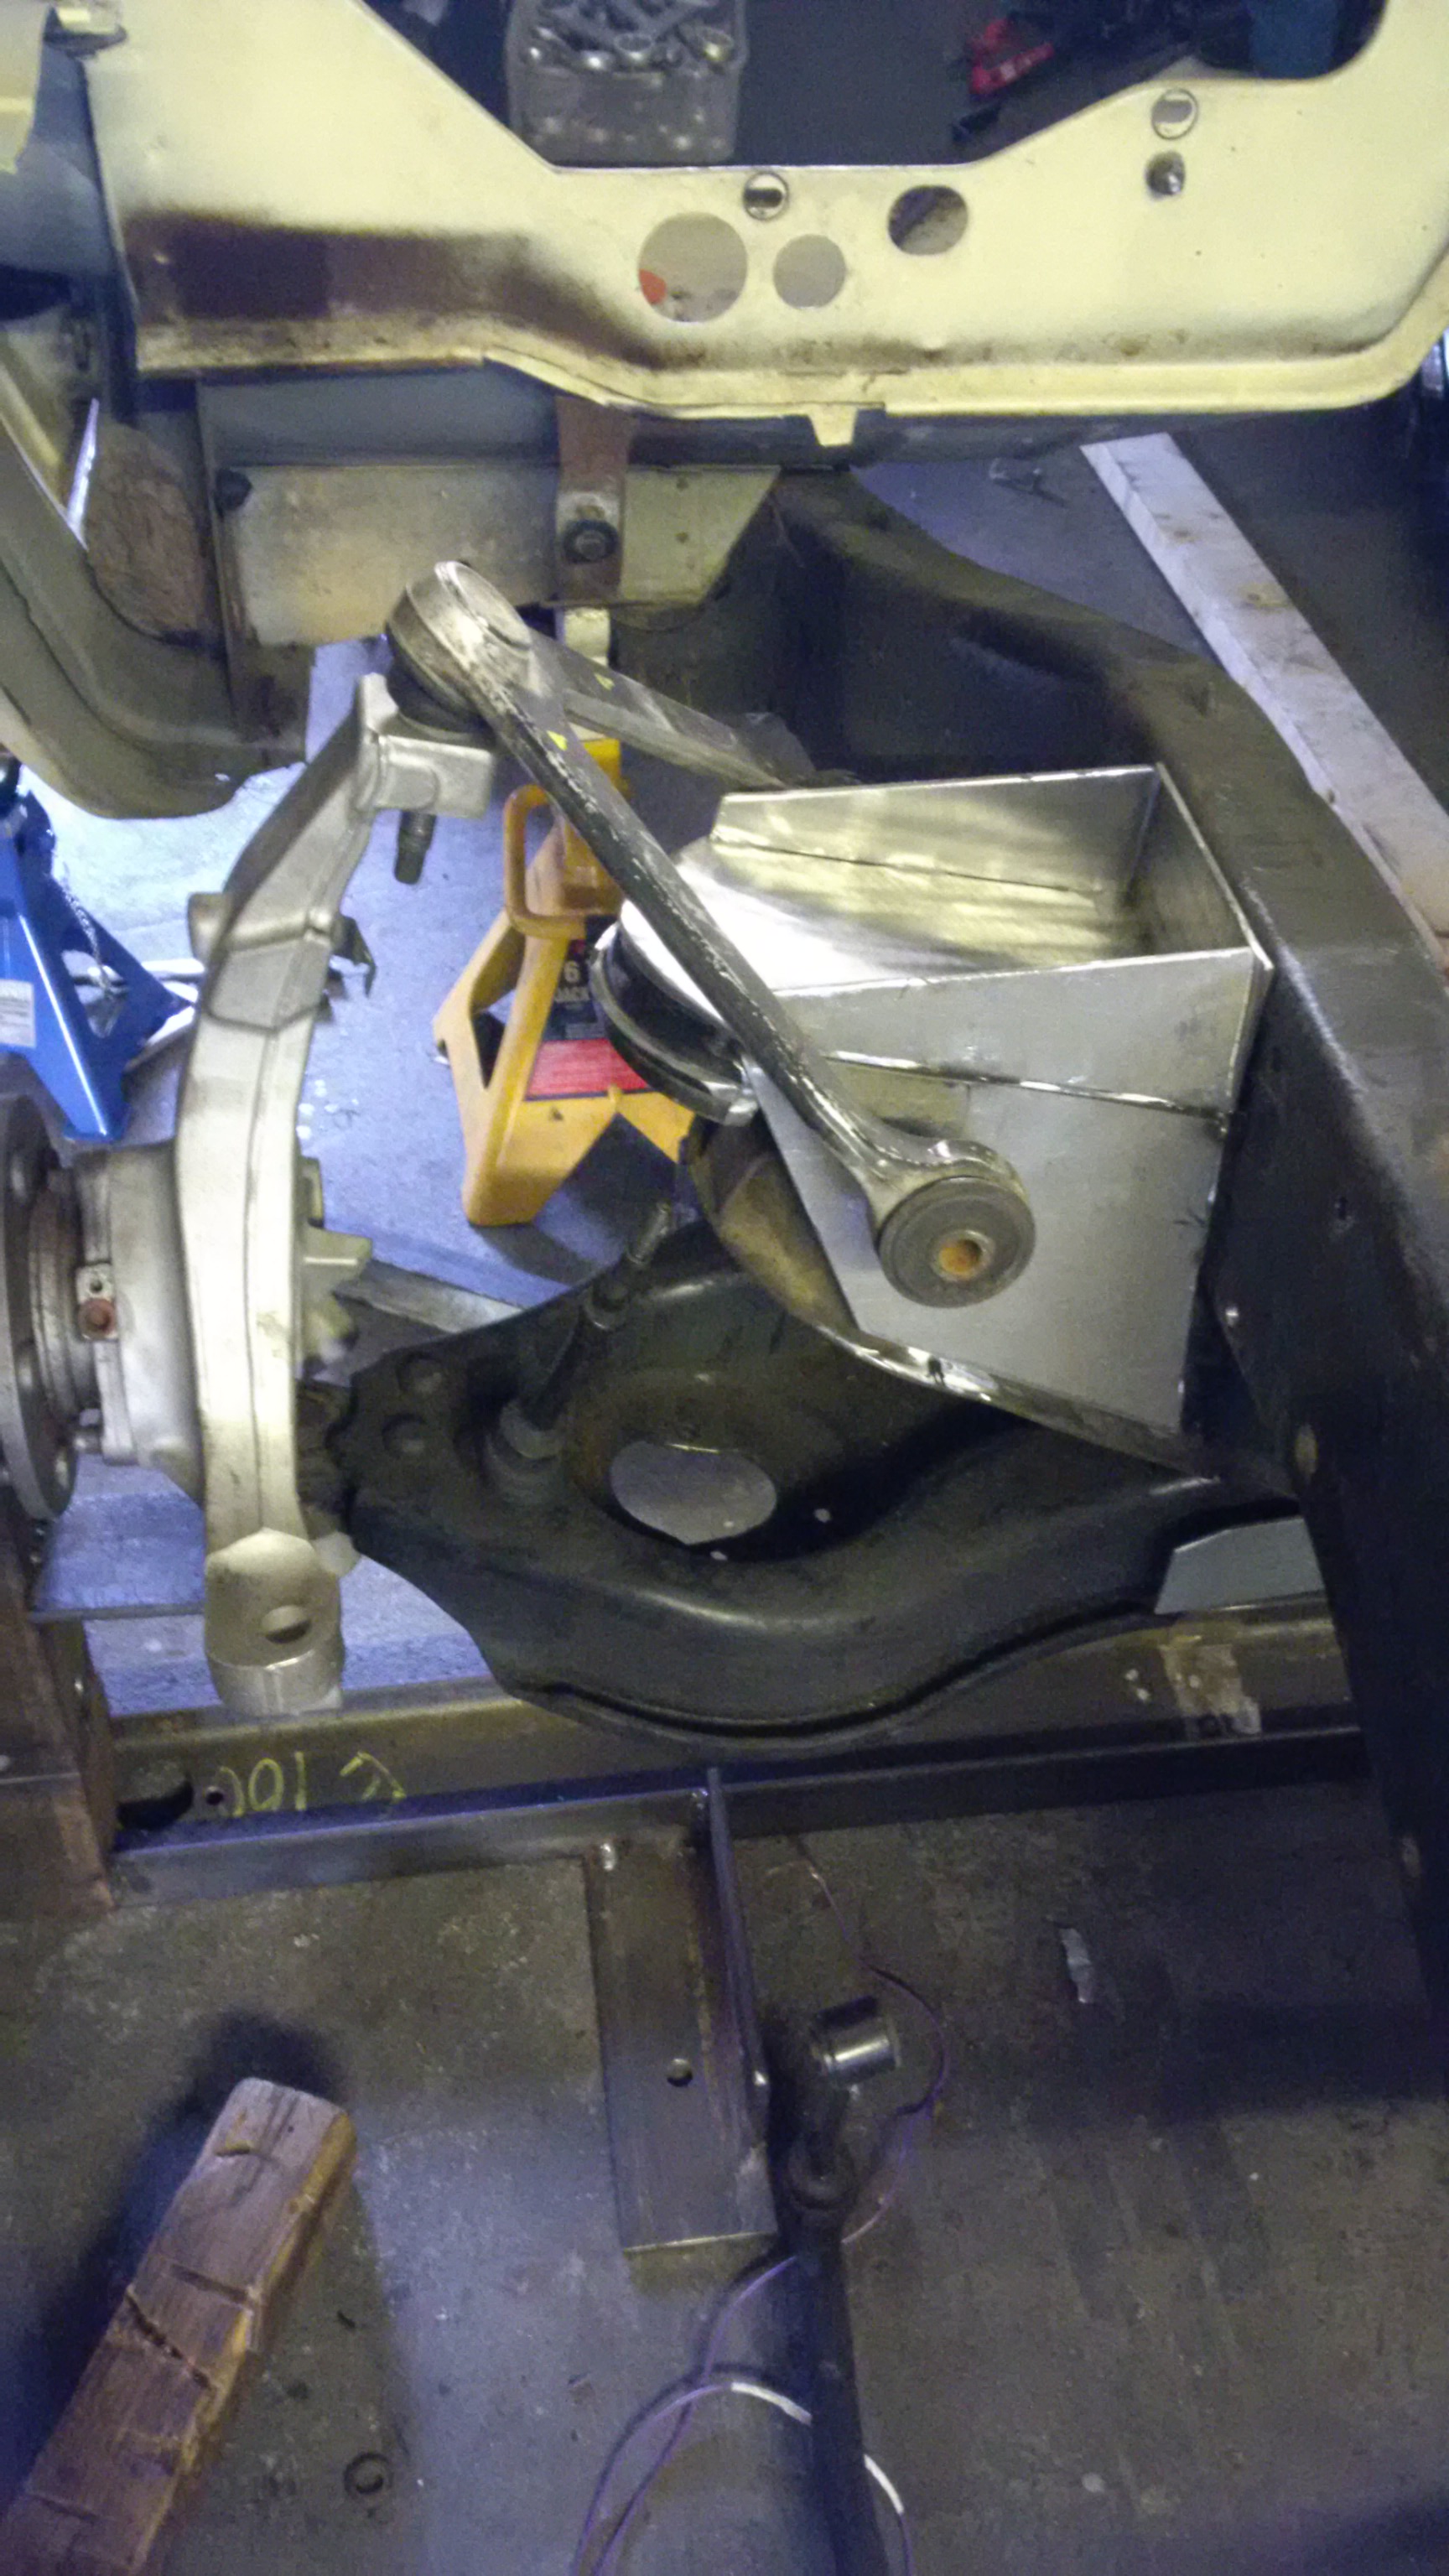
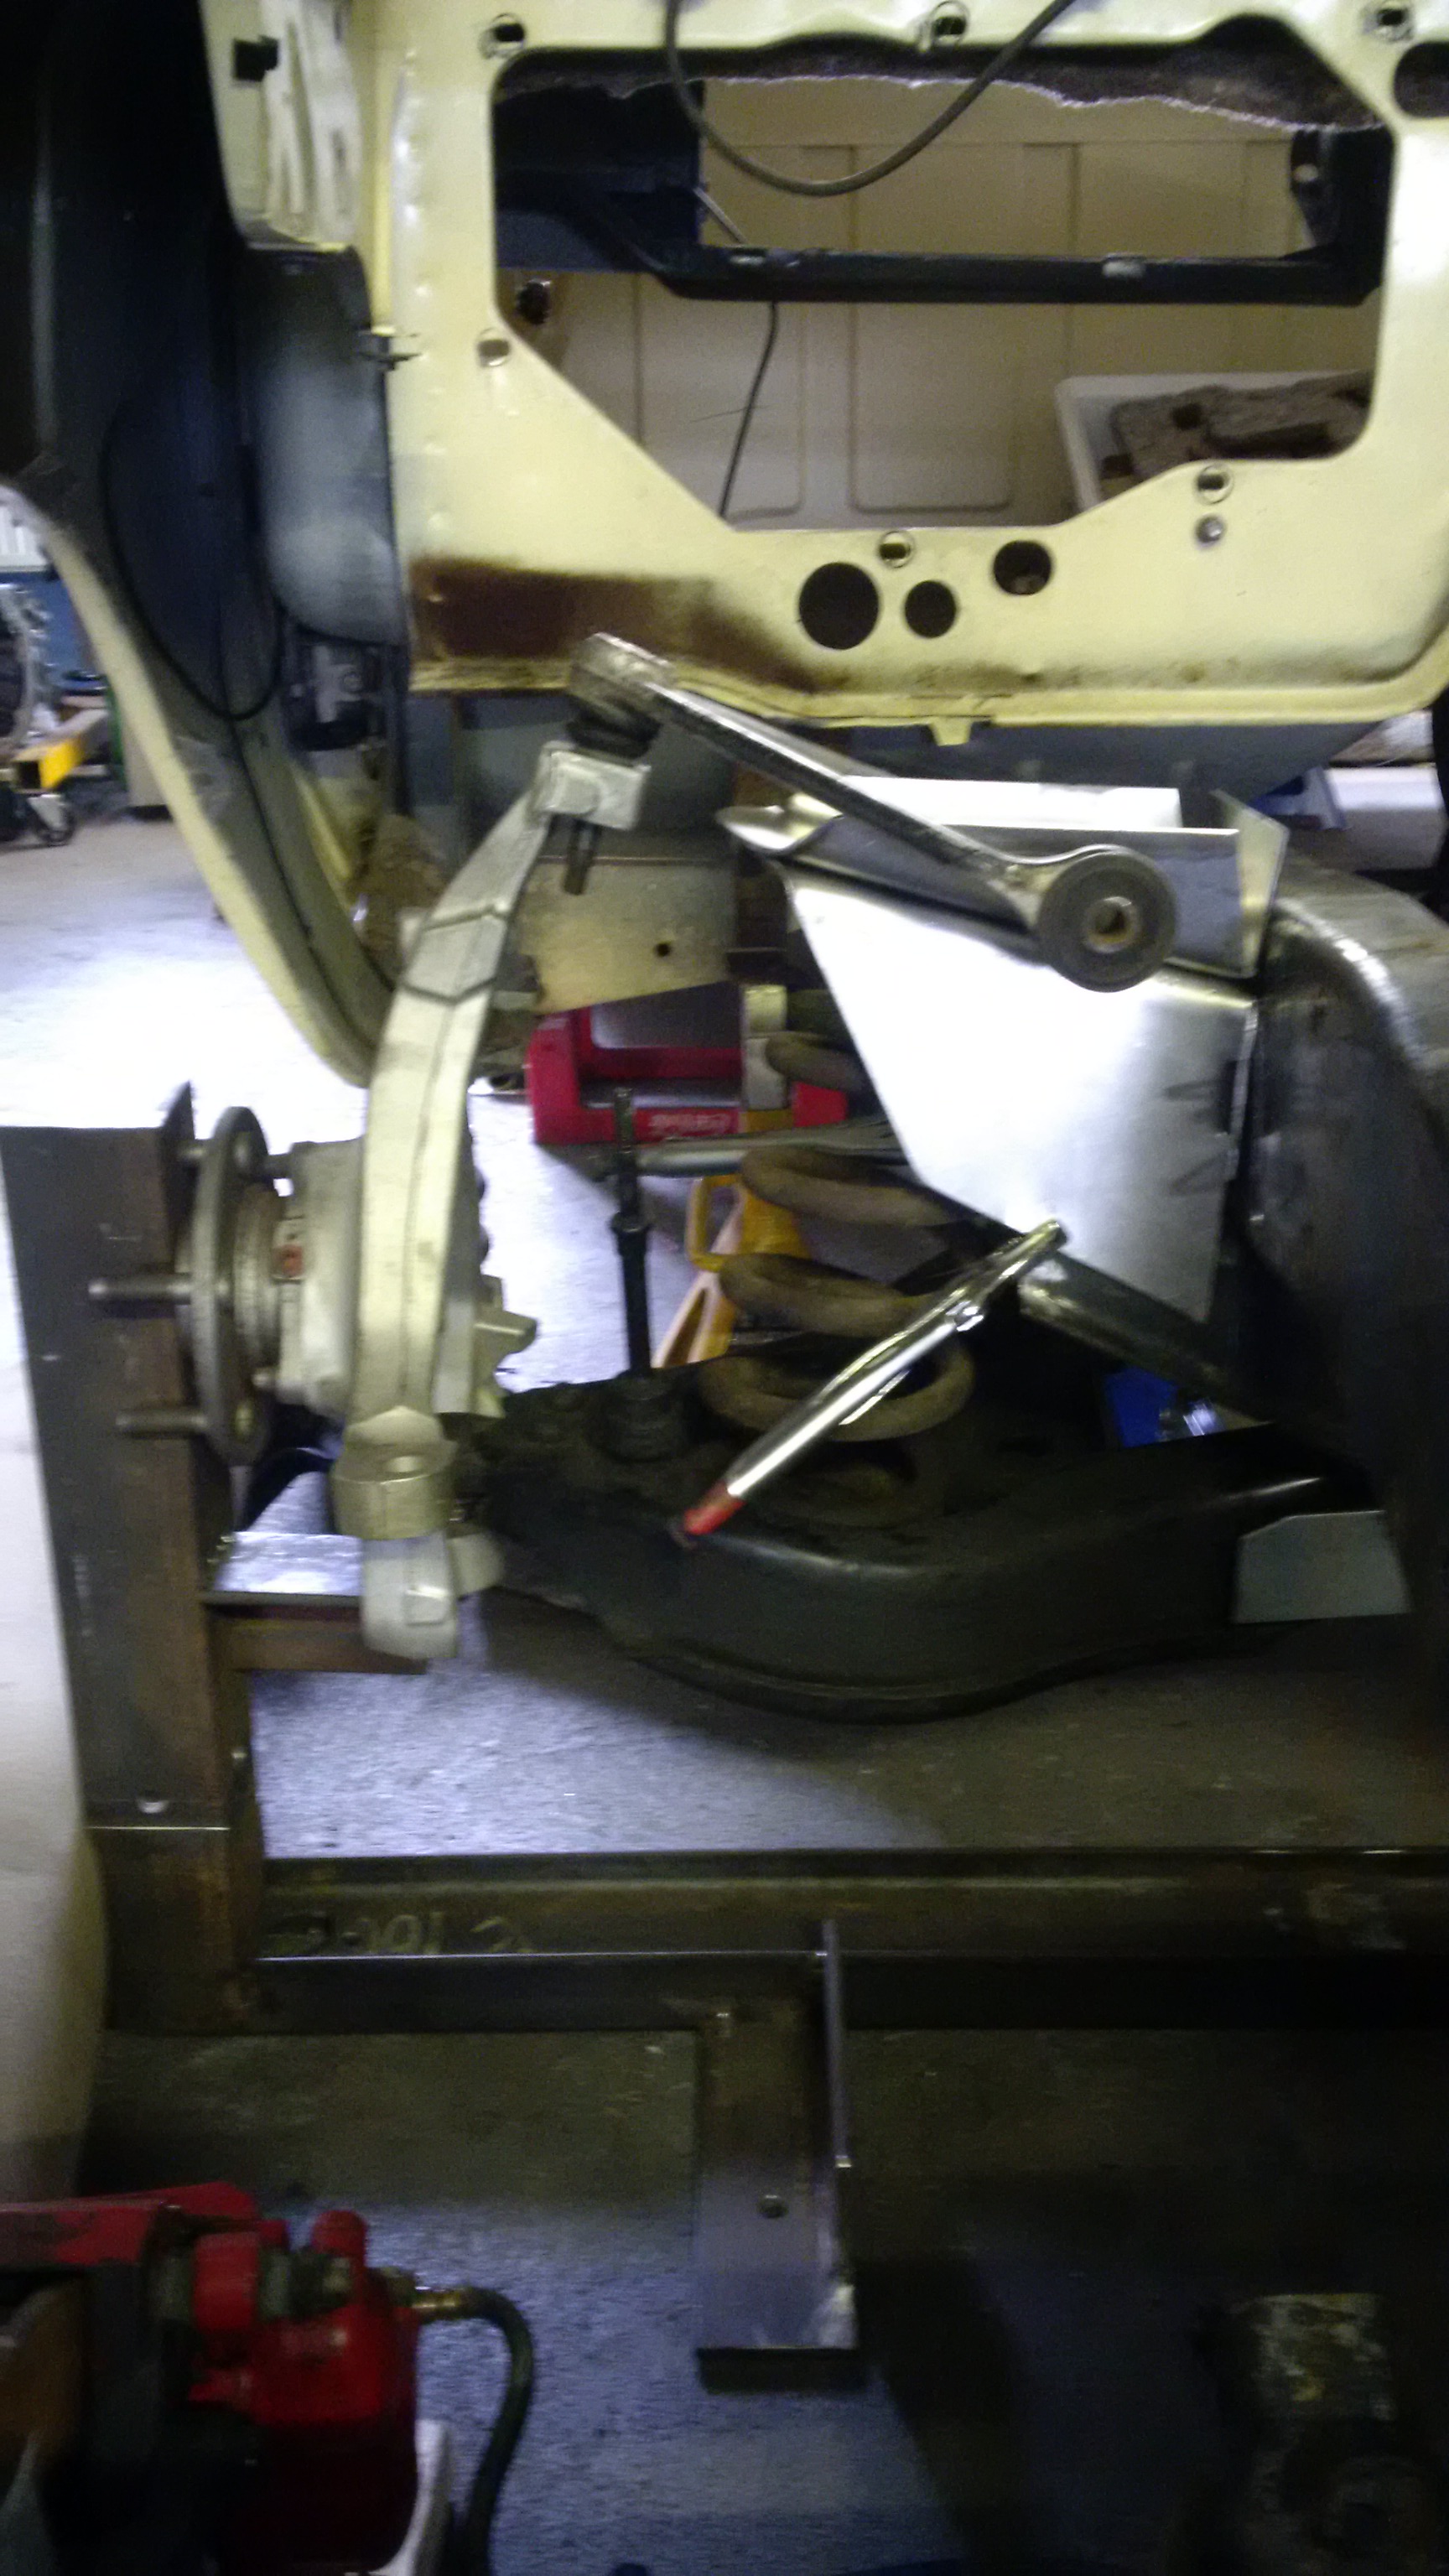
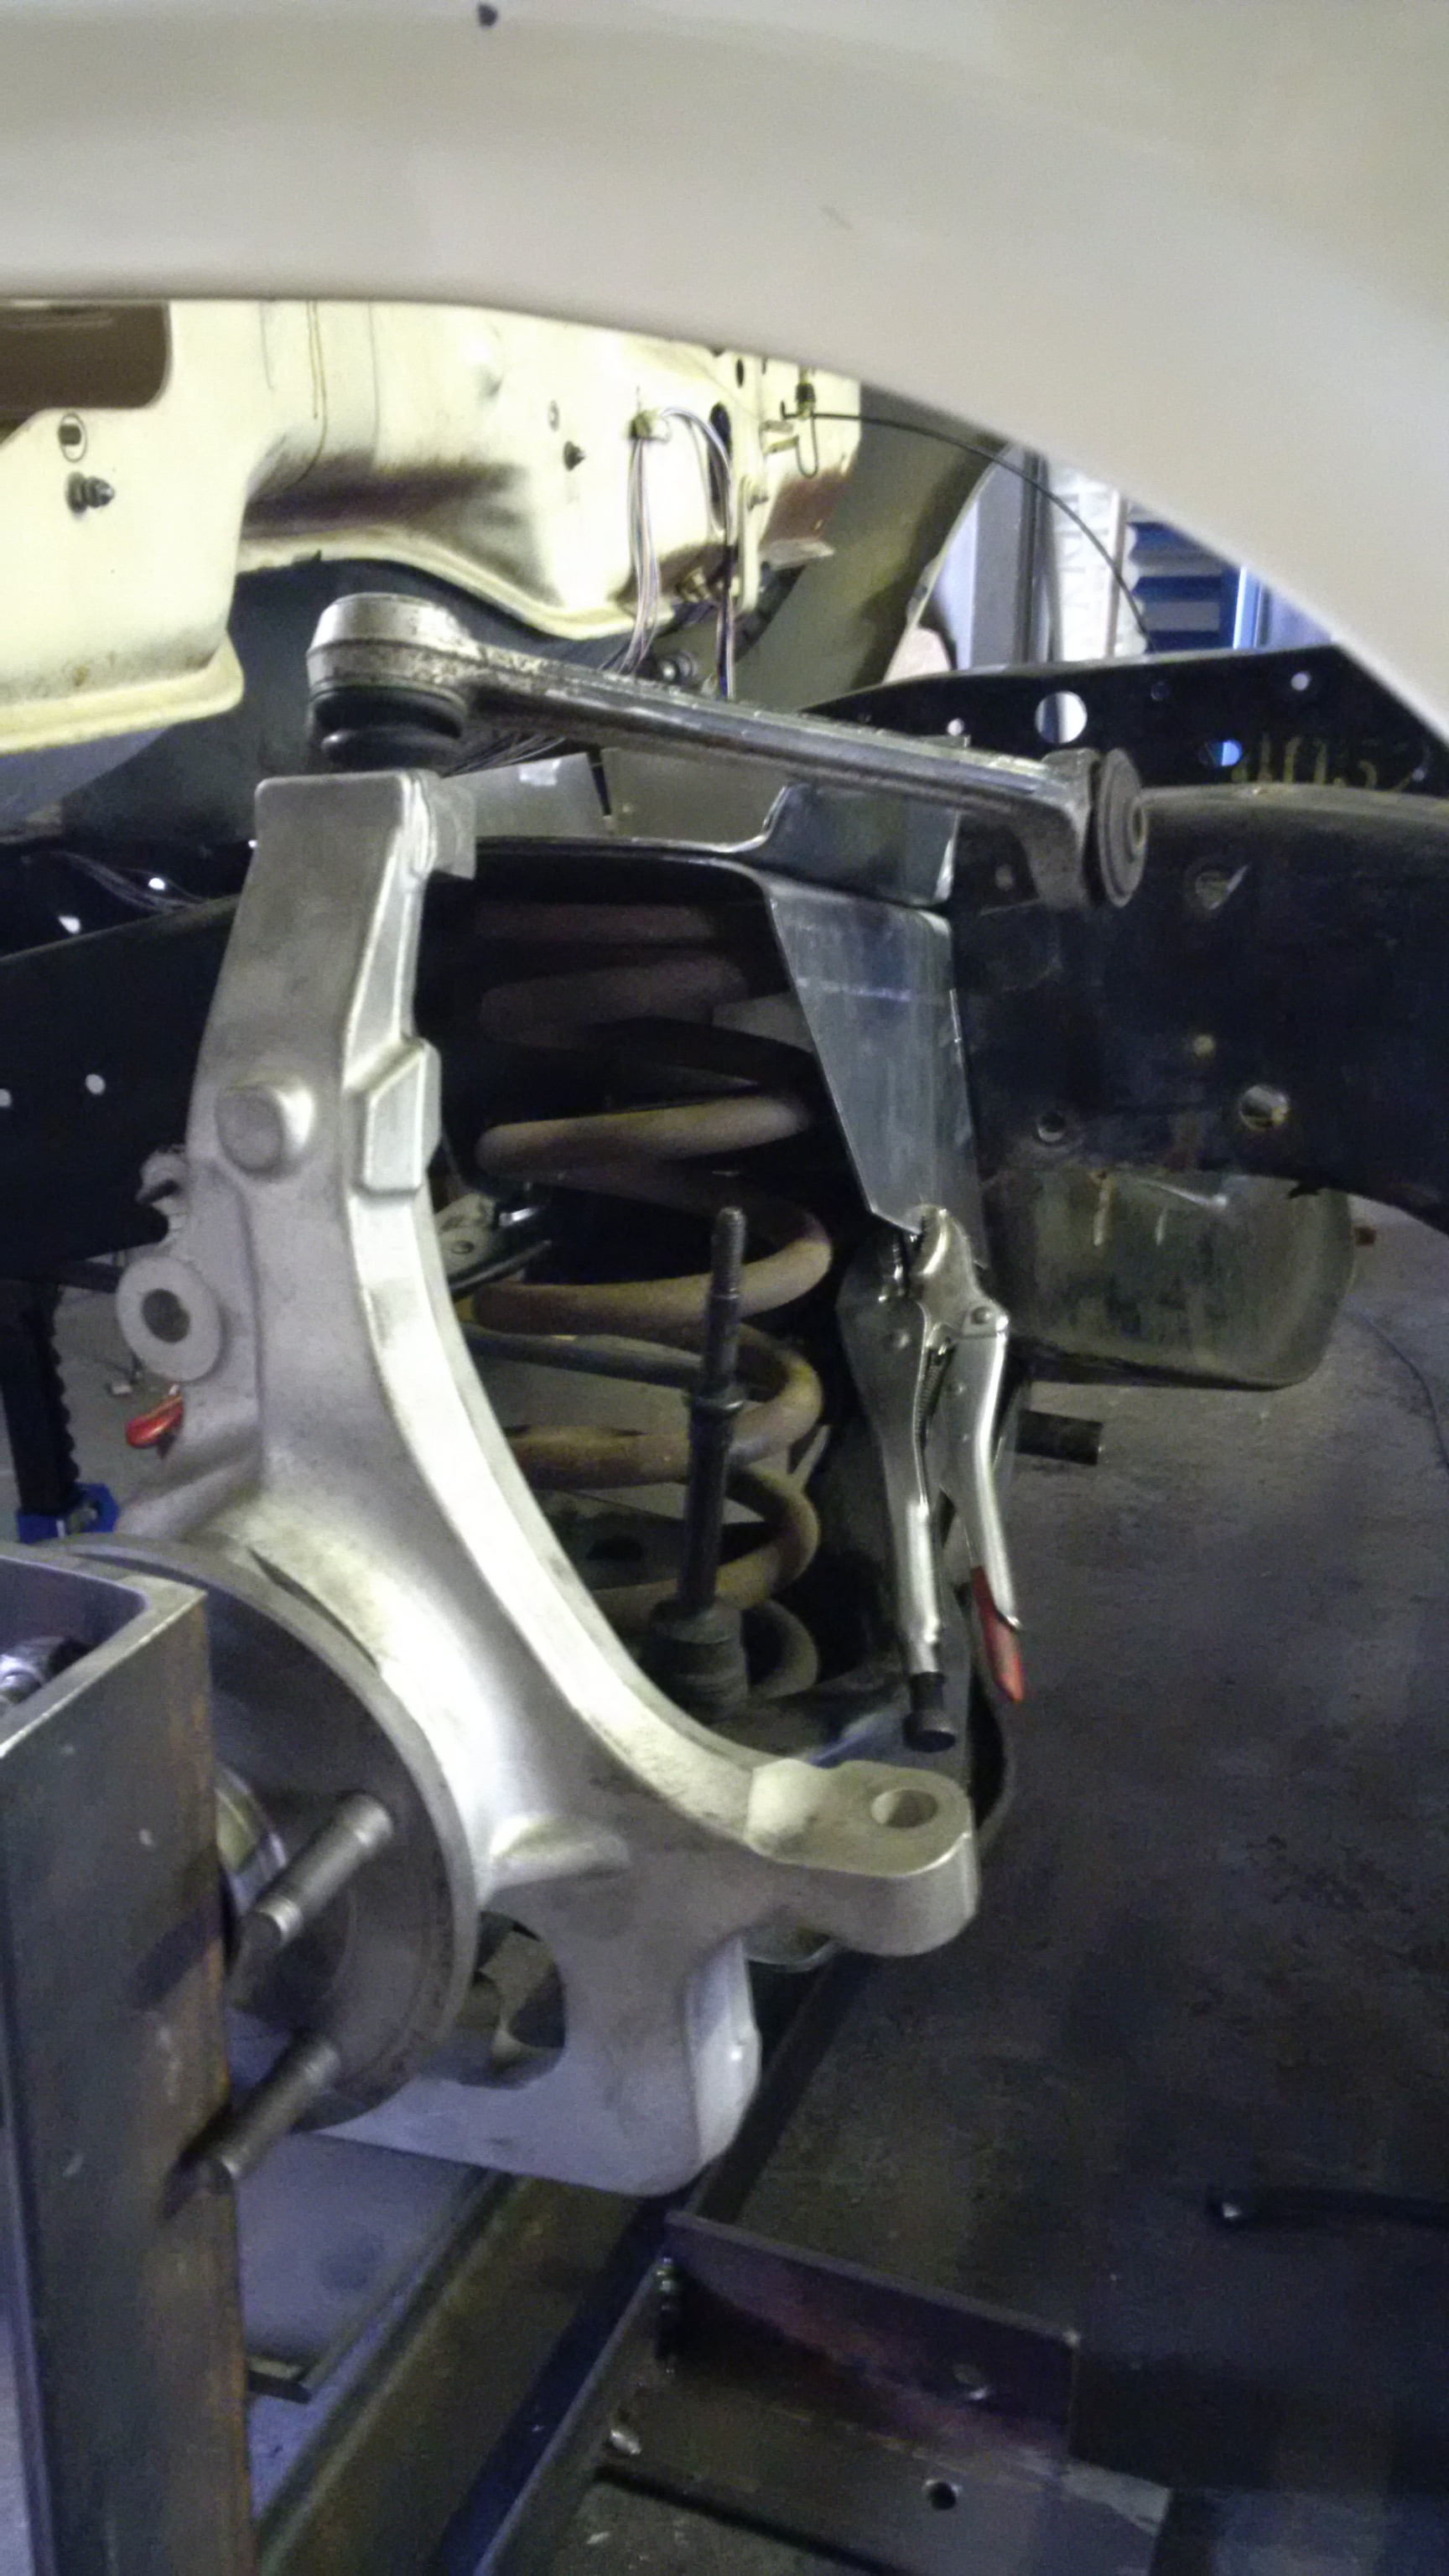
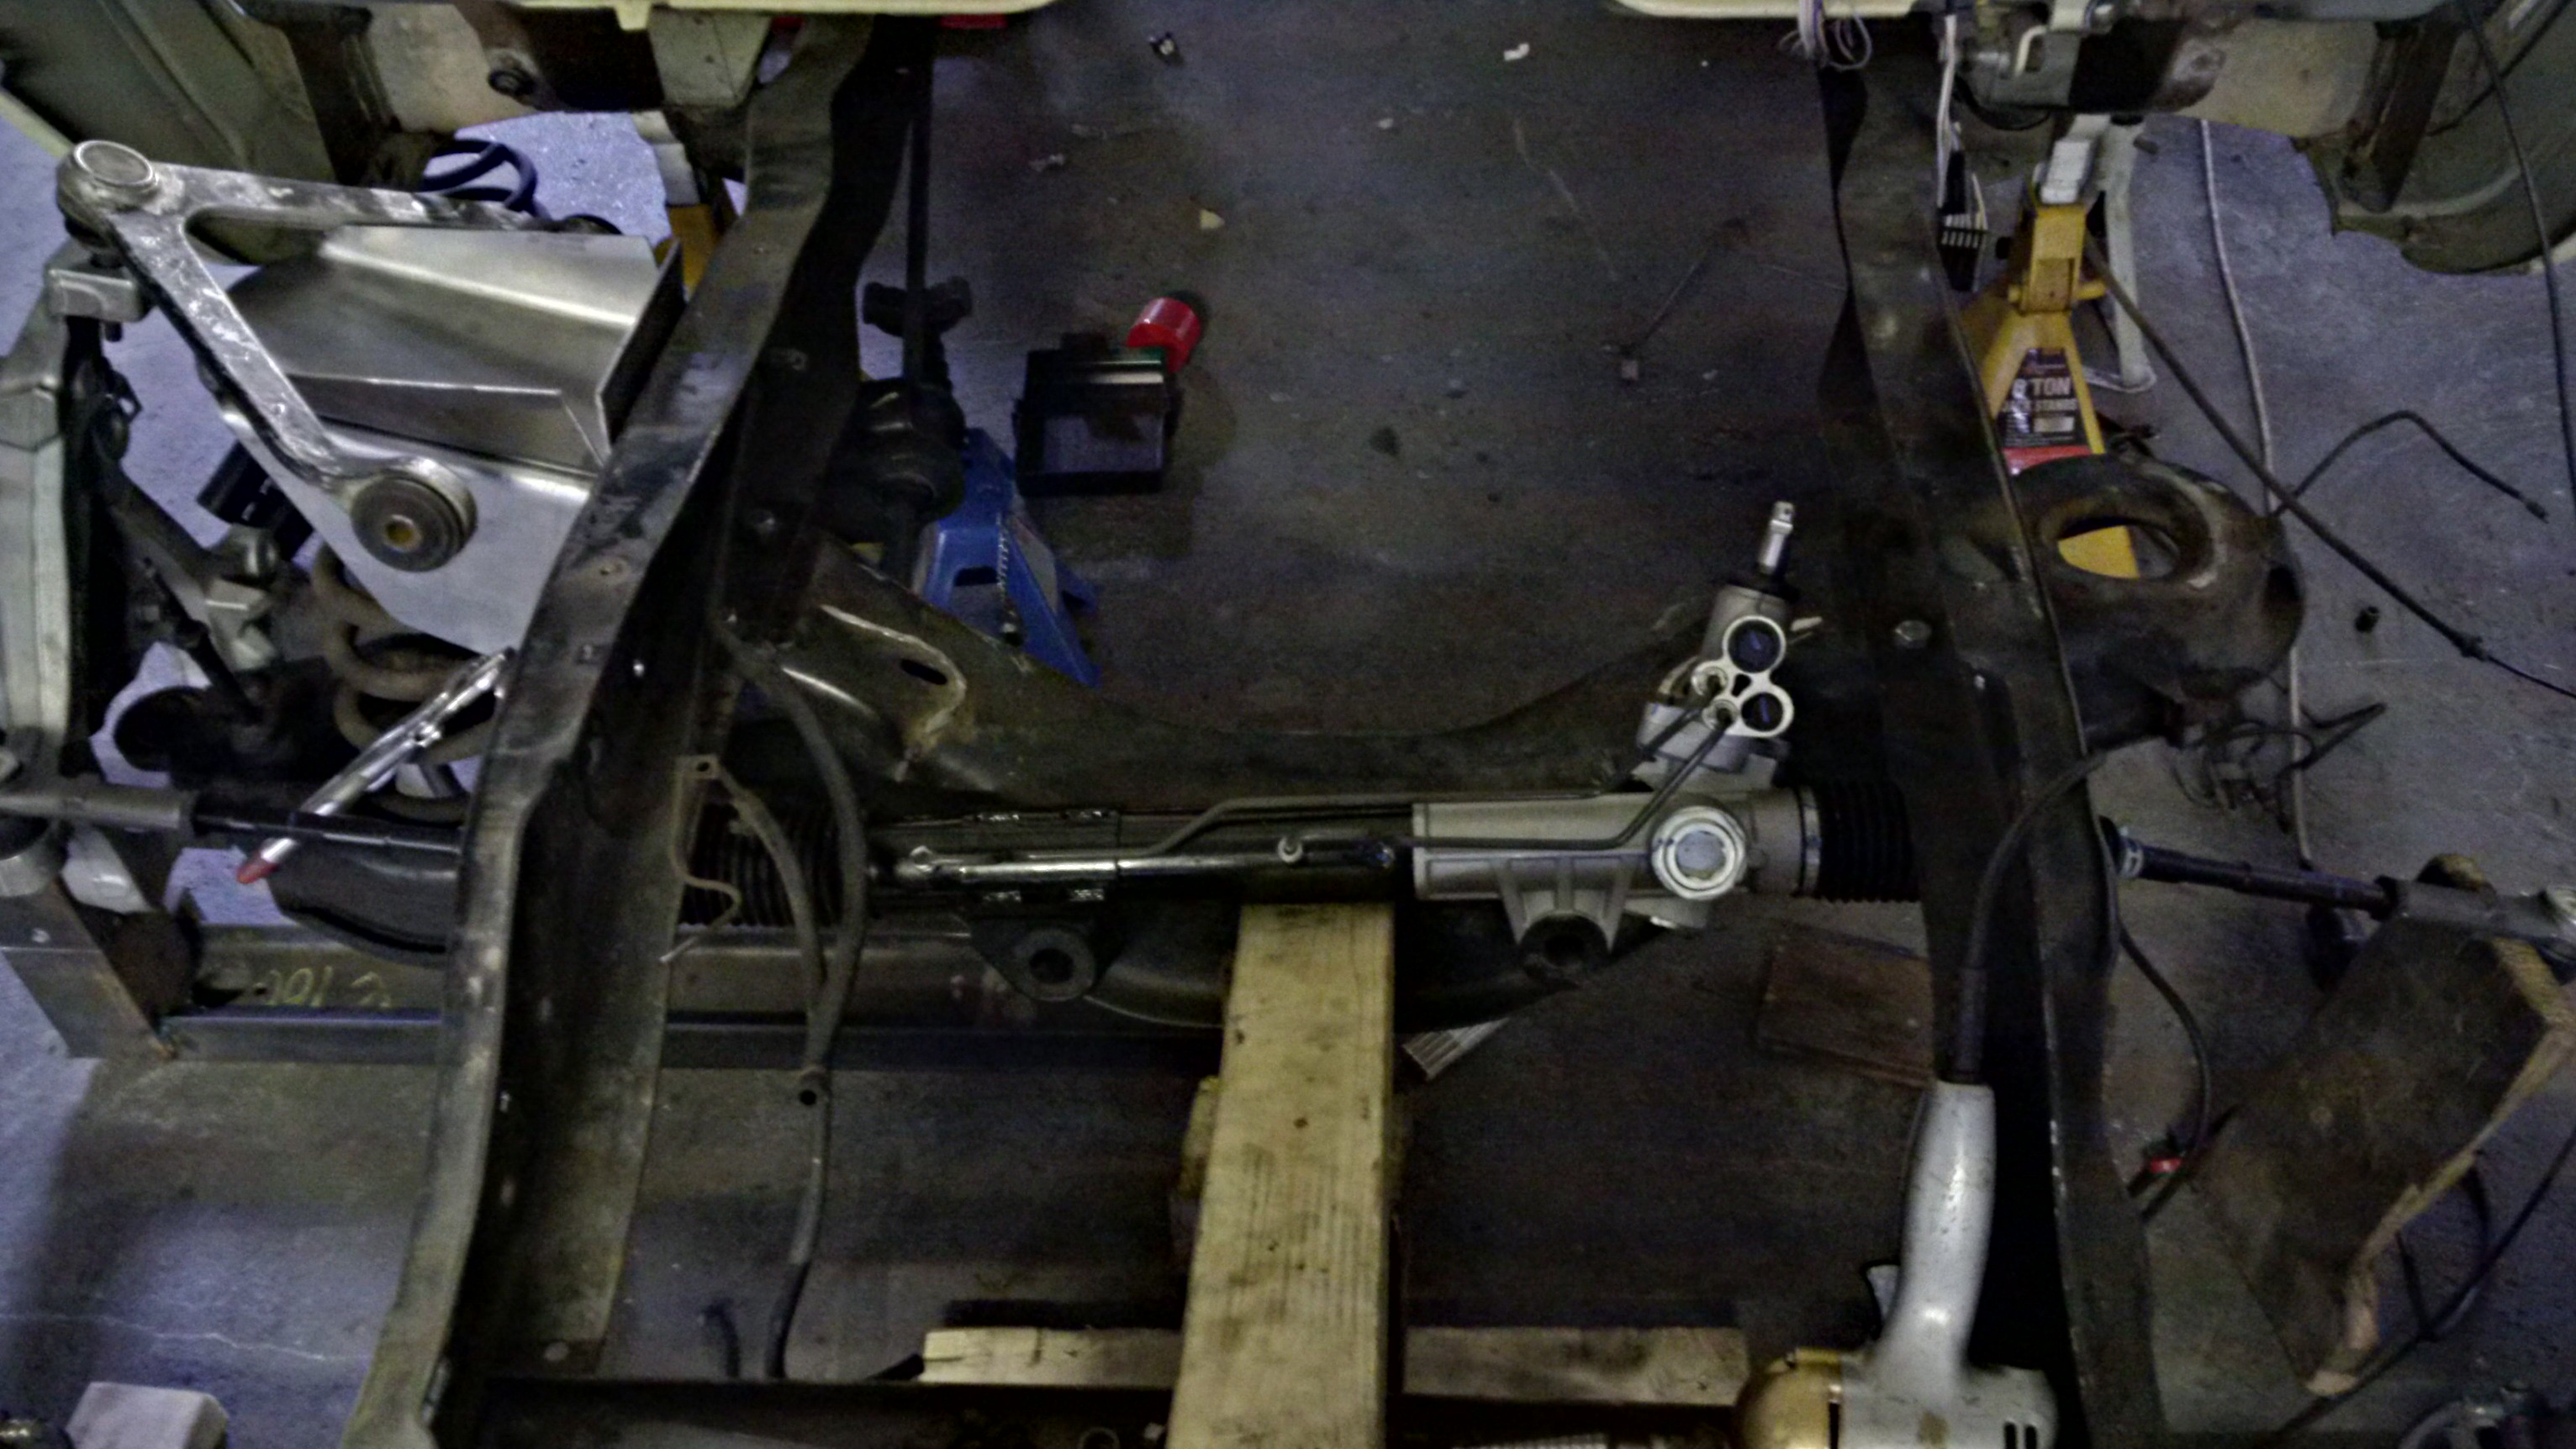
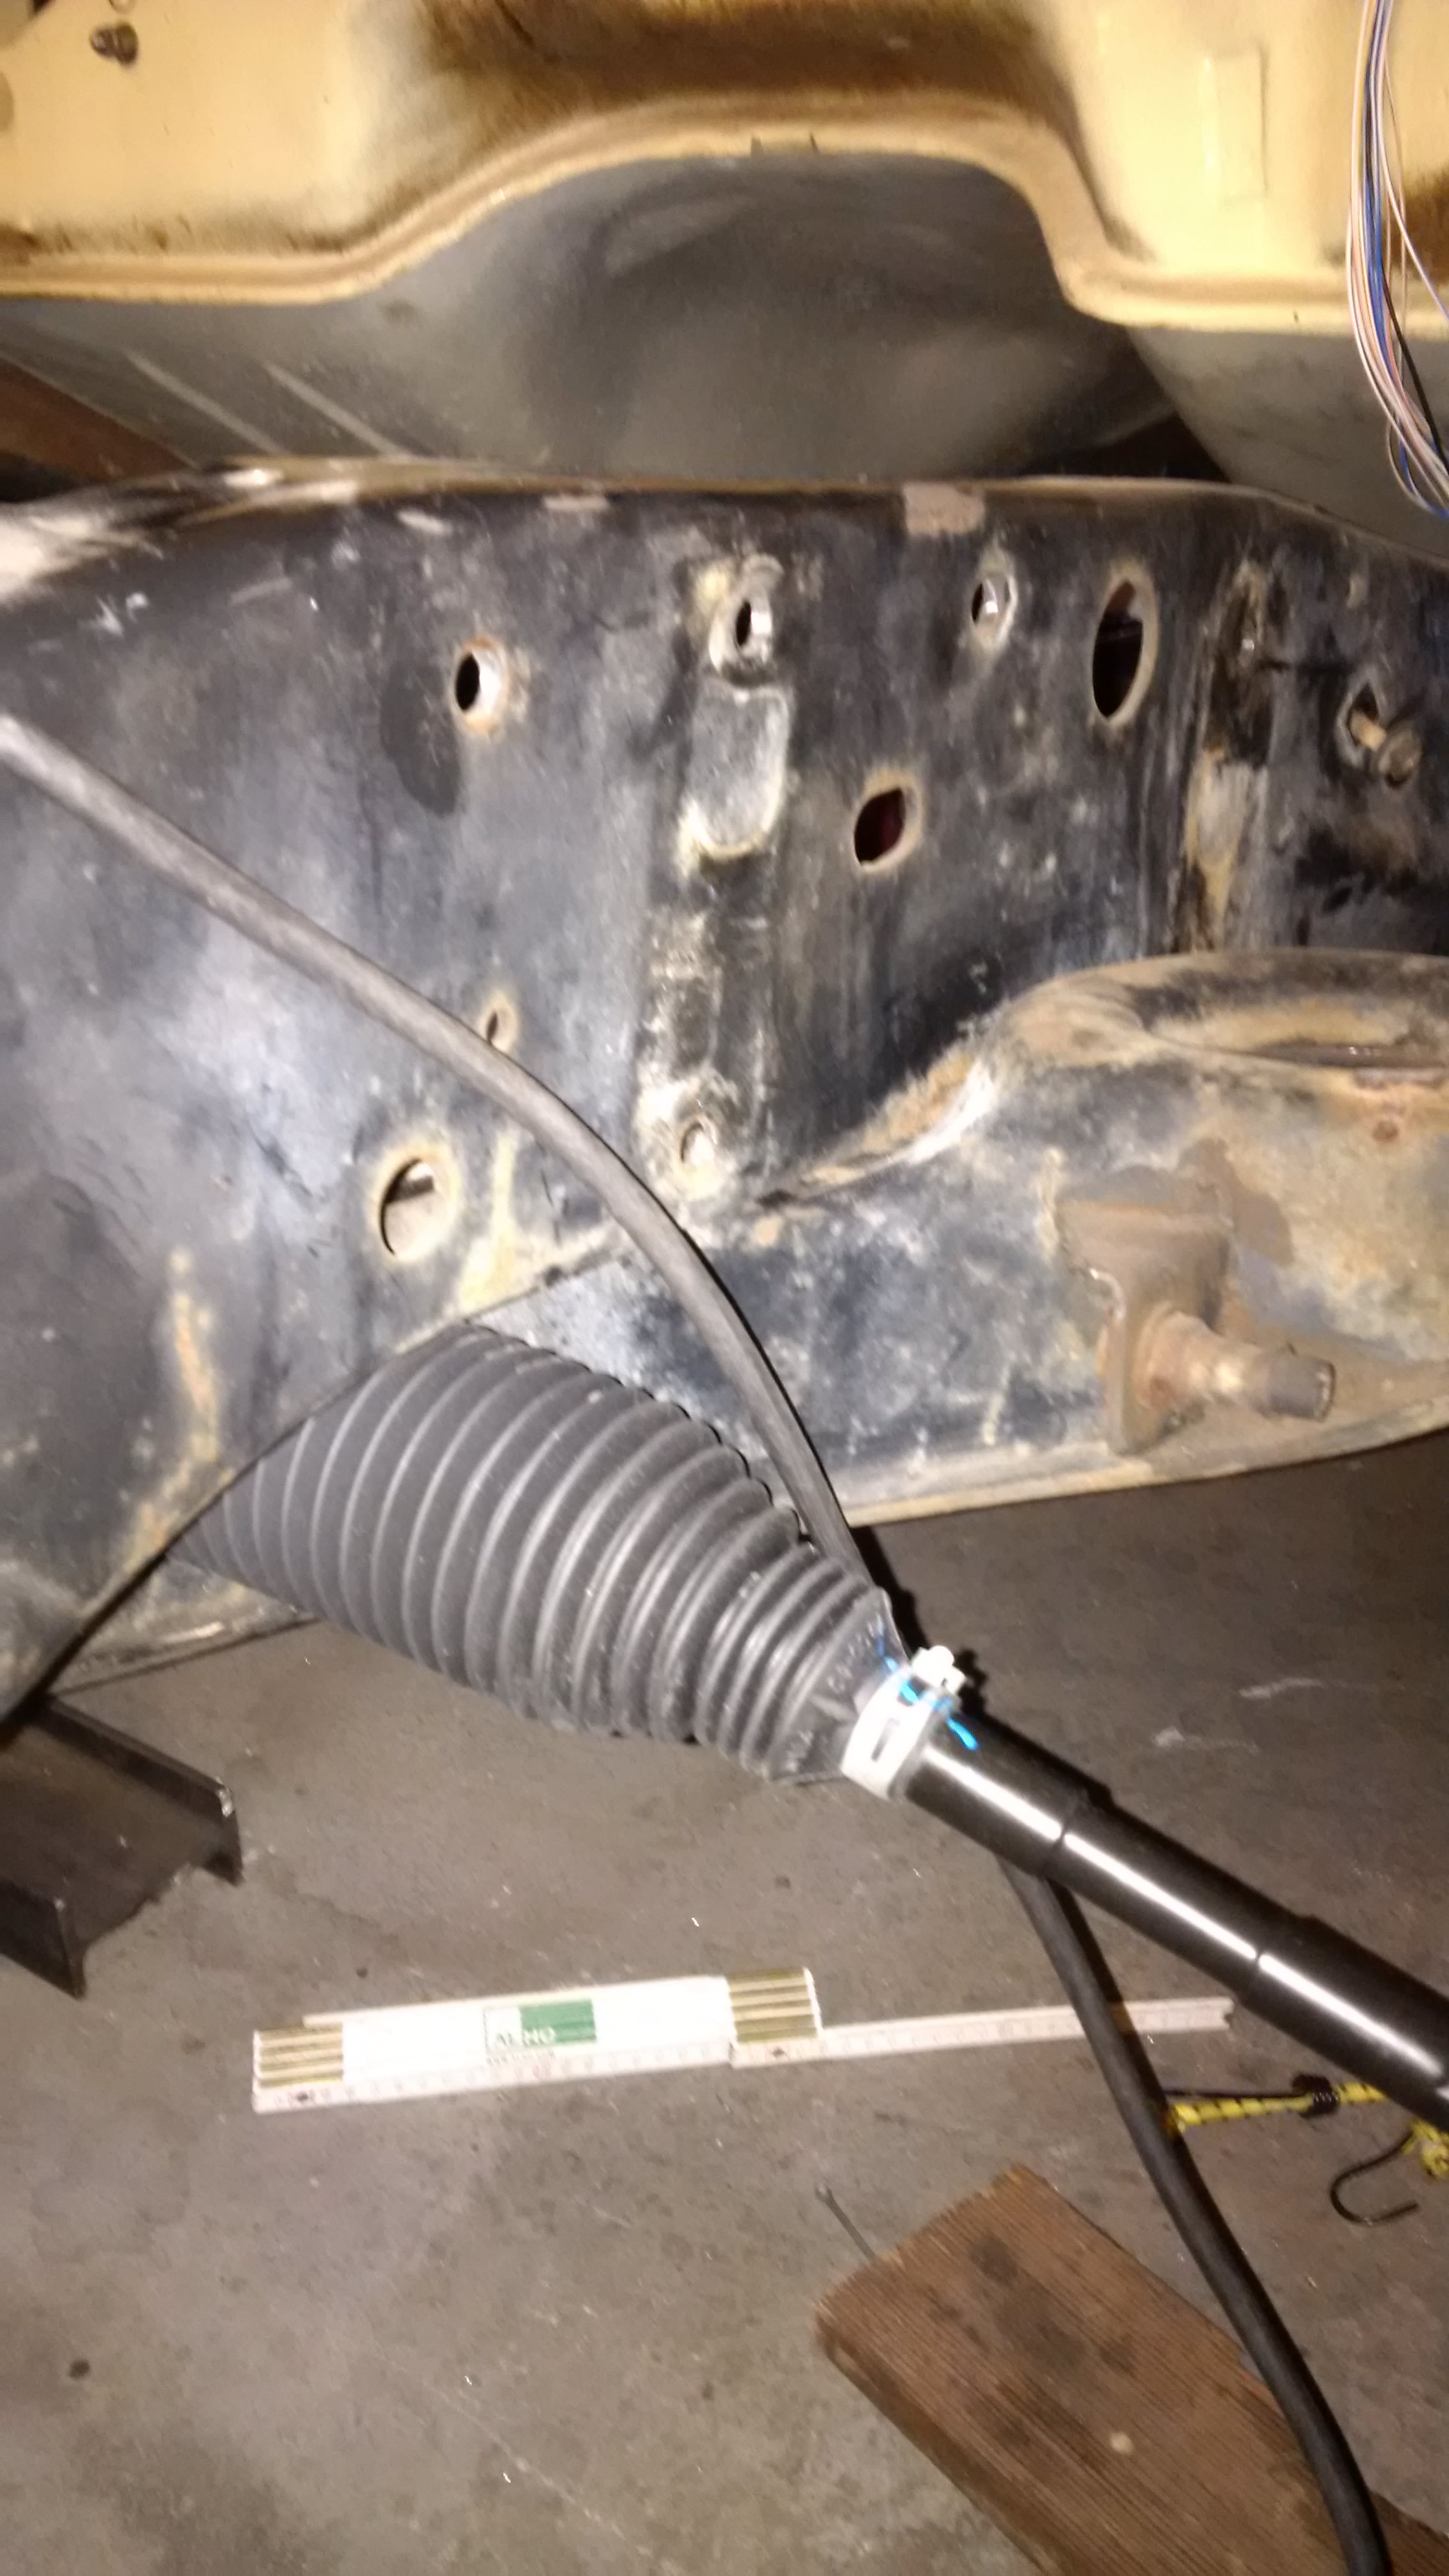
- i found out where to mount the steering rack and proceeded with creating a jig and fiddling with the steering shaft.
This all fits like it was made for it.
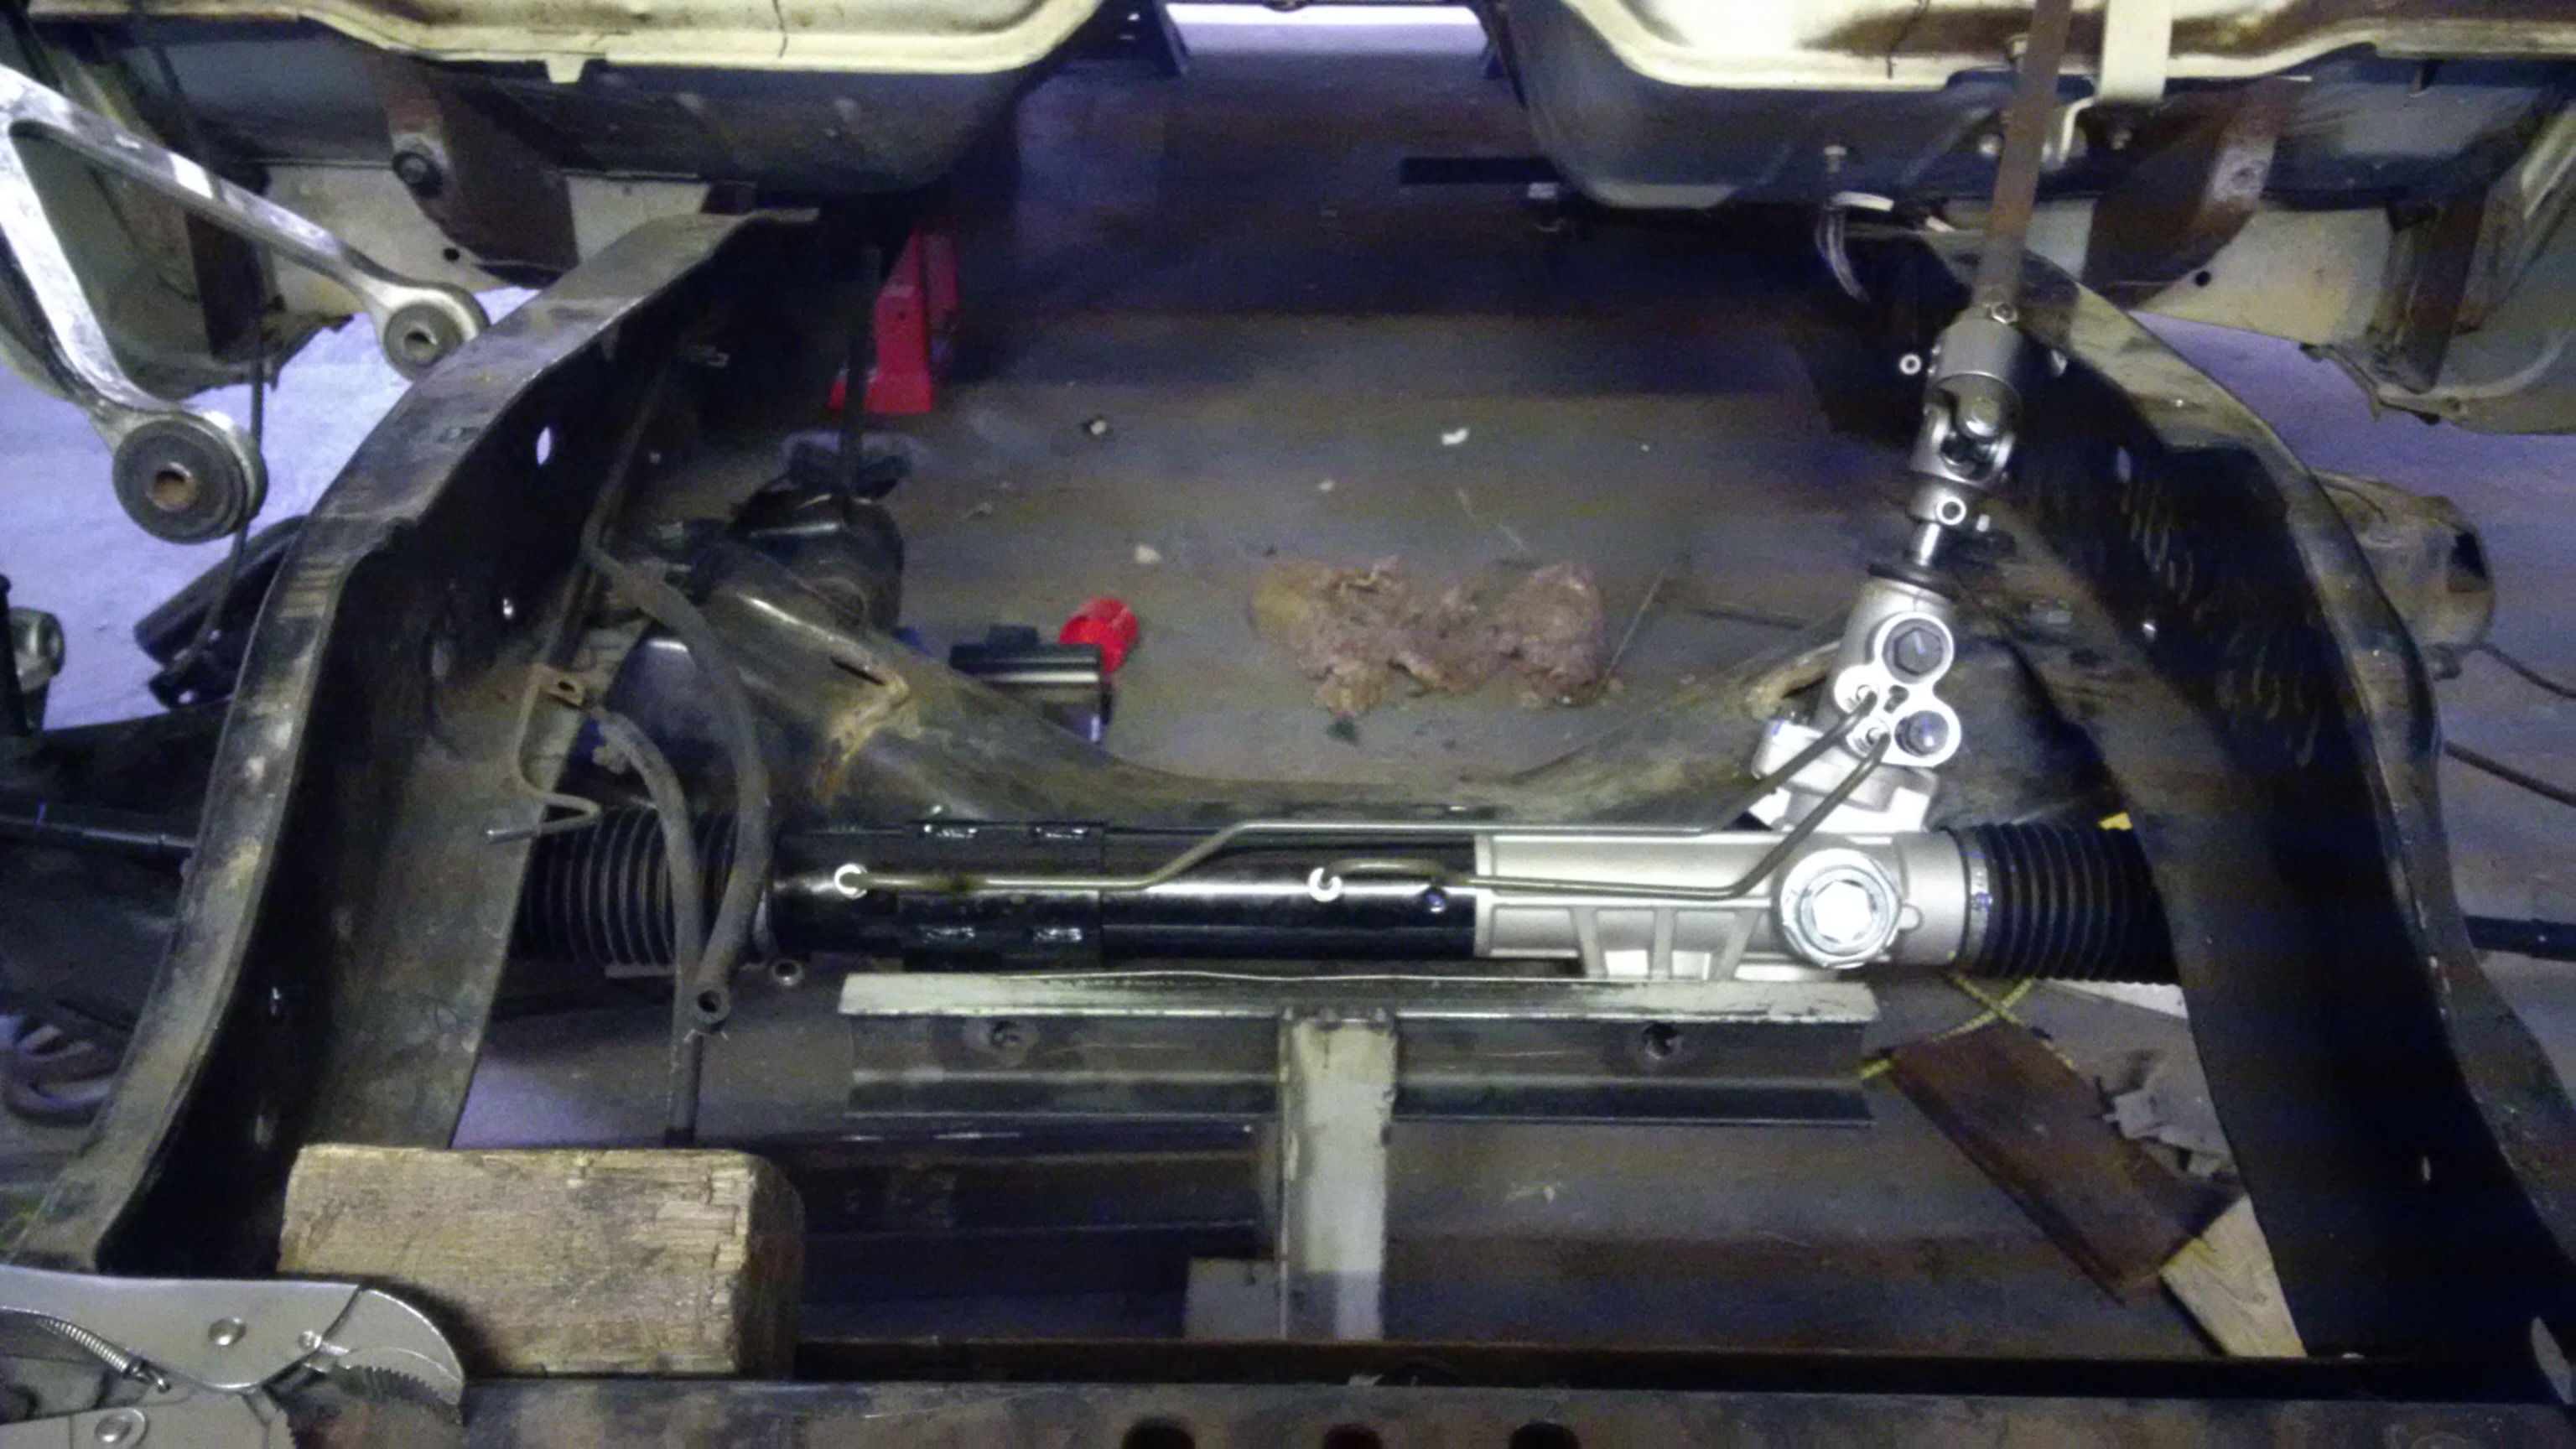
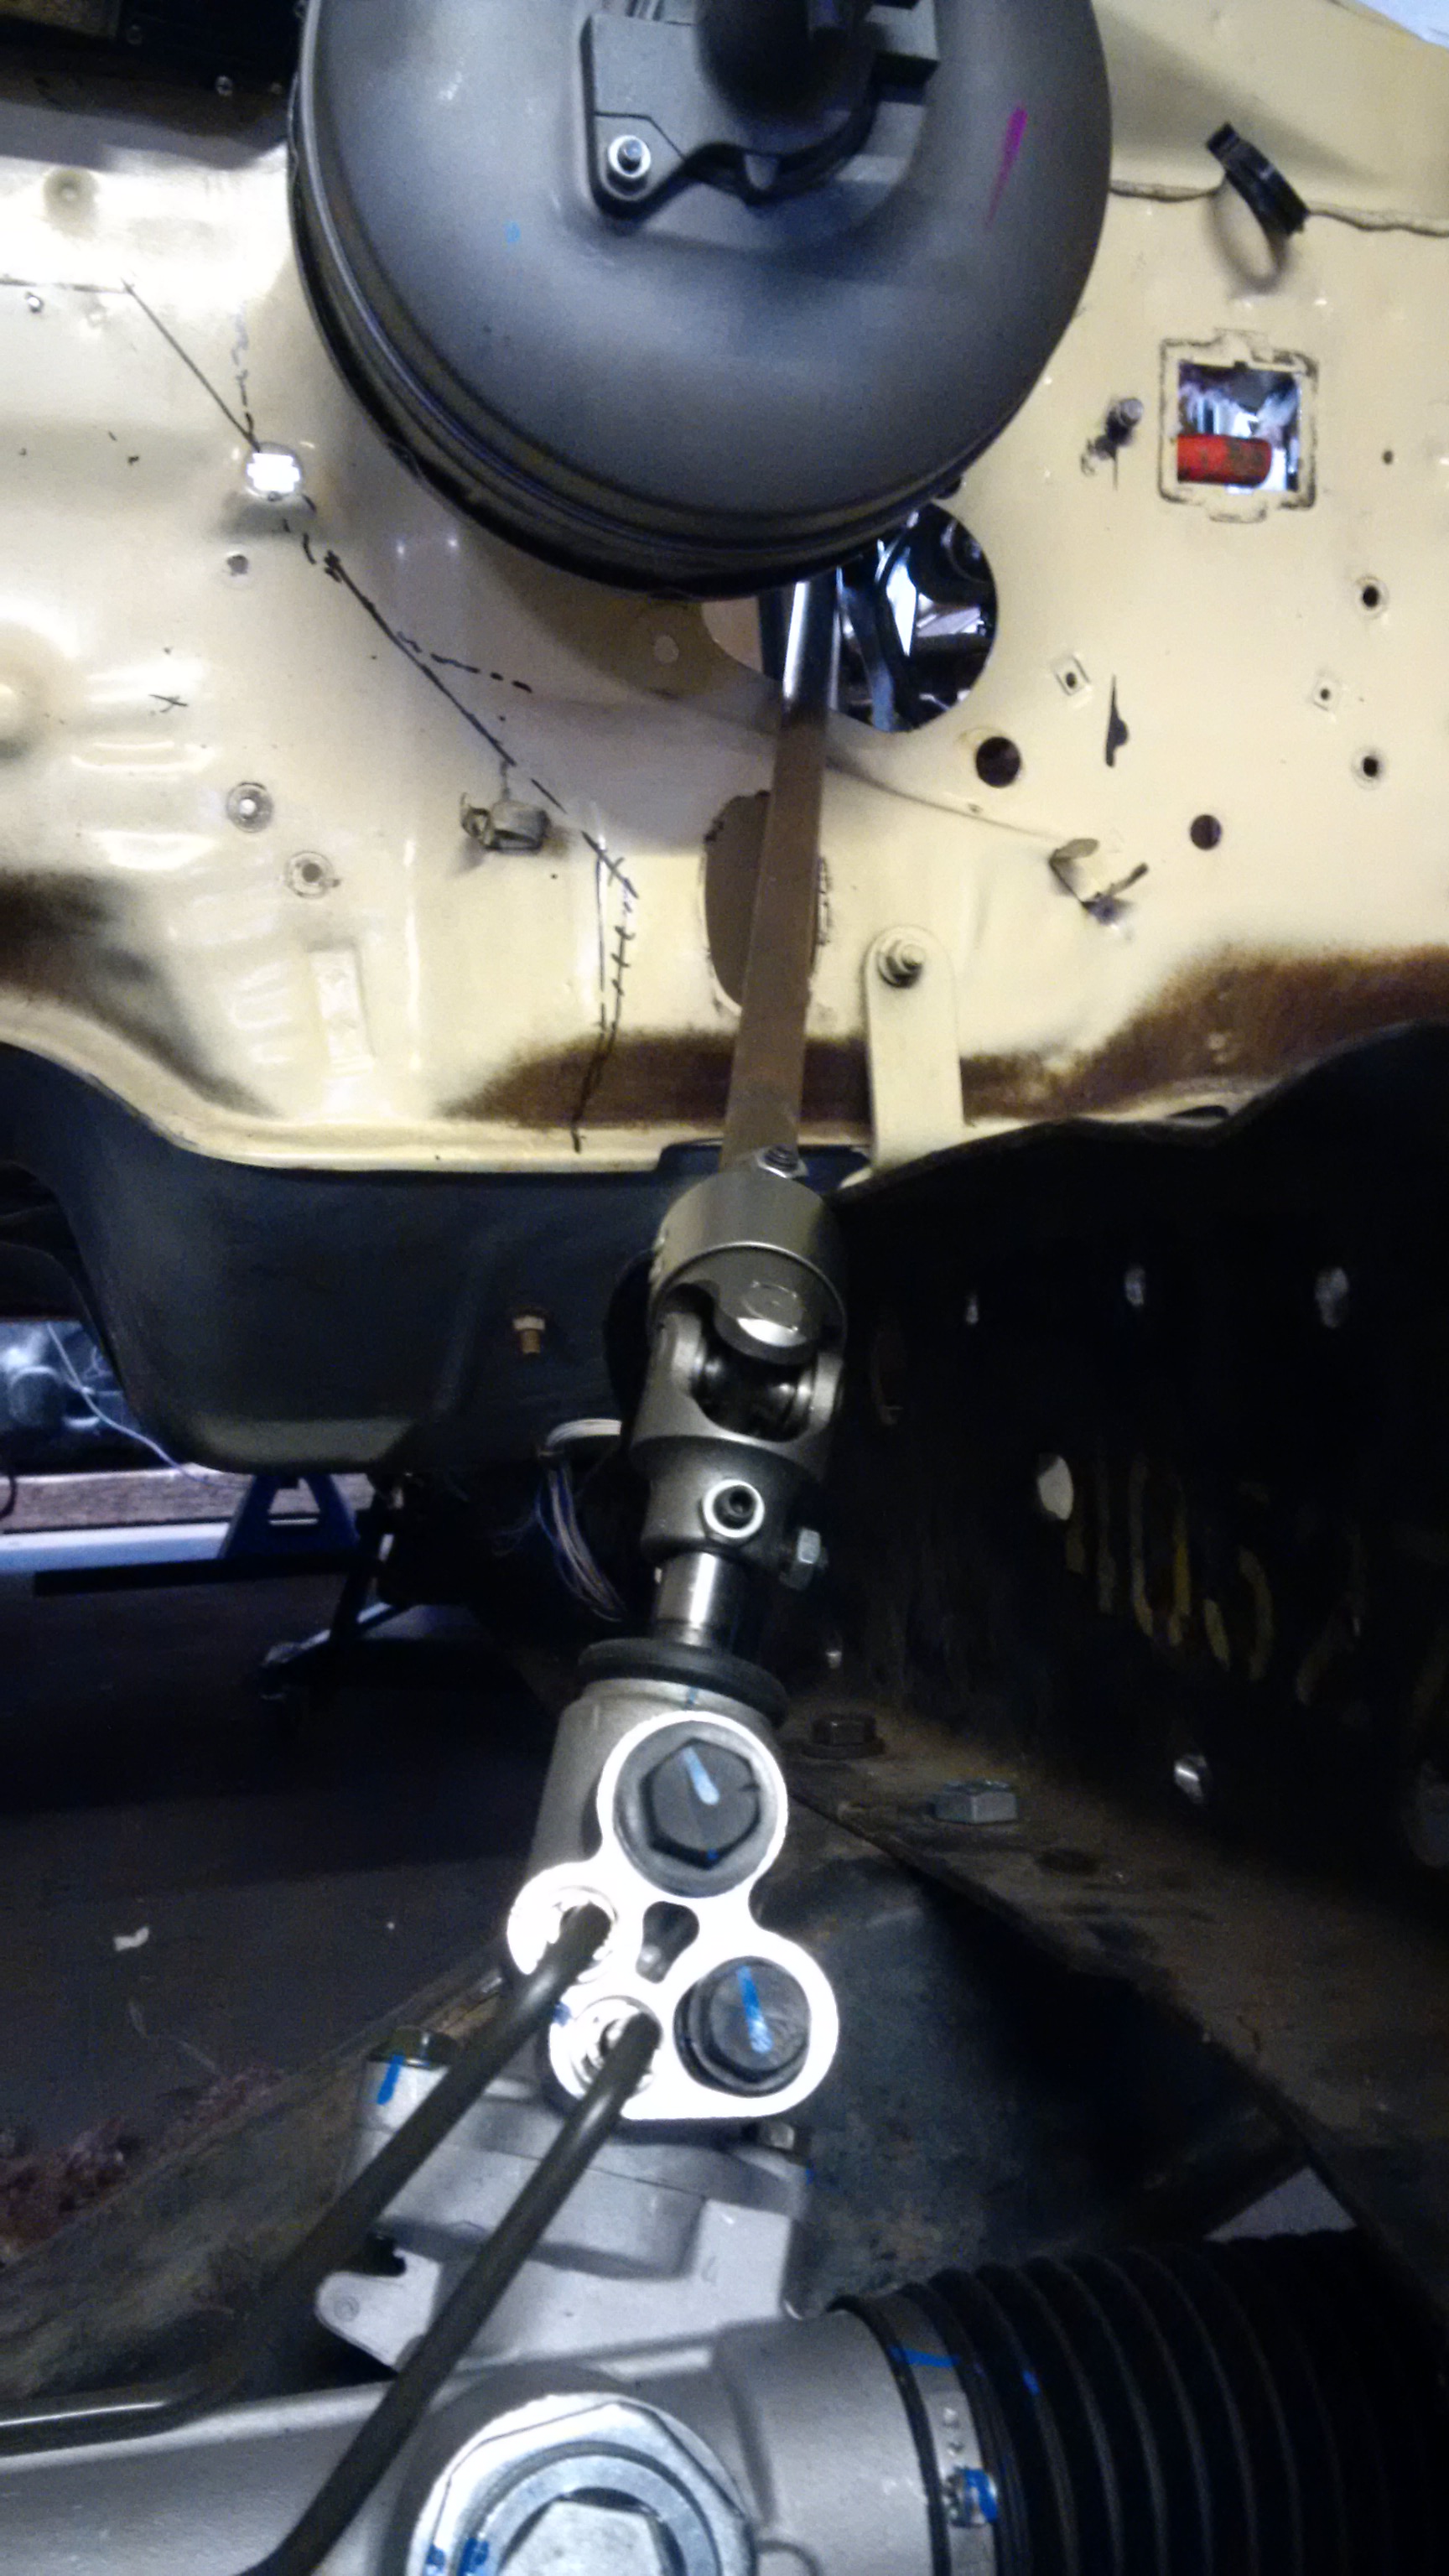
That is at ride height:

And there's plenty of clearance for the boots and tie rod links:
That's where things are right now.
I did not proceed any further from here.
I had to build up funds for this truck and it was kind of complicated to find a business that would make the coil buckets for me.
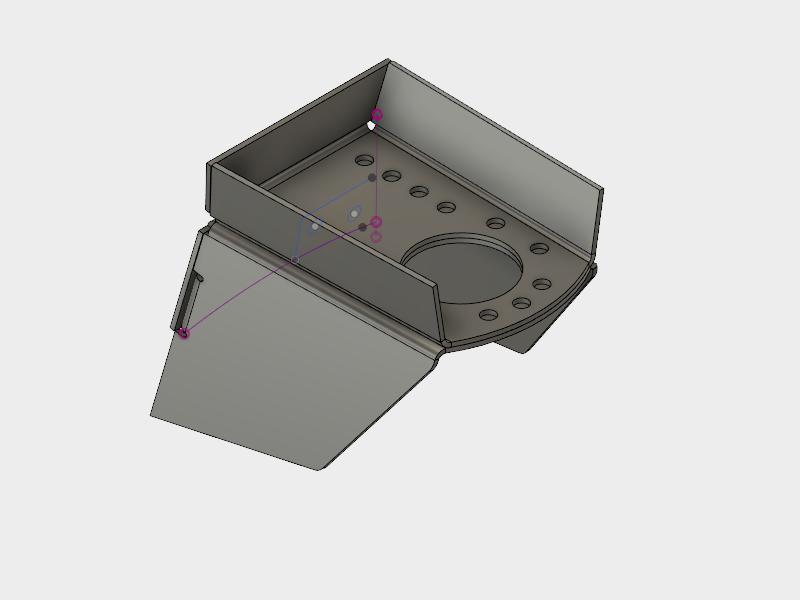
Turns out nobody wants to bend these but i found someone that will cut the plates for me.
This is what stuff will look like, when done.
Right now, what i really need, is a complete set of OEM 22x10 wheels, like the real deal.
I am looking to spend like 2 - 3 grand for a good, straight set ... but that seems like hunting hens teeth at the moment.
So, if someone would part with a good set, i'm all ears and can arrange shipping.
Alex
sorry i did not reply to this thread for quite a while.
There has been quite some progress but not as much as i would like.
After i got the Challengers wiring harness modified far enough to get to the vehicles lighting system, i began to question if that's the route i want to go.
Why?
Because in 2015 Dodge switched to a halogen projector light and LED taillights.
Looks cool, but is hard to retrofit or modify to accept regular incandescent bulbs.
In the end after a lot of thinking, buying Challenger head- and taillights to dissect them (yes, i bought lights to make them kaputt to get to the internal circuit boards to understand how stuff works and how i could integrate them) i decided to go a different route.
It ended in buying this stuff:
What you are seeing here is Mopars standalone wiring harness for the 2015+ crate Hemis and a Racepak IQ3 street dash.
The vehicle will retain a refurbished stock wiring harness.
Easier to maintain and fix if it breaks down.
So now i have a big box of Challenger electrical guts to sell and nobody wants them... yet.
After that, i really went to town with cutting and gutting the front of the truck.
THAT needs to be shoehorned in THERE:
And it's reeeeaaally tight when you want that engine to sit low between the frame rails.
Like inaccessibly tight:
No, i'm not grinding on the frame to make that fit.
I'm moving the engine around.
Here's interference:
Here's interference gone:
Now that engine "drops right in" (i am still laughing, 10 minutes after writing that).
I can now even install the OEM headers without removing the engine.
They drop right inside the frame rail:
Although this looks really tight, i can easily fit my hand between the headers and the frame rail everywhere.
Here's an inside shot of that mess:
Other things have happened as well:
- i "designed" (Cardboard Aided Design) the coil bucket, spring perch whatever you want to call it and made a prototype.
- i found out where to mount the steering rack and proceeded with creating a jig and fiddling with the steering shaft.
This all fits like it was made for it.
That is at ride height:
And there's plenty of clearance for the boots and tie rod links:
That's where things are right now.
I did not proceed any further from here.
I had to build up funds for this truck and it was kind of complicated to find a business that would make the coil buckets for me.
Turns out nobody wants to bend these but i found someone that will cut the plates for me.
This is what stuff will look like, when done.
Right now, what i really need, is a complete set of OEM 22x10 wheels, like the real deal.
I am looking to spend like 2 - 3 grand for a good, straight set ... but that seems like hunting hens teeth at the moment.
So, if someone would part with a good set, i'm all ears and can arrange shipping.
Alex