Engine Removal - Any Pointers?

Carlwalski

New Member
Supporting Member
Joined
Aug 29, 2007
Messages
2,686
Reaction score
1
Location
New Zealand
Hi Lads,


I'm going to be removing The Batrams engine over the Christmas/New Years period. I've personally never removed an engine before but have several friends with lifts and engine stands etc. What is the easiest way? Trans off? Trans on? up and over or down and under the truck? My truck has the 4L80E which is smaller than the T56. Just want to do it safely. Before someone asks, I'm not doing any internal work, just a good freshen up, stream clean, mask and then it will be painted Satin black, it's the starting point of The Batrams engine bay tidy up/customization. Any safety tips, pointers, do's and don'ts are much appreciated.


Thanks,
Carl
 
Wow Carl...

Just my opinion...but if you are going to pull the engine...what a great time to go ahead and forge the bottom end...drop the pan, order some forged rods and forged pistons from Stinker, hone the cylinders...and maybe some Gen IV main bearings...

But just my opinion...

Someone will jump in with guide lines...dropping the trans is pretty simple and would seem to make the removal much less difficult.

I love your approach to doing the appearance things right!
 
Thanks guys for the input. :)


Roy - It would be a good time, I agree 100% IF I had planned to do said work but it's something that I'm not keen on doing. As mentioned numerous times, I like where I'm at now and am not into opening up a whole new can of worms on a 6,000mile engine that's in perfect running order. A RC auto is a whole new ball park. I'll squeeze any possible hp from bolt-ons but for me, reliability is the most important factor. 80-100hp over stock is fine for me. If this changes over time, I'll cross that bridge when and if I get there as we all know in this hobby, one can never say, never. Anyhow, before going off topic, this is just about removing the engine. I know some of you FI guys have removed yours more than once, sometimes more than twice lol yikes!!!


Cheers. ;)
 
a few main things that i've learned from pulling my Engine was...

1. Mask the fenders with painters tap.. try to protect to paint as much as possiable.. if you can remove the front bumper makes it WAY easier
2. removed the top cross bar with the hood latch on it makes it alot easier to get out
3. the fuel rails are sopose to have a special tool to remove the line from the rails.... i used a tiny flat head screw driver
4. Lable everything! the oil coolers line where they go what they connect to
5.take your time moving everything out of the way before you pull the motor out. it will make it 100x's easier to pull it in the end
5. i say leave the tranny in the truck i was able to stab my tranny back in the motor with the tranny bolt loose and a little bit of work...


6. if your going to pull it might as well put stronger stuff in the bottom end.. it's a shit ton of work for just paint... IMO but to each his own... good luck... i've pulled my motor twice it's not hard it's stright forward if you've pulled one before......

but for 1st timers i would say take pictures of everything you take apart or disconnect


Edit- also your going to have to undo the Wiring harness that is up under the truck.. it's on top of the bell housing i believe or mine was
 
Unbolt the trans and leave it in the truck. The block is very long and not easily managed as it is. Remove the radiator, a/c condenser, and other assorted things from the front end. Much easier to get it out without trying to clear all of those things and miss everything on the firewall. There are a couple of grounds on the rear of the engine that are easier to get to once you pull the engine forward some, easier still to get to from underneath truck, just be careful not to put too much strain on them. Other than that it's pretty straight forward, just make sure that you get everything disconnected off the engine before trying to get it out, if you feel something holding you back look again.

LABEL, LABEL, LABEL otherwise you will be cussing yourself for days. I used masking tape and a sharpie, don't be shy about it. Digital pics of anything you think that you won't remember don't hurt either.
 

Attachments

  • no motor.jpg
    no motor.jpg
    83.4 KB · Views: 540
i guess im lucky that im going to paint after i get the new motor back in. like they said take your time and pay attention to what you take off.
 
It's super straight forward Carl. Like the Ram From Hell said, just pull everything out of the way first (to include front fender liners) and leave the tranny in. I pulled one with the tranny and one without and the latter is the way to go. As for all the electrical connections and hoses go, when you put the engine back in, you'll see everything basically lines up with where it belongs so it isn't difficult at all. There are a bunch of electrical connections that go along the tranny and back to the fuel pump so make sure you get them all unplugged before you pull it out.
 
as a reference for ya, instructions as per the dealer


REMOVAL


1. Perform fuel pressure release procedure (Refer to 14 - Fuel System/Fuel Delivery - Standard Procedure) .
2. Disconnect negative battery cable.
3. Disconnect throttle body air inlet duct, remove air cleaner cover (Refer to 09 - Engine/Air Intake System/AIR CLEANER - Removal) .
4. Raise and support the vehicle.
5. Remove the lower engine shield.
6. Drain cooling system (Refer to 07 - Cooling - Standard Procedure) .
7. Paint mark and remove the driveshaft (Refer to 03 - Differential and Driveline/Propeller Shaft/SHAFT, Drive - Removal) .
8. Remove the transmission (Refer to 21 - Transmission and Transfer Case/Manual - Removal) .
- as the rest say, it's easier to leave it in.
9. Remove the starter (Refer to 08 - Electrical/Starting/STARTER - Removal) .
10. Disconnect the front exhaust pipe flange to exhaust manifold fasteners (1 and 2).
11. Disconnect the hydraulic cooling fan lines and capture any spillage (Refer to 07 - Cooling/Engine/FAN, Cooling - Removal) .
12. Drain engine oil and remove the oil filter.
13. Separate the air conditioning hose from the fan shroud.
14. Disconnect the lower radiator hose.
15. Disconnect the power steering line support bracket at the lower left of the radiator.
16. Loosen both engine mount through bolts.


17. Separate the ground strap (1) from the floor board, above the right exhaust flange .
18. Lower the vehicle.
19. Discharge air conditioning system (Refer to 24 - Heating and Air Conditioning/Plumbing/REFRIGERANT - Standard Procedure) .
20. Remove the upper radiator hose.
21. Disconnect windshield washer hose at the splice.
22. Remove radiator core support.
23. Disconnect the cooling fan harness connector (Refer to 07 - Cooling/Engine/FAN, Cooling - Removal) .
24. Remove the radiator and radiator fan assembly (Refer to 07 - Cooling/Engine/RADIATOR, Engine Cooling - Removal) .
25. Remove the A/C condenser, cap and position the hoses aside.
26. Disconnect the heater hoses at the top front cover and at the lower coolant housing and position aside.


27. Disconnect the oil cooler hoses from the engine and position aside (Refer to 09 - Engine/Lubrication/COOLER and LINES, Oil - Standard Procedure) .
28. Remove accessory drive belt (1) .
29. Disconnect and remove generator .
30. Remove power steering pump mounting bolts and set pump aside.


31. Disconnect A/C lines and electrical connector from A/C compressor. Plug holes in A/C compressor to prevent debris from entering A/C compressor.
32. Disconnect brake booster vacuum hose and fuel line to fuel rail.


33. Disconnect the cruise control, accelerator cable and fuel vapor purge harness (2) , then set aside.
34. Disconnect the engine harness connectors on top of the intake manifold.
35. Disconnect the spark plug wires from the spark plugs and set the plug wires on top of the engine.
36. Disconnect the ground strap at the thermostat housing and pull the electrical harness underneath the intake manifold and set aside.


37. Install Special Tool 9363 - Engine Lifting Brackets (1) and to the exhaust manifold heat shield studs where indicated.


38. Insert engine lifting bar (1) through the access holes in the engine lifting brackets (2) and secure with the bar retaining pins (3).


39. Remove engine with an engine hoist (1).
 
terrible01 said:
as a reference for ya, instructions as per the dealer


REMOVAL


1. Perform fuel pressure release procedure (Refer to 14 - Fuel System/Fuel Delivery - Standard Procedure) .
2. Disconnect negative battery cable.
3. Disconnect throttle body air inlet duct, remove air cleaner cover (Refer to 09 - Engine/Air Intake System/AIR CLEANER - Removal) .
4. Raise and support the vehicle.
5. Remove the lower engine shield.
6. Drain cooling system (Refer to 07 - Cooling - Standard Procedure) .
7. Paint mark and remove the driveshaft (Refer to 03 - Differential and Driveline/Propeller Shaft/SHAFT, Drive - Removal) .
8. Remove the transmission (Refer to 21 - Transmission and Transfer Case/Manual - Removal) .
- as the rest say, it's easier to leave it in.
9. Remove the starter (Refer to 08 - Electrical/Starting/STARTER - Removal) .
10. Disconnect the front exhaust pipe flange to exhaust manifold fasteners (1 and 2).
11. Disconnect the hydraulic cooling fan lines and capture any spillage (Refer to 07 - Cooling/Engine/FAN, Cooling - Removal) .
12. Drain engine oil and remove the oil filter.
13. Separate the air conditioning hose from the fan shroud.
14. Disconnect the lower radiator hose.
15. Disconnect the power steering line support bracket at the lower left of the radiator.
16. Loosen both engine mount through bolts.


17. Separate the ground strap (1) from the floor board, above the right exhaust flange .
18. Lower the vehicle.
19. Discharge air conditioning system (Refer to 24 - Heating and Air Conditioning/Plumbing/REFRIGERANT - Standard Procedure) .
20. Remove the upper radiator hose.
21. Disconnect windshield washer hose at the splice.
22. Remove radiator core support.
23. Disconnect the cooling fan harness connector (Refer to 07 - Cooling/Engine/FAN, Cooling - Removal) .
24. Remove the radiator and radiator fan assembly (Refer to 07 - Cooling/Engine/RADIATOR, Engine Cooling - Removal) .
25. Remove the A/C condenser, cap and position the hoses aside.
26. Disconnect the heater hoses at the top front cover and at the lower coolant housing and position aside.


27. Disconnect the oil cooler hoses from the engine and position aside (Refer to 09 - Engine/Lubrication/COOLER and LINES, Oil - Standard Procedure) .
28. Remove accessory drive belt (1) .
29. Disconnect and remove generator .
30. Remove power steering pump mounting bolts and set pump aside.


31. Disconnect A/C lines and electrical connector from A/C compressor. Plug holes in A/C compressor to prevent debris from entering A/C compressor.
32. Disconnect brake booster vacuum hose and fuel line to fuel rail.


33. Disconnect the cruise control, accelerator cable and fuel vapor purge harness (2) , then set aside.
34. Disconnect the engine harness connectors on top of the intake manifold.
35. Disconnect the spark plug wires from the spark plugs and set the plug wires on top of the engine.
36. Disconnect the ground strap at the thermostat housing and pull the electrical harness underneath the intake manifold and set aside.


37. Install Special Tool 9363 - Engine Lifting Brackets (1) and to the exhaust manifold heat shield studs where indicated.


38. Insert engine lifting bar (1) through the access holes in the engine lifting brackets (2) and secure with the bar retaining pins (3).


39. Remove engine with an engine hoist (1).


That sounds about right, but no need to remove the alternator, or plug wires. You may get away with pulling the engine & trans together if its really smaller than the T56. I pull the transmission first on a stocker. Like Wade said, its real easy to scratch/scuff the paint be careful. Also since your doing this for cosmetic purposes only, I would consider removing the upper wire loom before you pull the engine as this is a contact spot. Its kinda hard to pull these engines without making contact, especially yours being an 06 they are harder to get out than the 04-05 because the cross-member is different, and the oil pan is also, quite different. If I had a mint condition show truck like yours, I would never-EVER pull the engine just for clean-up purposes. I would rather crawl under it with a q-tip while having an enema than pull the engine all the way out. Keep in mind this for sure: Anytime you pull an engine you get greasy/oliy hands, and this transfers to everything you touch. Trust me its impossible to stay 100% clean while R&R'ing an engine. You WILL dirty up the engine bay in other areas just by the R&R. Then again, if your very patient, you have extra time on your hands, you have the ability to be very careful, and you really want a spectacular clean-up/paint job, then go for it. Its really not that hard, I am just tired of pulling engines.
 
robwclark said:
That sounds about right, but no need to remove the alternator, or plug wires. You may get away with pulling the engine & trans together if its really smaller than the T56. I pull the transmission first on a stocker. Like Wade said, its real easy to scratch/scuff the paint be careful. Also since your doing this for cosmetic purposes only, I would consider removing the upper wire loom before you pull the engine as this is a contact spot. Its kinda hard to pull these engines without making contact, especially yours being an 06 they are harder to get out than the 04-05 because the cross-member is different, and the oil pan is also, quite different. If I had a mint condition show truck like yours, I would never-EVER pull the engine just for clean-up purposes. I would rather crawl under it with a q-tip while having an enema than pull the engine all the way out. Keep in mind this for sure: Anytime you pull an engine you get greasy/oliy hands, and this transfers to everything you touch. Trust me its impossible to stay 100% clean while R&R'ing an engine. You WILL dirty up the engine bay in other areas just by the R&R. Then again, if your very patient, you have extra time on your hands, you have the ability to be very careful, and you really want a spectacular clean-up/paint job, then go for it. Its really not that hard, I am just tired of pulling engines.


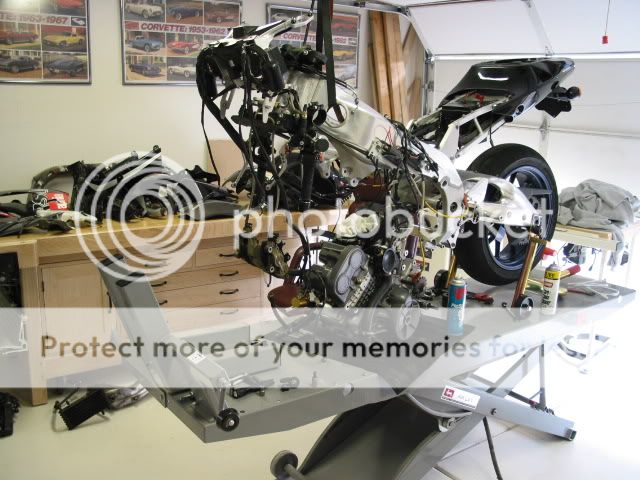
Couldn't have said it any better. I pull a lot of motorcycle engines and no way I'd pull one for simple paint and clean up. Maybe on my 2st bikes but otherwise never. This one took 2 hrs to get out and about 4hrs to get back in.

Picture004.jpg
 
Whoa! EXCELLENT info guys, much appreciated indeed. :)


I'm wondering if this is perhaps a little overkill. What do you guys think? I just don't like, and already know I'll be pissed off with my nice gloss black intake and valve covers then seeing the dull, dirty cast iron looking block where ever you stand looking into the engine bay. :( I wonder if I spend a lot of time just masking it, jacking the front up high, removing the headers, valve covers, intake and a few other items if I can paint it in place? Even taking my time masking it very well (OCD style) and doing it properly will still only take 1/4 the time of pulling and re-installing the engine, if that. What say ye?
 
Carlwalski said:
Whoa! EXCELLENT info guys, much appreciated indeed. :)


I'm wondering if this is perhaps a little overkill. What do you guys think? I just don't like, and already know I'll be pissed off with my nice gloss black intake and valve covers then seeing the dull, dirty cast iron looking block where ever you stand looking into the engine bay. :( I wonder if I spend a lot of time just masking it, jacking the front up high, removing the headers, valve covers, intake and a few other items if I can paint it in place? Even taking my time masking it very well (OCD style) and doing it properly will still only take 1/4 the time of pulling and re-installing the engine, if that. What say ye?

Absolutely Carl. take and remove everything you can and clean, detail & mask it off. I can almost guarantee you will not be pleased if you end up pulling the whole mill.
 
Thanks guys, this is why I started the thread so I can make this call, thanks heaps everyone. On paper it all sounds fine but I can see a few headaches and issues. If I were building the engine, sure but for a 4-6 hour (overall) paint job it seems VERY overkill and unnecessary to get the same results. I will paint the engine in place and remove all the odds, ends and anything else within a mile of the paint range. Looks like it'll be a fun weekend of masking!!! :D :D :D
 

Latest posts

Support Us

Become A Supporting Member Today!

Click Here For Details

Back
Top