Is this build retaining the stock pistons?


You are using an out of date browser. It may not display this or other websites correctly.
You should upgrade or use an alternative browser.
You should upgrade or use an alternative browser.
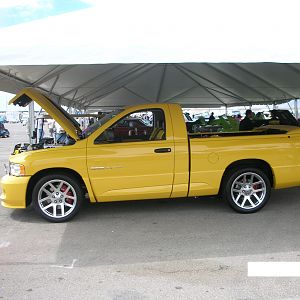
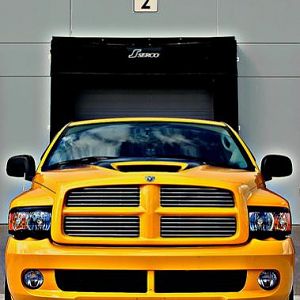
motor upgrades
- Thread starter Ironhead
- Start date
Tooloe said:i cannot wait either this is more than likely the closest guy on this forum with the same set up i'm going with... my cam is a hair diffrent but it's based off the 270..... other than that our set ups are pretty much the same other than my baby will be on the bottle!:rock: :rock: :rock: I WANT TO HEAR THIS MOTHER!
hey bone do you know how much he took off his heads?...... mine have been shaved down twice... and i'm just being nosey lol and want to know how much they took off his heads to lol
No, but I can find out. I saw the slight damage before and knew their would be some milling to correct it. Steve (machine shop) taped it up after it was done, so I didn't see the finished work on that part. I am sure it wasn't a huge amount but enough to change the compression a small amount. They always resurface the heads for minor defects and to fit flush.
Ironhead said:bone those heads came off of kyles old motor")
Copy now.
your so rough on thingskyle's srt10 said:Sorry for the confusion
Dom426
Full Access Member
that is the silliest question that i have heard in a long time:dontknow: :dontknow:Prof said:Is this build retaining the stock pistons?
Wow, just seems to me that with the heads off you might have gone ahead and replaced at least the pistons...rods would probably be fine...good luck and I hope it meets or exceeds your expectations...I am loving this normally aspirated approach that many of you are willing to experiment with...we are all gaining a lot of knowledge in the process.
505'sFastestViper. said:that is the silliest question that i have heard in a long time:dontknow: :dontknow:
Another comment you might want to consider recalling...
Dom426
Full Access Member
i guess so keeping them stock is the silliest thing ive seen in a long timeProf said:Another comment you might want to consider recalling...
i apologize roy
Dom, where are you on your upgrade? And is the Bling effort complete?
how hard is it to drop the oil pan with motor still in truck ,,,i am thinking i might replace pistons but i would not like to pull motor out to do it,,
and if i dont what is wrong with staying with stock pistons if i dont go forced air
and if i dont what is wrong with staying with stock pistons if i dont go forced air
I have heard that pistons can be changed with the heads off...someone much more familiar with the process will have to verify...
If the rods are going to stay stock...and if the pistons can be changed from the top (just a rumor)...leave the rods stock and go for the forged pistons before you replace the heads...
Who out there can tell us for sure?????????
If the rods are going to stay stock...and if the pistons can be changed from the top (just a rumor)...leave the rods stock and go for the forged pistons before you replace the heads...
Who out there can tell us for sure?????????
you cant remove the pan with the engine in the truck, and you cant install a forged piston without doing some type of honing or boring, a forged piston grows at a different rate than an oem, an oem piston uses very close (a thousands) tolerance, a forged piston grows at least two or three thousands, and needs at least 4 thousands clearance. so when the piston grows, without honeing your cylinder will be trashed
I have to beg to differ on this one:marchmellow:
REMOVAL
(1) Disconnect the negative battery cable.
(2) Disconnect engine oil indicator tube fastener
from the right cylinder head cover.
(3) Raise vehicle on hoist.
(4) Remove the lower engine shield.
(5) Drain engine oil.
(6) Remove the front cross member (Refer to 13 -
FRAME & BUMPERS/FRAME/FRONT CROSSMEMBER
- REMOVAL)
(7) Remove flywheel inspection cover.
(8) Loosen engine mount through bolts.
(9) Wiggle and separate the oil level indicator tube
from the oil pan.
NOTE: Careful positioning of the jack stand is necessary
to prevent damage to other components
(10) Raise and support the front of the engine with
a jackstand located on the A/C bracket (Fig. 62).
(11) Remove transmission to oil pan fasteners (Fig.
63).
(12) Remove oil pan bolts and remove oil pan (Fig.
64).
NOTE: Clean and inspect oil pan gasket. The pan
gasket can be used again if in good condition.
INSTALLATION
(1) Clean gasket surfaces. Inspect oil pan gasket.
Replace as necessary.
(2) Apply an 1/8 in. bead of Mopar Engine RTV at
the two joints between the cylinder block to timing
chain case cover and the two joints between the rear
main seal retainer and engine block.
(3) Position oil pan and gasket to engine block,
seat the oil level indicator tube in the oil pan and
hand start all fasteners (Fig. 65).
(4) Run the transmission to oil pan bolts in finger
tight (Fig. 63).
(5) Torque 5/16–18 oil pan bolts to 23 N·m (200 in.
lbs.). Torque 1/4–20 oil pan bolts to 11 N·m (95 in
lbs.).
(6) Torque transmission to oil pan bolts to 23 N·m
(200 in. lbs.) (Fig. 63).
(7) Lower the engine and remove the jack stand.
(8) Tighten engine mount through bolts to 102
N·m (75 ft. lbs.).
(9) Install flywheel inspection cover.
(10) Install frame front cross member (Refer to 13
- FRAME & BUMPERS/FRAME/FRONT CROSSMEMBER
- INSTALLATION).
(11) Lower vehicle.
(12) Install the oil level indicator tube fastener.
(13) Fill the crankcase with the correct oil to
proper level.
(14) Start the engine and inspect for leaks.
Fig. 62 ENGINE SUPPORT
1 - OIL PUMP PICK UP TUBE
2 - JACK STAND
3 - LEFT ENGINE MOUNT
4 - FRONT STABILIZER BAR
5 - RIGHT ENGINE MOUNT
- OIL COOLER HOSE ADAPTOR
Fig. 63 Transmission to Oil Pan Bolts
1 - TRANSMISSION TO TOP OF ENGINE
2 - 7/16 BOLTS AND WASHERS
3 - TRANSMISSION TO OIL PAN
9 - 348 ENGINE - 8.3L DR
Fig.
I have tried it, it is tones easier to jsut remove the engineDevilDawg3097 said:I have to beg to differ on this one:marchmellow:
REMOVAL
(1) Disconnect the negative battery cable.
(2) Disconnect engine oil indicator tube fastener
from the right cylinder head cover.
(3) Raise vehicle on hoist.
(4) Remove the lower engine shield.
(5) Drain engine oil.
(6) Remove the front cross member (Refer to 13 -
FRAME & BUMPERS/FRAME/FRONT CROSSMEMBER
- REMOVAL)
(7) Remove flywheel inspection cover.
(8) Loosen engine mount through bolts.
(9) Wiggle and separate the oil level indicator tube
from the oil pan.
NOTE: Careful positioning of the jack stand is necessary
to prevent damage to other components
(10) Raise and support the front of the engine with
a jackstand located on the A/C bracket (Fig. 62).
(11) Remove transmission to oil pan fasteners (Fig.
63).
(12) Remove oil pan bolts and remove oil pan (Fig.
64).
NOTE: Clean and inspect oil pan gasket. The pan
gasket can be used again if in good condition.
INSTALLATION
(1) Clean gasket surfaces. Inspect oil pan gasket.
Replace as necessary.
(2) Apply an 1/8 in. bead of Mopar Engine RTV at
the two joints between the cylinder block to timing
chain case cover and the two joints between the rear
main seal retainer and engine block.
(3) Position oil pan and gasket to engine block,
seat the oil level indicator tube in the oil pan and
hand start all fasteners (Fig. 65).
(4) Run the transmission to oil pan bolts in finger
tight (Fig. 63).
(5) Torque 5/16–18 oil pan bolts to 23 N·m (200 in.
lbs.). Torque 1/4–20 oil pan bolts to 11 N·m (95 in
lbs.).
(6) Torque transmission to oil pan bolts to 23 N·m
(200 in. lbs.) (Fig. 63).
(7) Lower the engine and remove the jack stand.
(8) Tighten engine mount through bolts to 102
N·m (75 ft. lbs.).
(9) Install flywheel inspection cover.
(10) Install frame front cross member (Refer to 13
- FRAME & BUMPERS/FRAME/FRONT CROSSMEMBER
- INSTALLATION).
(11) Lower vehicle.
(12) Install the oil level indicator tube fastener.
(13) Fill the crankcase with the correct oil to
proper level.
(14) Start the engine and inspect for leaks.
Fig. 62 ENGINE SUPPORT
1 - OIL PUMP PICK UP TUBE
2 - JACK STAND
3 - LEFT ENGINE MOUNT
4 - FRONT STABILIZER BAR
5 - RIGHT ENGINE MOUNT
- OIL COOLER HOSE ADAPTOR
Fig. 63 Transmission to Oil Pan Bolts
1 - TRANSMISSION TO TOP OF ENGINE
2 - 7/16 BOLTS AND WASHERS
3 - TRANSMISSION TO OIL PAN
9 - 348 ENGINE - 8.3L DR
Fig.
try those directions they are tons of fun
Lots have been fine with the stock pistons...a few of us were not so lucky...
Have a ball, that is the only rule.
Have a ball, that is the only rule.
Support Us
Become A Supporting Member Today!