Front springs JTSVP vs Belltech

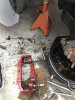
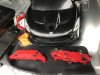
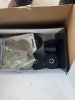
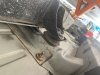
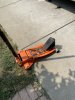
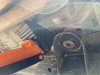
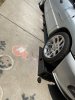
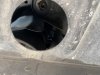
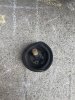
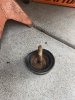
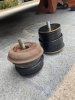
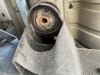
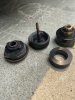
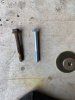
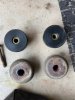
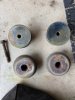
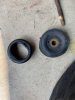
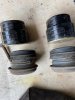
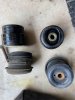
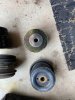
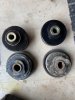
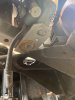
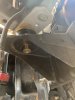
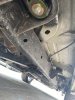
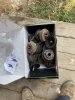
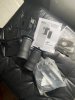
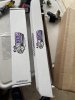
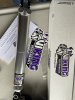
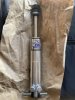
I was finally able to get an alignment yesterday, when my front driver side caliper starts smoking. Luckily I was like 5 mins front my house. Pistons are seizing, time for a rebuild. I took them apart and was able to un seize the driver side but one piston on the passenger side wouldn’t move. So just decided do take them out and start the rebuild on the calipers. I was able to take them apart and degrease them today. Tomorrow I’ll get some really fine sand paper and remove the rust from the piston bores. While I’m at it, I’m going to repaint the calipers, install new pistons/seals/dust boots and do new pads/rotors. I bought my truck from Chicago 6 years ago and haven’t replaced the brakes. Then again, I’ve only driven my truck only 15,000 miles in those 6 years. I finally was ready to start driving my truck then this happens, never fails. I’ll upload some more pictures tomorrow.
 

Attachments

  • CC777357-74AB-49AB-BC35-5FD2A9F4A608.jpeg
    CC777357-74AB-49AB-BC35-5FD2A9F4A608.jpeg
    434.3 KB · Views: 24
  • 6F8044A3-A8A9-4FFF-B797-EA8703AE7269.jpeg
    6F8044A3-A8A9-4FFF-B797-EA8703AE7269.jpeg
    379.4 KB · Views: 24
My suspension upgrades have come to another halt. First it was my alignment and now.... Below is the thread that halted my suspension upgrades. Right when I had the money for my rear helper bags, now this happens.

Caliper piston seized
 
Update. Finally I was able to drive my truck after my caliper rebuild on the front. I have to say it rides like a dream now. I put about 250 miles yesterday, had to move somethings to our new house. Truck did bottom out a few times, I had a dresser, a desk and some other things in the bed(bed was full). But it wasn’t bad at all. I just need my helper bags on the rear and that should finish my suspension mods. Helper bags really help when you have weight out back, I run helper bags in my Durango with no rear bump stops. So over all I’m happy with my suspension mods and I’ll keep you guys updated when I put in the rear helper bags. Below is a picture of my durango with a 2.5/3 drop and my Srt10 with stock height.
 

Attachments

  • 16D2DD22-15EB-47C1-85C9-80C90D18B821.jpeg
    16D2DD22-15EB-47C1-85C9-80C90D18B821.jpeg
    356 KB · Views: 28
Last edited:
So after a couple of months of gathering all my parts I installed them all and all I can say is it rides way better than before. Here’s is the list of parts I replaced,

Front and rear sway bars
Front and rear Endlinks/bushings
Front and rear sway bar bushings
Inner and outer tie rods
Front wheel/hub bearings
Lower ball joints
Upper control arms
Front springs
Camber plates
Isolator spring bushings
Front and rear bumpstops
Front and rear shocks
Rear flip kit(saddle welded)
Leaf spring bushings

Please let me know if your interested in part numbers, break down on cost and total cost of the parts. Thanks.


I would love the part Number's I'm looking to do the same and up in the air about lowering it.
 
I would love the part Number's I'm looking to do the same and up in the air about lowering it.

Here you go.

2005 Dodge Ram SRT10 Quad Cab Suspension/lowering part numbers

Belltech components
-Front/Rear Street Performance Shocks # 9543
-Regular Cab Front Springs (don’t not use the front bumpstops the kit comes with, you will have about 1/8 of travel) # 4756
-Rear Flip Kit (don’t used the rear bumpstops the kit comes with, you will have no travel and will ride on the bumpstop) # 6686

Cal Trac components
-Cal Tracs for flipped axle #5704

Energy Suspension Components (all bushings are made of Polyurethane)
-Coil Springs Isolator Bushings # 5.6111G
-Front Shorter Bumpstops # 9.9132G
-Upper And Lower Control Arm Bushings # 5.3137G
-Rack and Pinion Bushings # 5.10103G
-Leaf Springs Bushings # 5.2115G

Hotchkis Suspension Components (all bushings are made of Polyurethane)
-Front/Rear Sway Bars And Rear Endlinks # 2265
-Front/Rear Sway Bar Bushings # 2265RB

Moog Components
-Inner Tie Rods # EV407
-Outer Tie Rods # ES3538
-Lower Ball Joints # K7411
-Upper Control Arms # CK7424
-Wheel/Hub Bearings # 515073
-Shorter Front Sway Bar Endlinks # K80337
-Caster/Camber Cam Bolt Kit # K100351


Prothane Suspension Components (all bushings are made of Polyurethane)
-Rear Shorter Bumpstops # 19-1314-BL
 
Wanted to update the thread, still haven’t had time to replace the upper and lower control arm bushings with the energy suspension polyurethane bushings. And still haven’t got the rear helper bags. But decided on replacing my cab mount bushing with energy suspension polyurethane bushings. This covid has really had all parts scarce. Ordered these back in April and I finally got them. Here are some pictures of the polyurethane bushings and my current cab mounts. I will update the treads as install comes along.
 

Attachments

  • DD83A2EF-15E4-4822-A89C-F2835CFBE047.jpeg
    DD83A2EF-15E4-4822-A89C-F2835CFBE047.jpeg
    273.1 KB · Views: 22
  • F417661B-B72A-4B06-AB8C-B306796F0F75.jpeg
    F417661B-B72A-4B06-AB8C-B306796F0F75.jpeg
    219.5 KB · Views: 22
  • 7B3FE56F-C23A-405A-9923-8A5D93C80B5F.jpeg
    7B3FE56F-C23A-405A-9923-8A5D93C80B5F.jpeg
    366 KB · Views: 22
where did ya get your cab bushings at???

been tryin for a while now to get them for my RC.

thanks
 
They don’t list any for the 1500 rams, they only list the 2500. So I kind of took a gamble on them, but luckily it worked out. I’ll get you some part numbers later today when I get home.

where did ya get your cab bushings at???

been tryin for a while now to get them for my RC.

thanks
 
makes sense.

been told for bout 10 years that "will get to it",lol.

the part numbers would be great

have a goodun
 
These are the 2 part numbers they have listed. If you have a single cab I would make sure you check that you have 6 mounting points before you purchase them. I checked my quad cab before I purchase them to make sure I had the 8 mounting points. Good thing it worked out for me, driver side is in and just need to finish the passenger side. Will post pictures shortly.

5.4116G for the single cab
5.4115G for the quad cab

makes sense.

been told for bout 10 years that "will get to it",lol.

the part numbers would be great

have a goodun
 

Attachments

  • A8772B38-C6F4-45E9-95CF-5633935AE298.png
    A8772B38-C6F4-45E9-95CF-5633935AE298.png
    469.4 KB · Views: 12
  • 38595F2A-C656-45DE-B42D-03600307FD70.png
    38595F2A-C656-45DE-B42D-03600307FD70.png
    503.3 KB · Views: 11
  • 6DD1DD0C-E905-4BA3-9D4B-0F8EED1A8861.png
    6DD1DD0C-E905-4BA3-9D4B-0F8EED1A8861.png
    497.4 KB · Views: 11
  • BF0CBD9A-7E59-4D32-8A5E-983679DD6EDF.png
    BF0CBD9A-7E59-4D32-8A5E-983679DD6EDF.png
    515 KB · Views: 11
These are the 2 part numbers they have listed. If you have a single cab I would make sure you check that you have 6 mounting points before you purchase them. I checked my quad cab before I purchase them to make sure I had the 8 mounting points. Good thing it worked out for me, driver side is in and just need to finish the passenger side. Will post pictures shortly.

5.4116G for the single cab
5.4115G for the quad cab

thanks
that's a big help
those are the folks i use also. great shippin times, they are only 40 mileish from me, lol.
pretty sure the RC has 4 mount points, but will check & get this project rollin
it has 6. did not consider the 2 front ones

thanks again & have a goodun
 
thanks
that's a big help
those are the folks i use also. great shippin times, they are only 40 mileish from me, lol.
pretty sure the RC has 4 mount points, but will check & get this project rollin
it has 6. did not consider the 2 front ones

thanks again & have a goodun

Anytime, tried for the longest to find some for the 1500 and nothing. Good thing it worked out.
 
Both sides complete, haven’t taken it out for a ride yet. But they sure look good. Truck on ramps should give you enough room to replace all mounts(either 8 for QC or 6 for RC). I used a rubber chalk block to lift the body off the frame to remove the mounts. The front belly pan give you access to the front ones. Here are some pictures.
 

Attachments

  • 96DAEDC9-3E35-4EEF-82E9-80185E619B47.jpeg
    96DAEDC9-3E35-4EEF-82E9-80185E619B47.jpeg
    561.1 KB · Views: 20
  • 615FE391-9CF0-4BD1-A8BF-4B26FDECB3E8.jpeg
    615FE391-9CF0-4BD1-A8BF-4B26FDECB3E8.jpeg
    241.9 KB · Views: 20
  • 3B4B750B-D21B-4F07-A287-3ACDC38BD960.jpeg
    3B4B750B-D21B-4F07-A287-3ACDC38BD960.jpeg
    430.6 KB · Views: 21
  • 7560FA10-A210-4344-87E3-169ECBD319C5.jpeg
    7560FA10-A210-4344-87E3-169ECBD319C5.jpeg
    283.9 KB · Views: 21
For the QC mounts there are 2 different kinds of bushings, the instructions explain which ones go where. The stock ones were definitely way over due, very soft(can easily bend with your hand. The polyurethane ones are definitely more beefier, here are some more pictures.
 

Attachments

  • 8175DB4B-6FD9-4263-BED7-2C03A5602C2D.jpeg
    8175DB4B-6FD9-4263-BED7-2C03A5602C2D.jpeg
    615 KB · Views: 22
  • 5017C6AF-5E46-4D77-AEFC-EB41BC8F78DA.jpeg
    5017C6AF-5E46-4D77-AEFC-EB41BC8F78DA.jpeg
    528.8 KB · Views: 21
  • AC0BDCD7-F330-43DD-B1B7-DB9CCECF63A0.jpeg
    AC0BDCD7-F330-43DD-B1B7-DB9CCECF63A0.jpeg
    384.4 KB · Views: 22
  • F3C71210-A9D8-4A27-AEB7-4A92095E745E.jpeg
    F3C71210-A9D8-4A27-AEB7-4A92095E745E.jpeg
    379.3 KB · Views: 22
  • 12717AB9-6156-4A5B-8542-FA405CB3A6C6.jpeg
    12717AB9-6156-4A5B-8542-FA405CB3A6C6.jpeg
    487.8 KB · Views: 24
More pictures, you can see the differences between both bushings. And also the new hardware it comes with.
 

Attachments

  • 4ABF48A4-0F66-450E-AA28-D531EF5272AE.jpeg
    4ABF48A4-0F66-450E-AA28-D531EF5272AE.jpeg
    598.6 KB · Views: 22
  • 07435ABB-D939-4A94-8491-6D020BF85A7F.jpeg
    07435ABB-D939-4A94-8491-6D020BF85A7F.jpeg
    230.9 KB · Views: 21
  • A6C9F2BA-E4ED-44A8-9795-3AE0727A6D97.jpeg
    A6C9F2BA-E4ED-44A8-9795-3AE0727A6D97.jpeg
    249.1 KB · Views: 22
  • FFA86E90-F010-4C02-8254-137FEB1AFABC.jpeg
    FFA86E90-F010-4C02-8254-137FEB1AFABC.jpeg
    588 KB · Views: 20
  • 0BC52DC7-5F42-45D8-8508-B78D78211997.jpeg
    0BC52DC7-5F42-45D8-8508-B78D78211997.jpeg
    597.2 KB · Views: 21
  • A85109B7-7A6F-488C-A94D-203700E79A55.jpeg
    A85109B7-7A6F-488C-A94D-203700E79A55.jpeg
    443.7 KB · Views: 21
  • 5051F760-FC4F-4ACA-AF90-239736CC78E4.jpeg
    5051F760-FC4F-4ACA-AF90-239736CC78E4.jpeg
    215.4 KB · Views: 21
  • 9BFB43D8-83C1-40EE-847F-4B27EDB62A78.jpeg
    9BFB43D8-83C1-40EE-847F-4B27EDB62A78.jpeg
    503.4 KB · Views: 19
  • 1C544932-828D-49F7-8198-BD40543F1C66.jpeg
    1C544932-828D-49F7-8198-BD40543F1C66.jpeg
    234.1 KB · Views: 22
Here some more pictures. Everything buttoned up and the old ones.
 

Attachments

  • D20A509E-14D2-410C-8448-6823EBD52B13.jpeg
    D20A509E-14D2-410C-8448-6823EBD52B13.jpeg
    249 KB · Views: 23
  • 8CB85DD2-43B5-426F-9D72-5A65350EF946.jpeg
    8CB85DD2-43B5-426F-9D72-5A65350EF946.jpeg
    266.2 KB · Views: 23
  • A3A955AE-D14B-4B35-BB74-BDBF8B0441EB.jpeg
    A3A955AE-D14B-4B35-BB74-BDBF8B0441EB.jpeg
    356.7 KB · Views: 22
  • 98FB4414-15C2-4E3E-86AF-675BDD6C18A0.jpeg
    98FB4414-15C2-4E3E-86AF-675BDD6C18A0.jpeg
    443.6 KB · Views: 22
I wanted to update the thread, bags came in and hopefully I’ll get a chance to install them soon. The plan is also to install some double adjustable shocks front and rear. I’ll keep you guys posted.
 

Attachments

  • 5058D0CF-B260-414A-B6A0-16CCB56BBC28.jpeg
    5058D0CF-B260-414A-B6A0-16CCB56BBC28.jpeg
    349.4 KB · Views: 19
Last edited:
Ordered some new double adjustable shocks for the truck, they look really good and quality is great. Don’t know if anyone else is running viking shocks, after some miles I’ll review the ride quality. Here are some pictures, I apologize for the dirty undercarriage lol.
 

Attachments

  • 8F33F767-D19A-4530-AF16-192B743CC067.jpeg
    8F33F767-D19A-4530-AF16-192B743CC067.jpeg
    272.6 KB · Views: 16
  • 6DE0F803-1983-461D-B14A-B9E6B16F4308.jpeg
    6DE0F803-1983-461D-B14A-B9E6B16F4308.jpeg
    334.1 KB · Views: 16
  • 97B8F5AA-24F0-487D-9FFF-ACDBDA8E0FE3.jpeg
    97B8F5AA-24F0-487D-9FFF-ACDBDA8E0FE3.jpeg
    391.1 KB · Views: 17

Latest posts

Support Us

Become A Supporting Member Today!

Click Here For Details

Back
Top