Hey friends! Couple more updates! I got the intake air temp (IAT) sensor moved, new MAP sensor, tune purchased/loaded, lower intercooler pipe installed, radiator and AC condenser back in. Ran into an issue with the dual fan setup I had, so I had to get another ordered from JMB. Details below!
IAT sensor move: when I removed my cold air intake the IAT sensor was plugged into it (through a rubber grommet) near the driver side throttle body. This sensor needs to be moved over by the blower intake. I found out the little rubber grommet in the heat shield is actually where this sensor goes - luckily I had just enough room to plug it in there after installing the catch can. Pretty easy to knock this out - just have some 16-18AWG wire on hand to lengthen the wire and run it over behind the heat shield. I would suggest soldering these if you are able, I just used wire connectors and heat shrink (I am terrible at soldering) and getting this done up in the engine bay just wasn't going to happen for me.
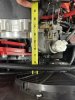
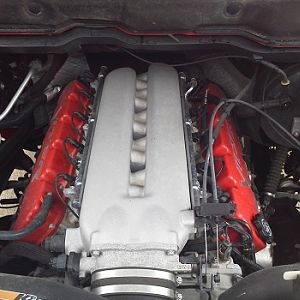
You will need to upgrade your MAP sensor. The stock SRT10s come with a 1 BAR MAP sensor, you need to upgrade to at least a 2 BAR sensor. I bought a 2 BAR sensor for a 2005 SRT4 and it fit just fine. I did call JMB to make sure before I purchased and these are what they use. I bought it from modern performance for around $40. The MAP sensor is located on the driver side intake manifold right behind the throttle body. 2 screws and you get the old out, then install the new one.
I purchased a tune from Torrie to get me running and to a dyno. Torrie will tweak the tune based on your dyno results. Torrie is well known, knows these kits well, so not too many questions to get the initial tune done. He will email it to you and you can get it loaded to your programmer.
[email protected]
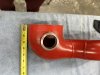
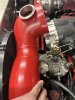
Lower intercooler pipe went on nice and easy. When you mount the blower, you would have already clocked the compressor housing and mocked up the lower intercooler pipe. The JMB kit comes with all the rubber joiners and clamps you need. The rubber joiner specific to the blower/lower intercooler has a taper - the smaller end fits to the blower and the larger end to the intercooler tube. Get everything snugged up, lined up and tighten your clamps.
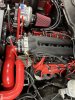
I bought a new aluminum 3 row radiator which went in just like the stock one. I did have to drill out the mounting holes a tad, they were just a hair off. Once the radiator is in you can put your lower radiator hose back in place.
The AC condenser is modified by JMB, when you remove it you will have to send it to them. I recommend just purchasing a new one from rockauto and having it shipped to JMB. I say this because I believe I paid about $100 to ship the stock AC condenser and a brand new one is around the same price. JMB will essentially cut the AC condenser in half and weld on new mounts so you can mount it to the front of the radiator. Same issues here, the fitment was a little off so I had to drill/widen the holes - I assume this was because the aftermarket radiator was mildly mis-measured. Who knows - either way, small modifications to the mounting points and get your hardware back in and you are good to go.
Once my new fan setup comes in I should be able to get her all finished. Really just have that, the upper intercooler pipe, the blow-off valve and the coolant overflow jug and she should be ready for a trip to the dyno!
Too many pics for single post - so pics to follow below!