phxpoolguy
Full Access Member
I have to scroll for five minutes to read the next post, thank god we're almost to next page. 


SOMEONE ELSE POST FROM FORDMUSCLCARFORUM
Many of you will probably remember that I trashed my Libertyprepped Toploader on the first run of the season due to too an inferior 2.90 ratio aftermarket first gear, too much traction and too stiff a clutch. http://www.fordmuscleforums.comdra...a-carnage.html I recently sent some parts to Liberty to have them modified to replace the damaged parts. As an upgrade to the old stuff, I had the 3rd and 4th gear Faceplated and since it is not offered for 2nd gear, I had them replace the old worn Proshift ring with a fresh one.
According to Liberty, the reason for Faceplating or Proshifting is to "eliminate the need to worry about missed shifts." Faceplating and Proshifting eliminate the synchronizers used in common street transmissions and for this reason are only recommended for track cars. Engagement can be harsh and the higher the shift RPM, the smoother the shift. It is possible to drive a Faceplated or Proshifted tranny on the street, but it requires a combination of double clutching and rpm matching. OK for an occasional jaunt, but not for a daily driver. I could have had 2nd, 3rd, and 4th Proshifted again, but that modification is not as long lasting as Faceplating and it is has less of a chance of surviving on the street. See Liberty Face Plate vs Proshift for further details on these 2 techniques.
In his thread I hope to show through the use of pictures the differences of these 2 techniques plus reveal
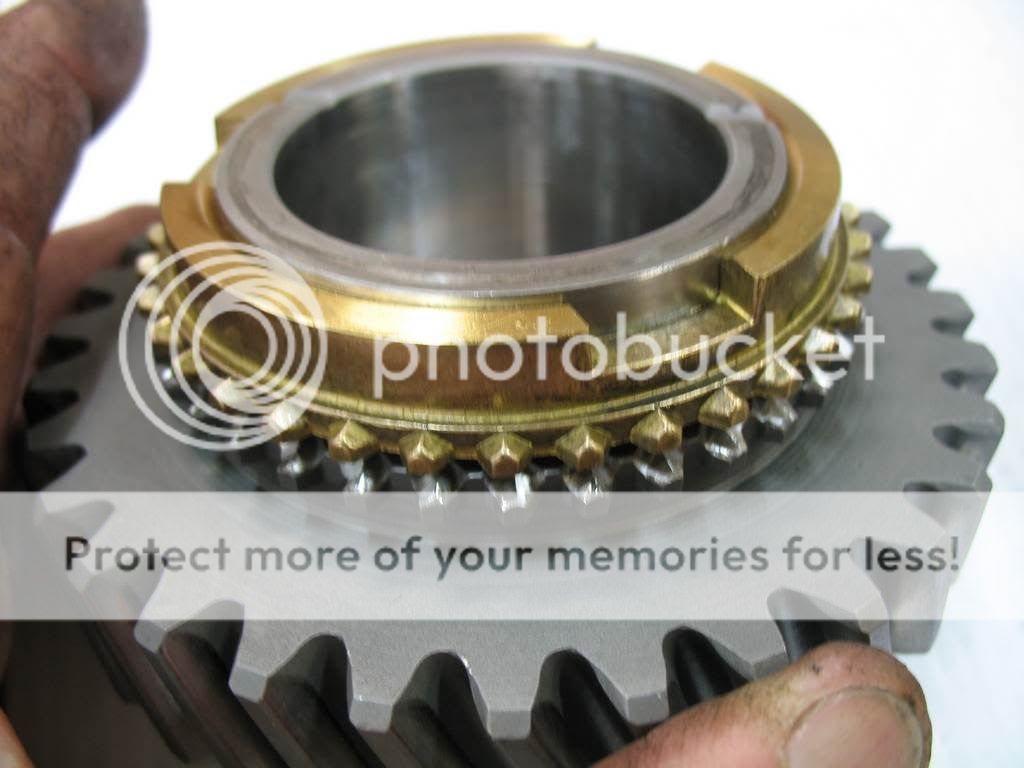
Here is a business end of a factory type toploader gear that is used with a sychro and a brass blocking ring:
This image has been resized. Click this bar to view the full image.

Report this image
This image has been resized. Click this bar to view the full image.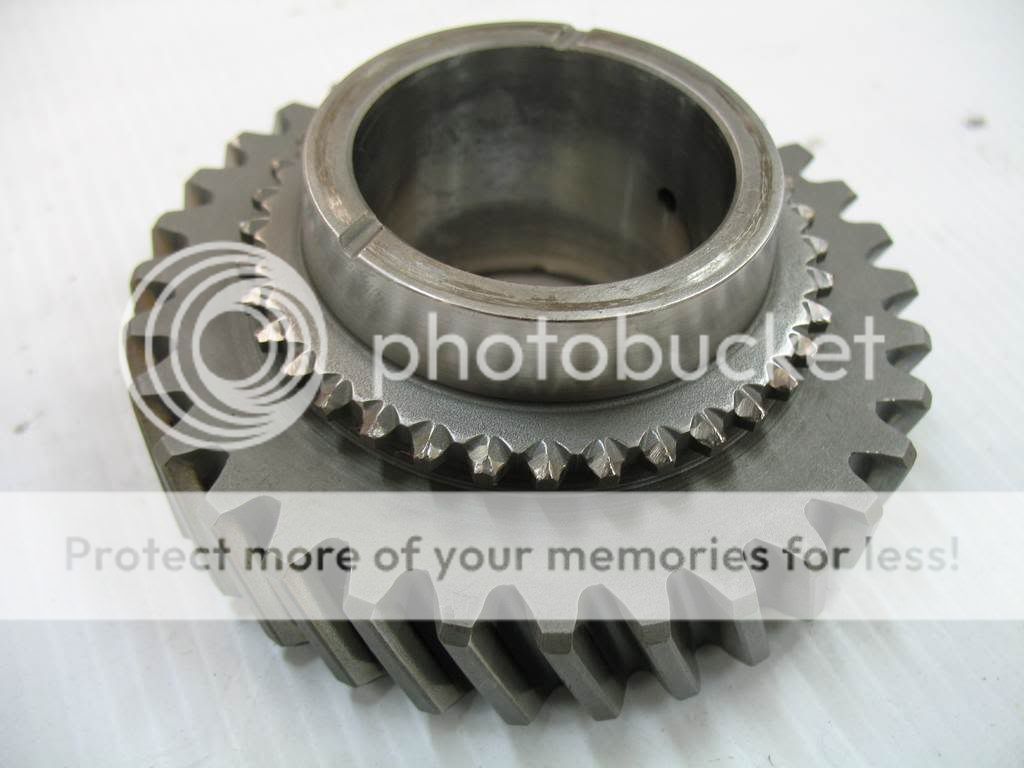
Report this image
This is the same gear, but it has been Proshifted by cutting off the factory teeth and welding on a different assembly:
This image has been resized. Click this bar to view the full image.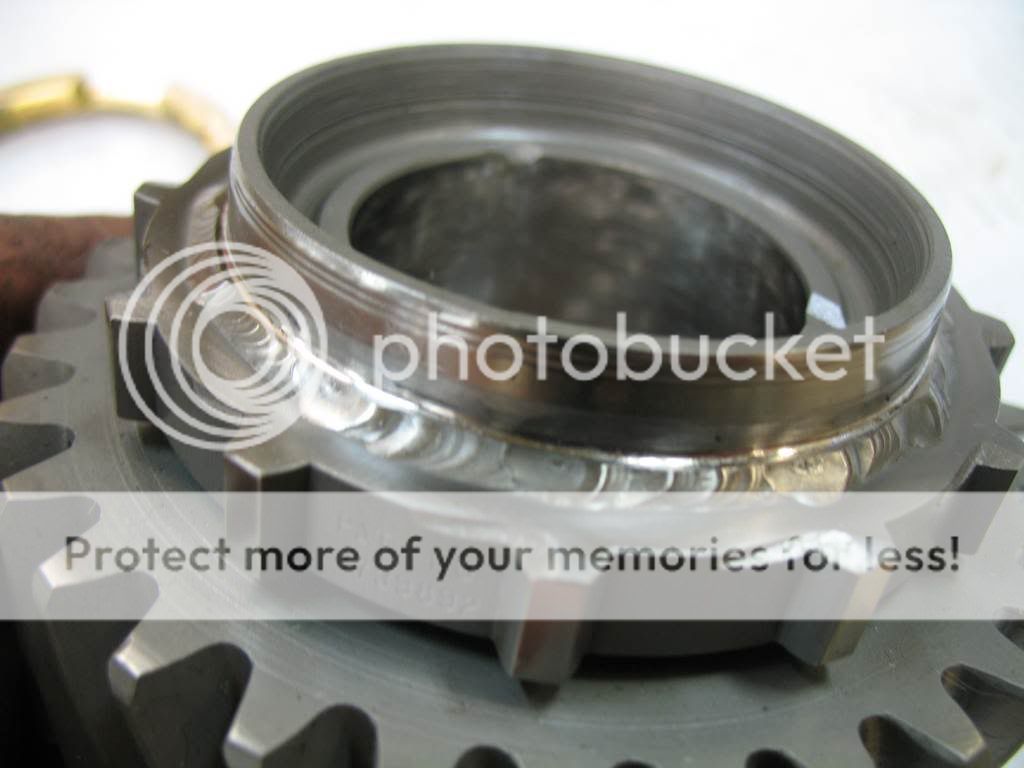
Report this image
This image has been resized. Click this bar to view the full image.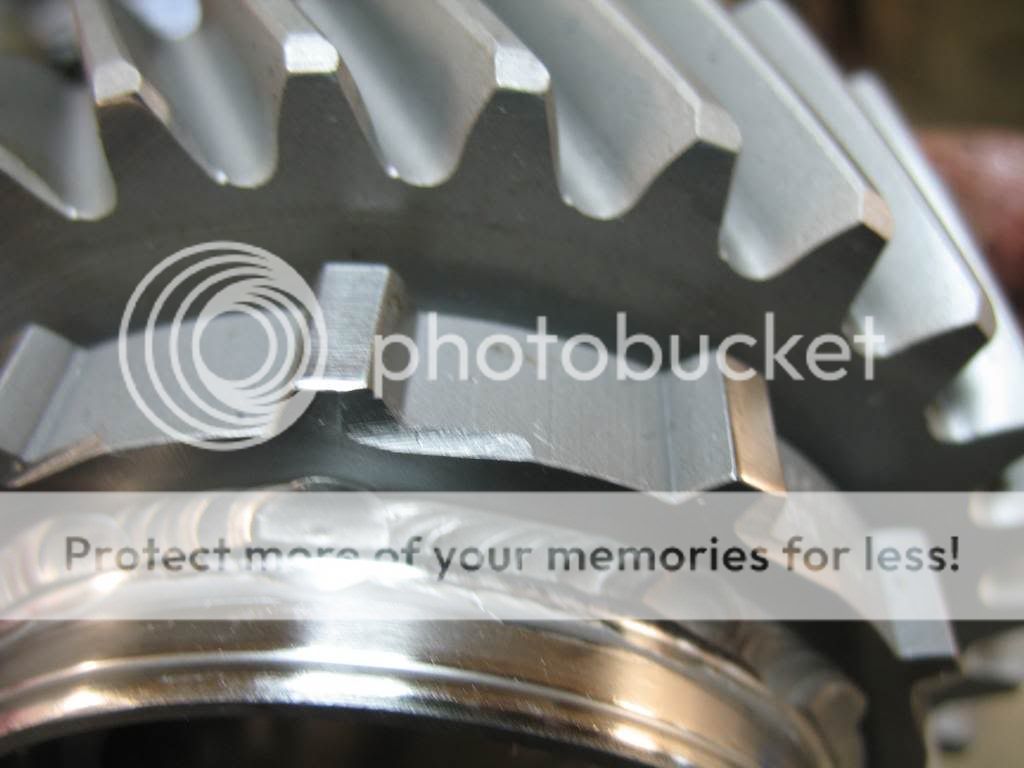
Report this image
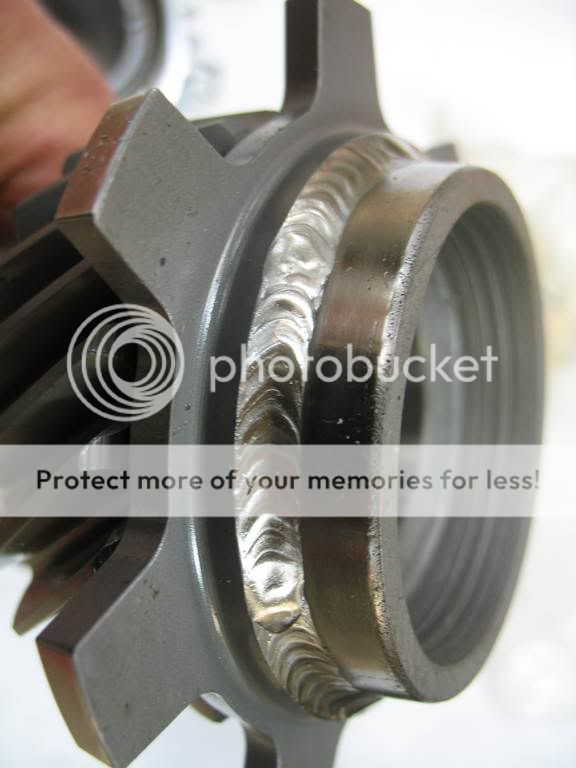
Here is the same gear, but faceplated. Again, it is accomplished by cutting off the factory teeth and welding on a different assembly:
This image has been resized. Click this bar to view the full image.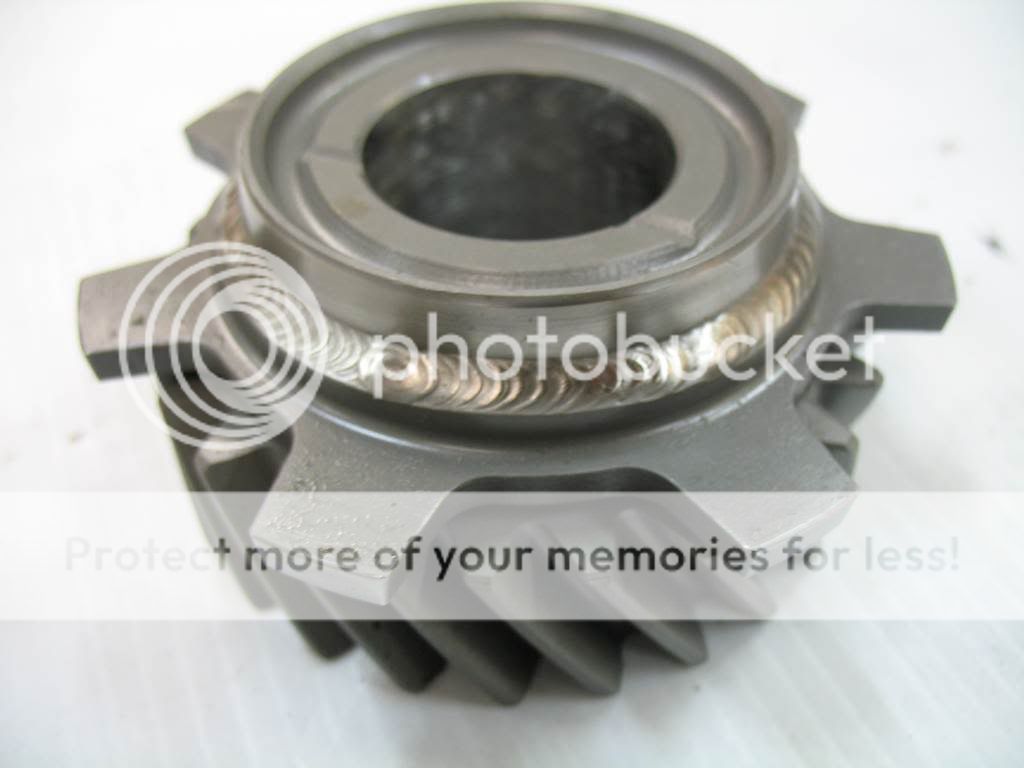
Report this image
Report this image
Here is all 3rd gears in one shot:
This image has been resized. Click this bar to view the full image.
Report this image
Of course the sychro rings (AKA sliders) will need to be replaced in order to use the new gears.
On the left in the following pic is a standard 3rd/4th gear slider. The one on the right has been Proshifted, which basically means that several teeth were ground from the ring:
This image has been resized. Click this bar to view the full image.
Report this image
The next pic shows the Faceplated slider replacement:
This image has been resized. Click this bar to view the full image.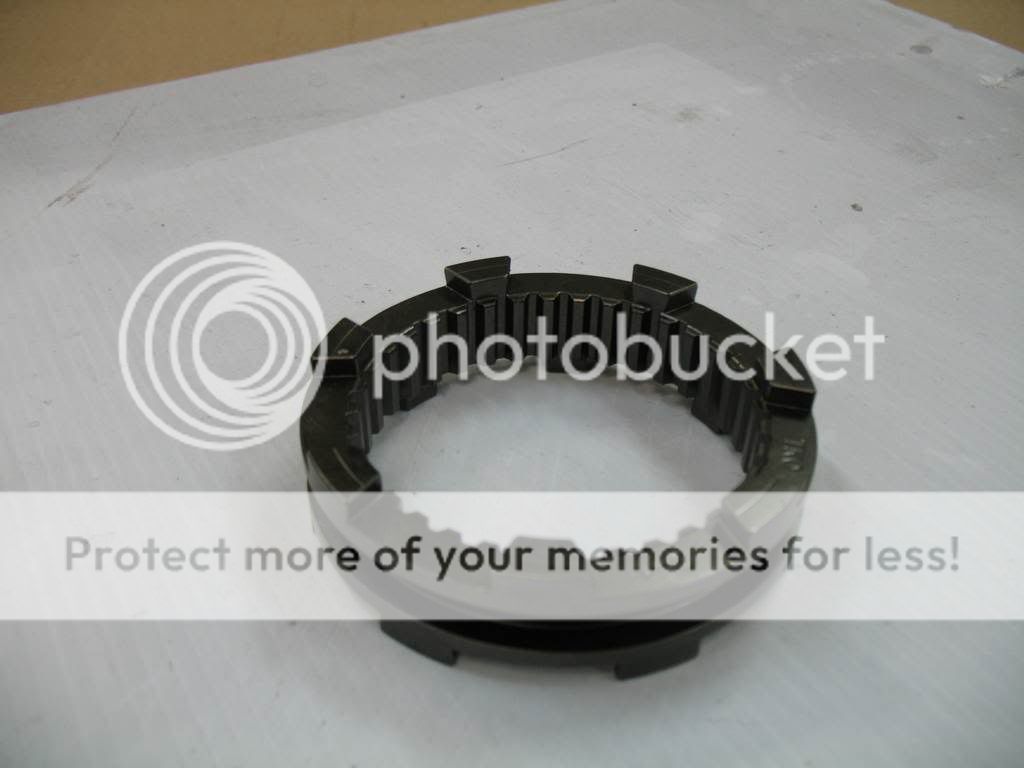
Report this image
This image has been resized. Click this bar to view the full image.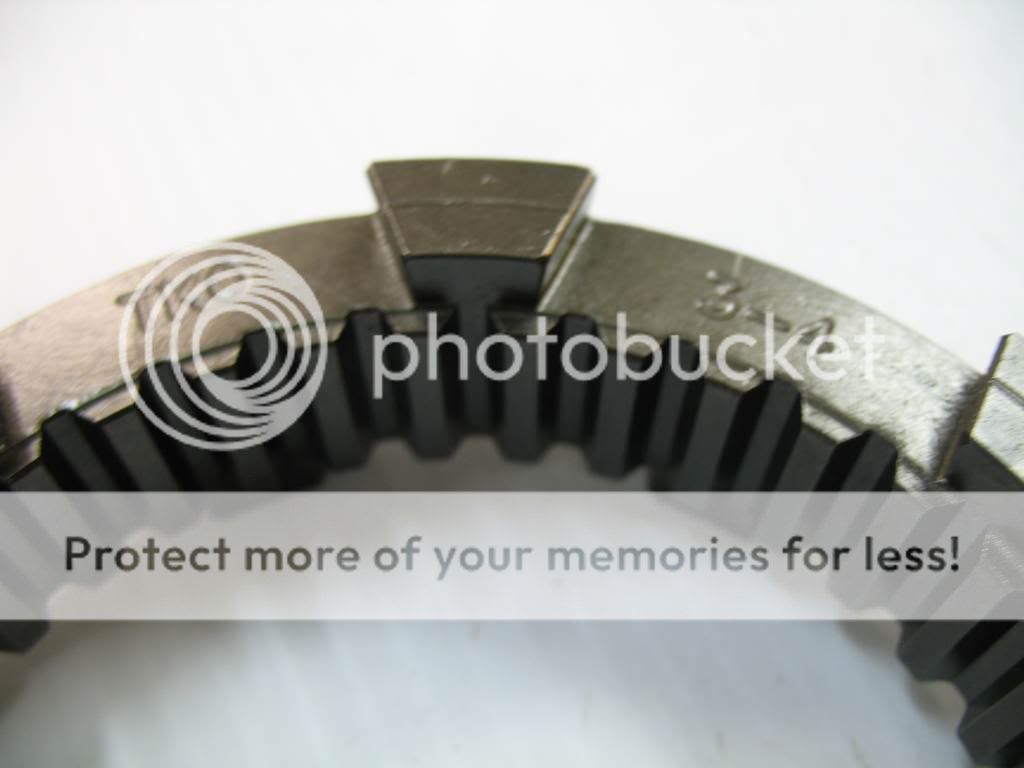
Report this image
Look closely and you will see that this slider is also used in a TKO.
When shifting, it slides and mates with the gears like this:
This image has been resized. Click this bar to view the full image.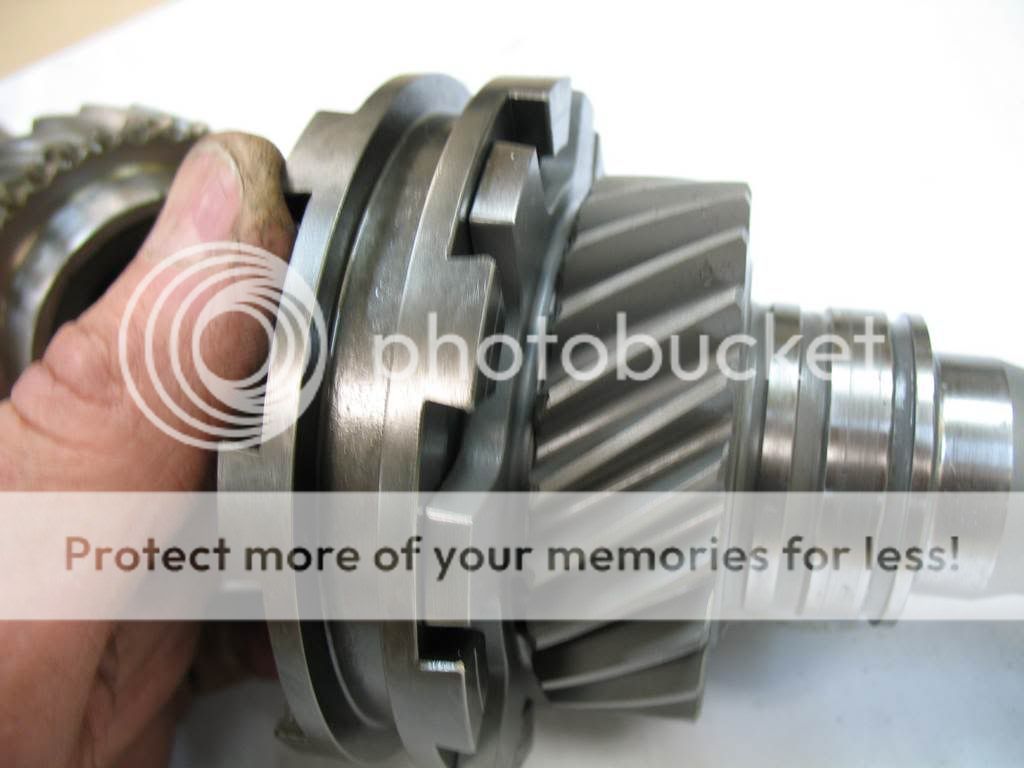
Report this image
A stock slider complete with inner hub, springs and shift dogs is on the left, and the Faceplated slider and inner hub is on the right. It doesn't use springs or dogs:
This image has been resized. Click this bar to view the full image.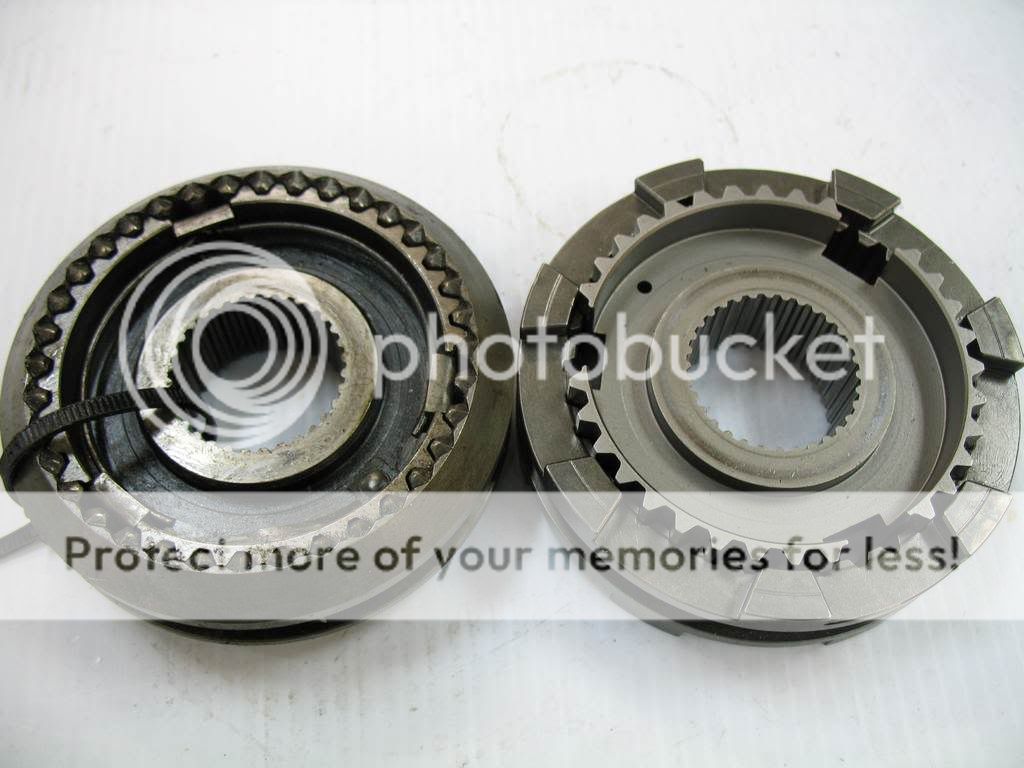
Report this image
The slider for 1st and second gear is different in appearance. The Proshifted side of the slider had teeth removed to match 2nd gear. The first gear side was not modified. On the left below is the stock slider and on the right is the Proshifted part:
This image has been resized. Click this bar to view the full image.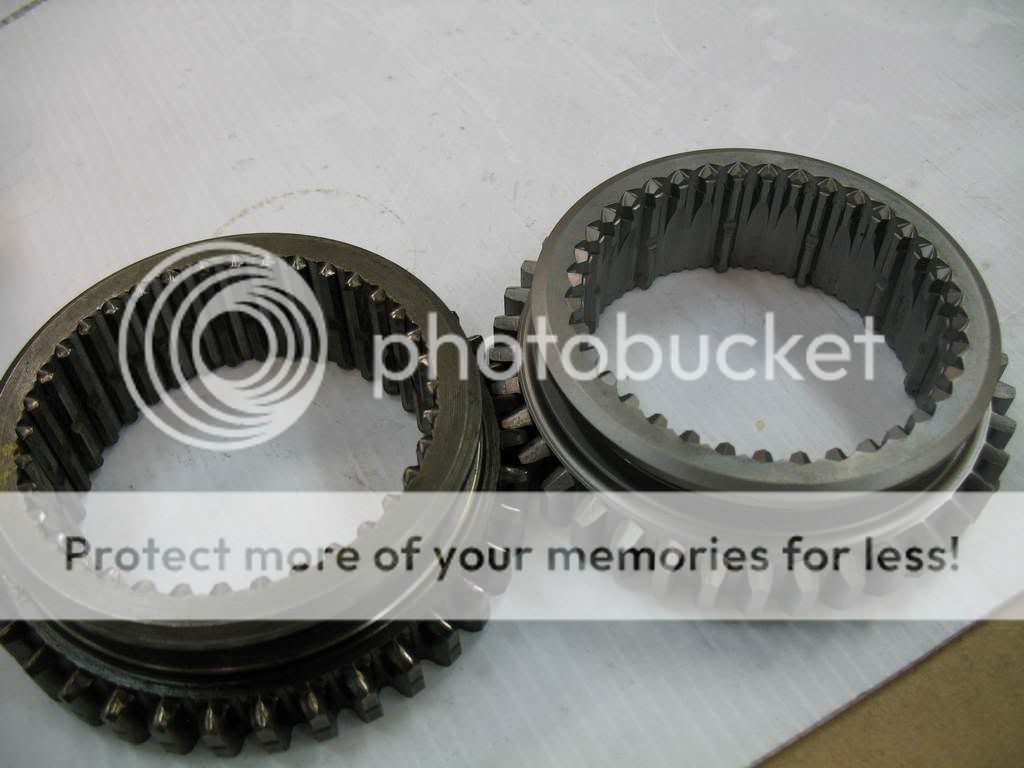
Report this image
This image has been resized. Click this bar to view the full image.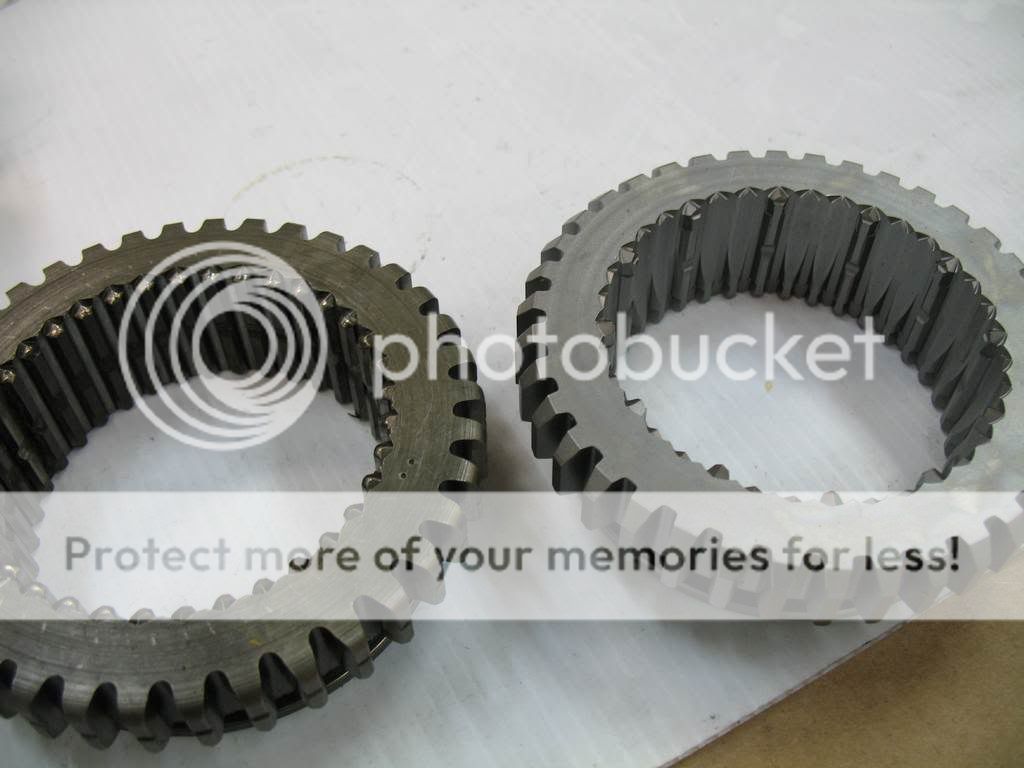
Report this image
An unmodified first gear is used in a Liberty toploader and the brass blocking rings and shift dogs/springs are eliminated. The modification of the Proshifted 2nd gear prevents them from being used. Because I wanted my racing toploader to be a little more street friendly, I had Liberty modify a brass blocker ring to use as a spacer on the Proshifted second gear so that the eliminated parts could be installed. This will give me a fully functioning sycro'ed first gear so that I won't have to come to a complete stop when downshifting.
On the left is a stock brass blocker ring and on the right the modified part:
This image has been resized. Click this bar to view the full image.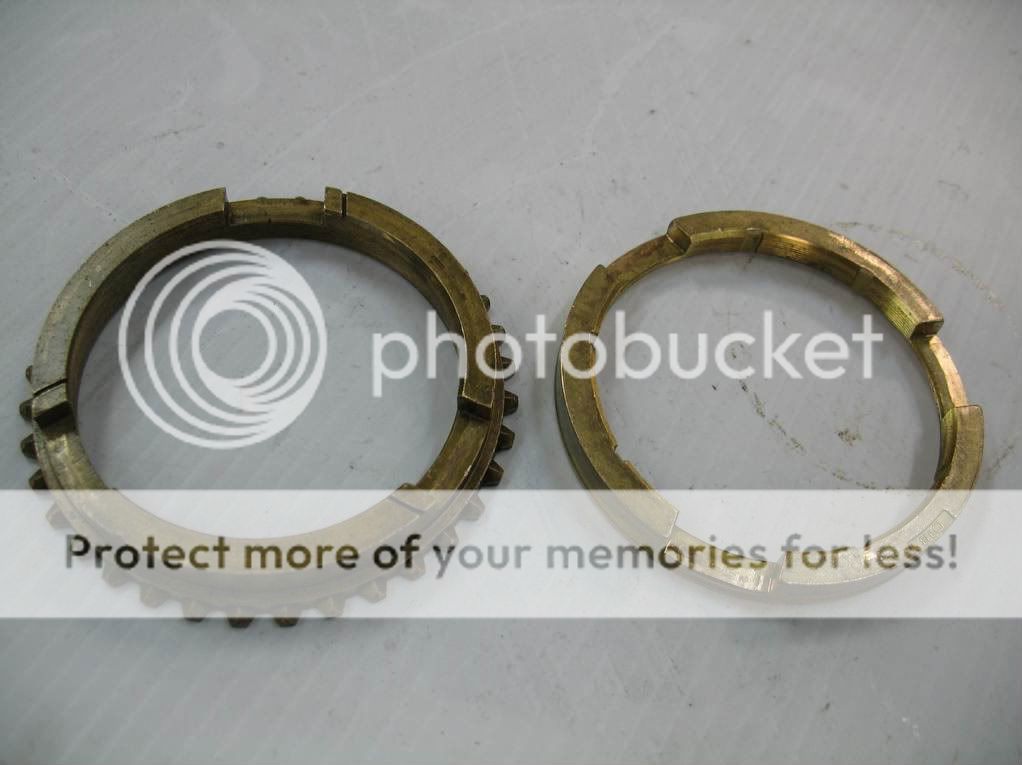
Report this image
Closeup of the modified ring:
This image has been resized. Click this bar to view the full image.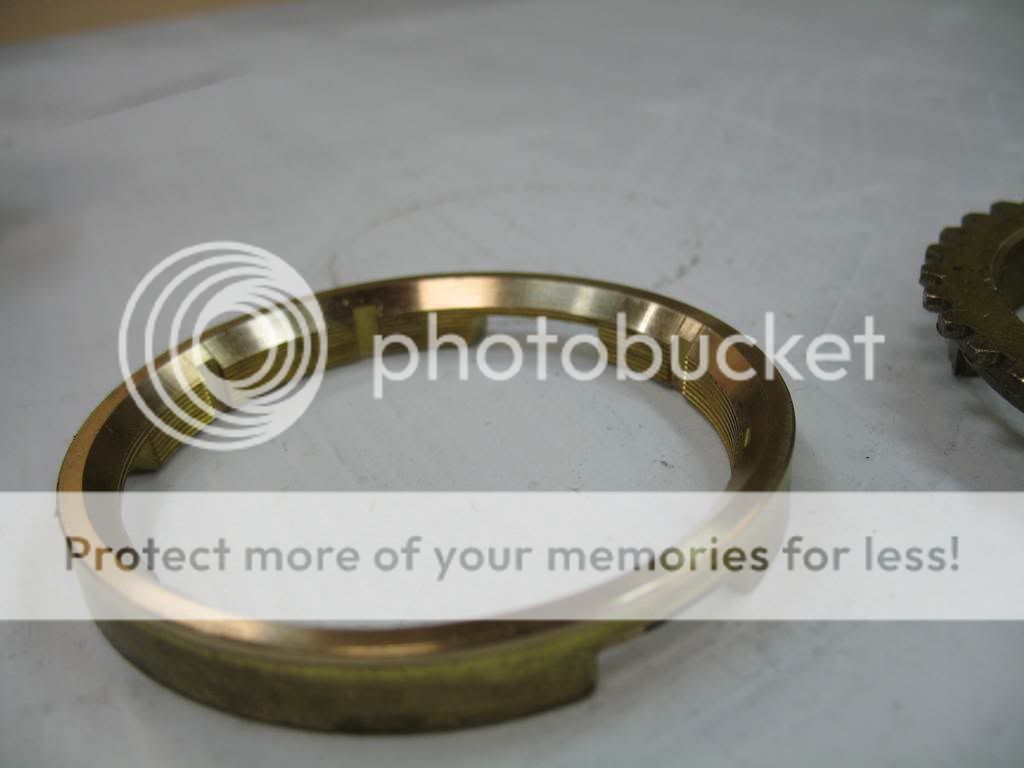
Report this image
Stock 1st gear with brass ring and shift dog:
This image has been resized. Click this bar to view the full image.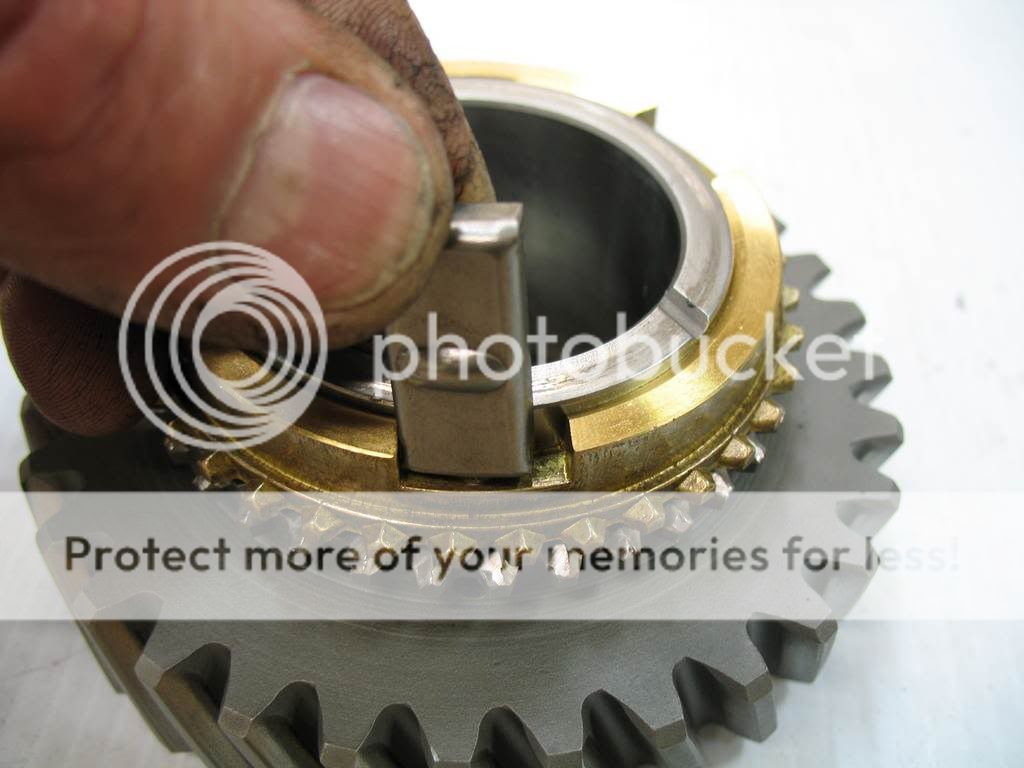
Report this image
Proshifted 2nd gear with brass ring and shift dog:
This image has been resized. Click this bar to view the full image.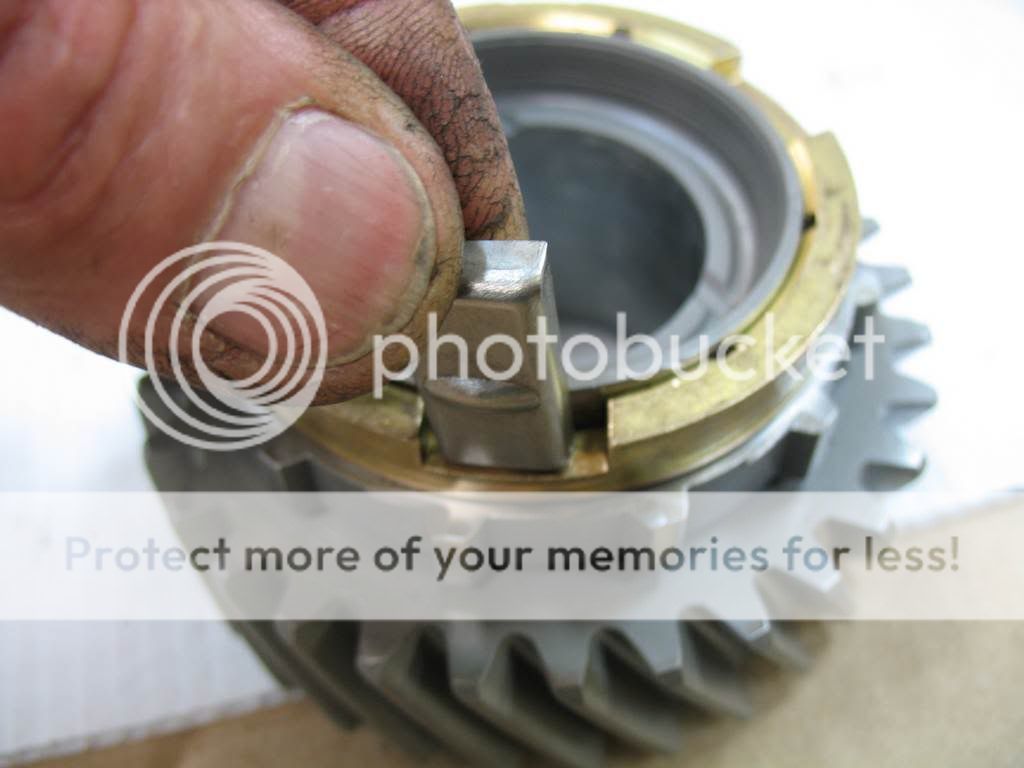
Report this image
In order to use the Faceplated gears in 3rd and 4th, the corresponding shift rail may need to be modified. Liberty widened the notches a little to ensure full engagement of the faceplated parts:
This image has been resized. Click this bar to view the full image.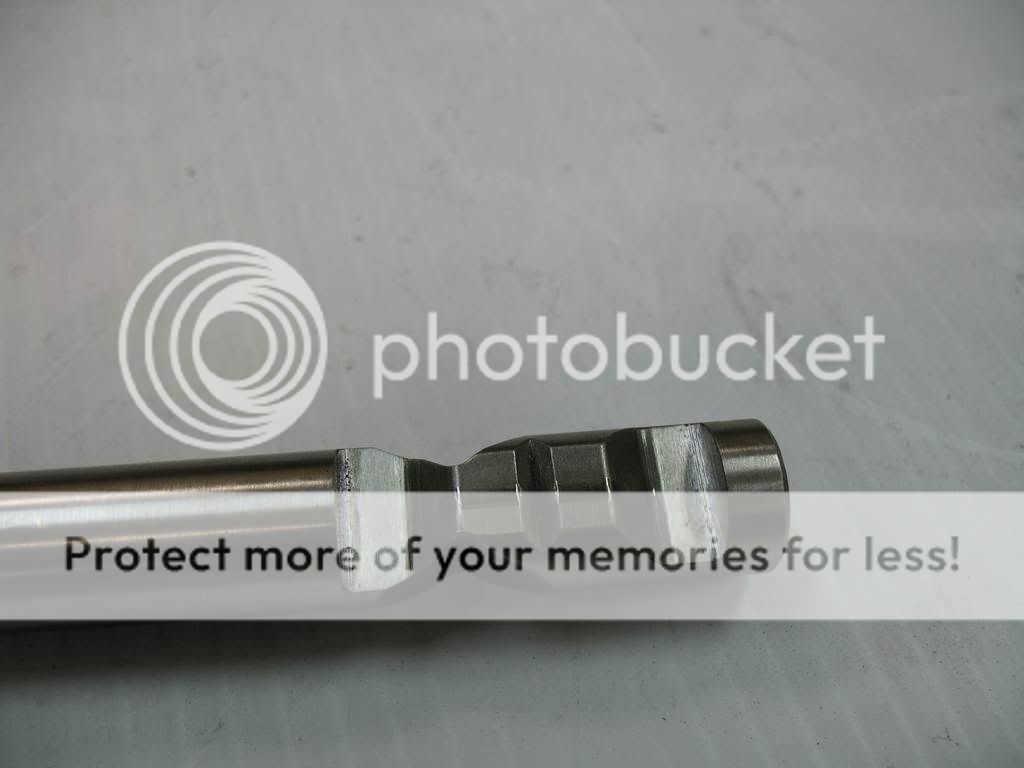
Report this image
Upon assembly I further modified the above shift rail by widening the 4th gear slot (on the right) even more to ensure full engagement.
One thing I notice when I had the fully Proshifted tranny is that the large gear of the countergear had a bevel machined into it. It was needed to help clear the modified sychro-it can be seen on the left:
This image has been resized. Click this bar to view the full image.Top 5 Hybrids!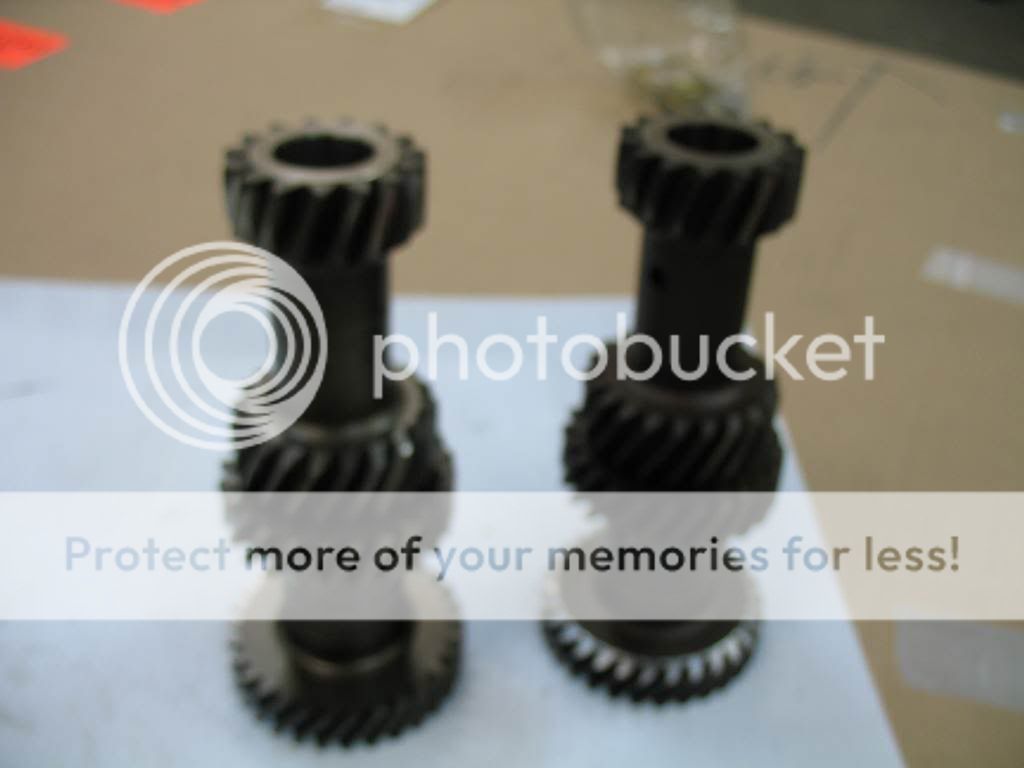
Go Green With a Fuel Efficient Car. Let Us Show You Your Options!
GreenHybrid.com - The Interactive Hybrid Car Resource
Report this image
This image has been resized. Click this bar to view the full image.Free Oil Change Coupons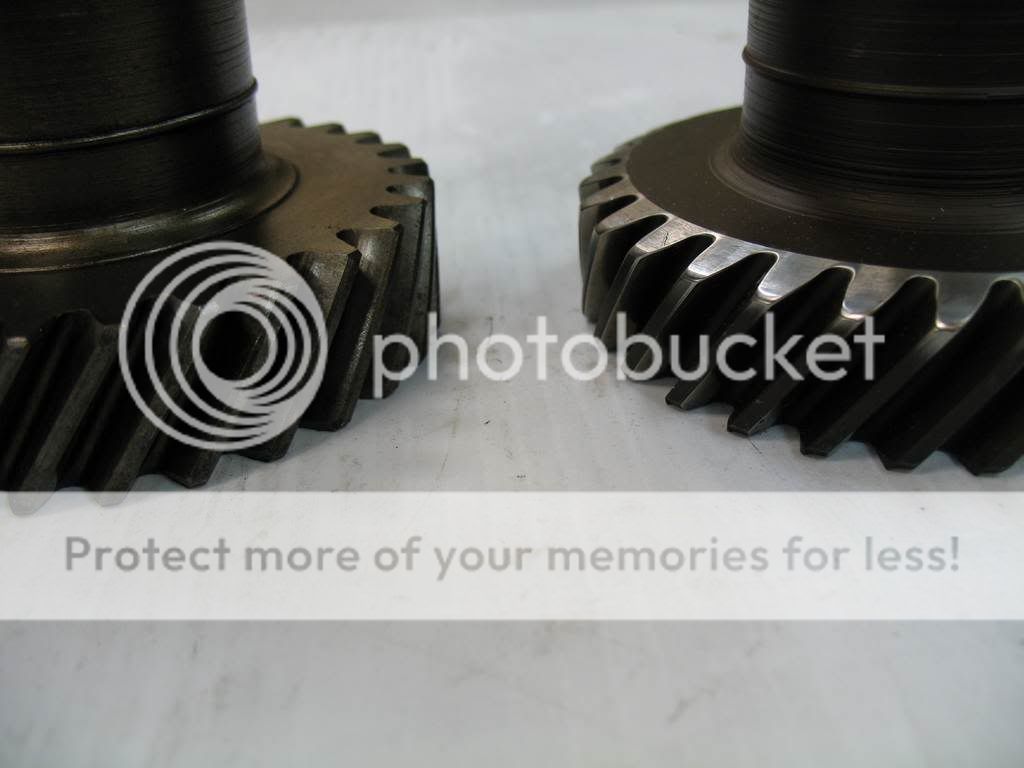
Never Pay Full Price for an Oil Change! - Free Oil Change Coupons.
MyLubeNGo.com
Report this image
To my surprise, the Faceplated countergear does not need the same modification and a stock gear can be used. Update-as mentioned below in another post: Upon trial assembly I found that there was slight interference between the Proshifted 4th gear and the counter gear. To fix the problem I ended up machining the counter gear as shown above, even though it wasn't supposed to be required.
I found 2 other things of interest that Liberty had originally done. The first is that they strengthened one of the shift forks by welding a small piece of metal to a weak area.
Original fork:
This image has been resized. Click this bar to view the full image.Volkswagen Official Site
Check Out VW.com for Pics of Our New Model Lineup. That's Das Auto.
VW.com
Report this image
Modified fork:
This image has been resized. Click this bar to view the full image.PowerFrame® Technology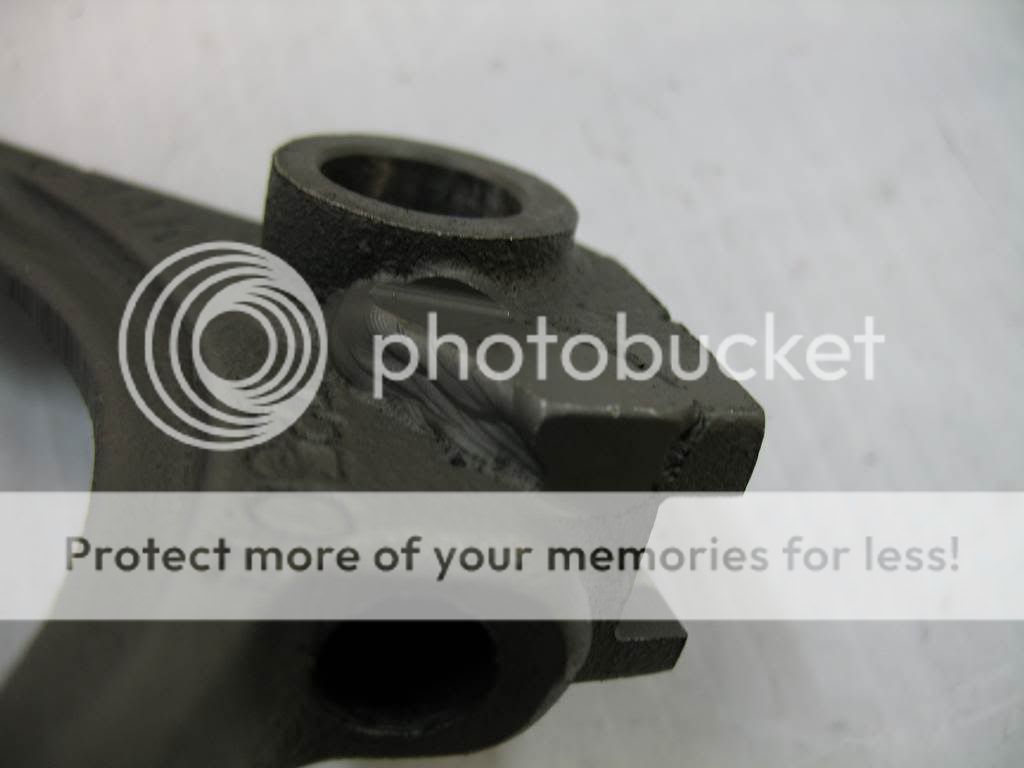
A PowerFrame® Logo on the Outside Means True Strength on the Inside.
www.Powerframe.com/Battery
Report this image
Side by side:
This image has been resized. Click this bar to view the full image.Save Gas & Money Hybrids!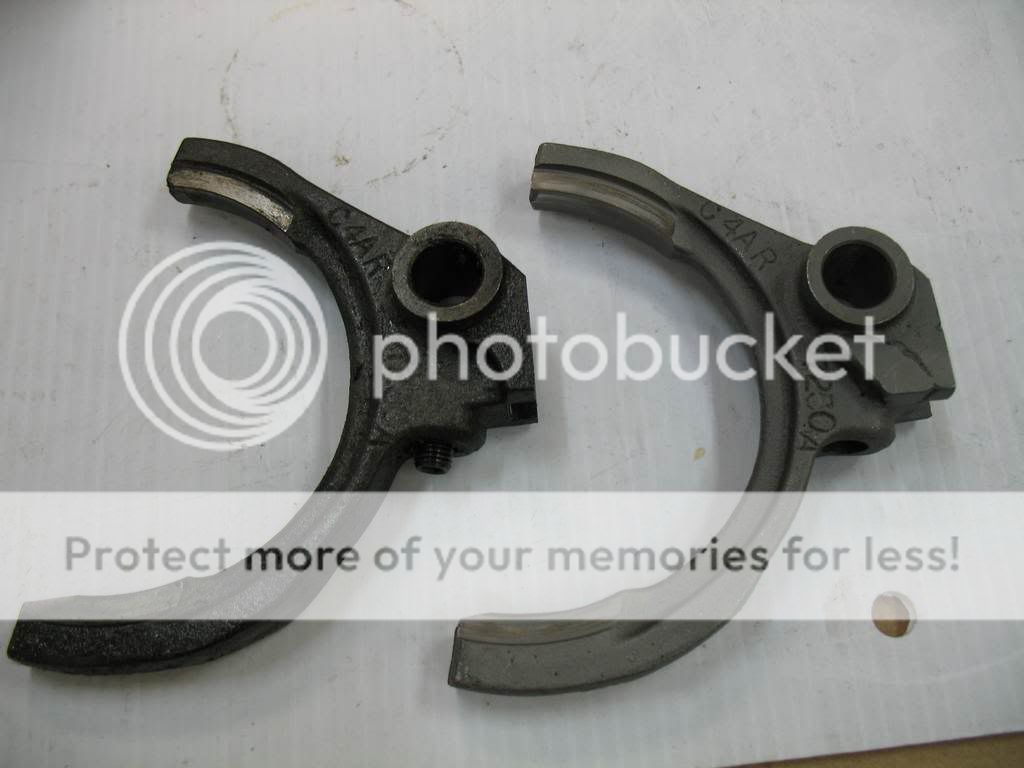
We Have New Hybrids With Great MPG & Options For You!
GreenHybrid.com - The Interactive Hybrid Car Resource
Report this image
The final thing of interest are the 1-2 and 3-4 shift levers which are much beefier than the stock:
This image has been resized. Click this bar to view the full image.PowerFrame® Technology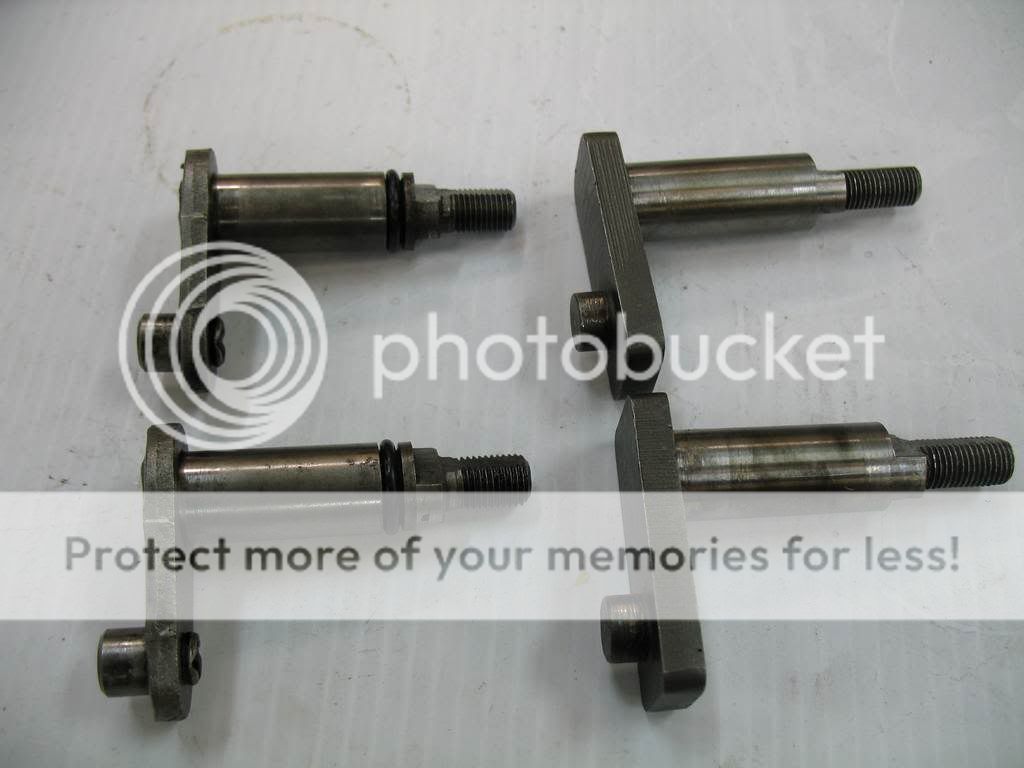
A PowerFrame® Logo on the Outside Means True Strength on the Inside.
www.Powerframe.com/Battery
Report this image
Interestingly, they did not include grooves for the sealing O rings.
In addition to the obvious work, Liberty polished the inside of the used gears that I provided and cleaned them up nicely:
This image has been resized. Click this bar to view the full image.Name Brand Luxury Watches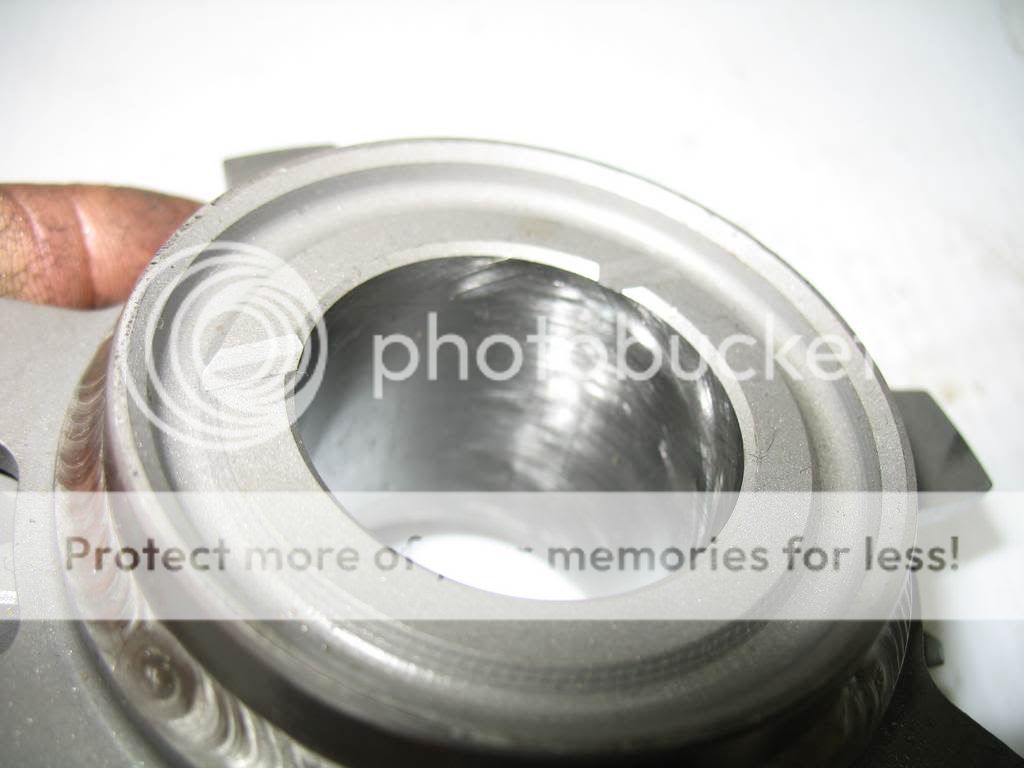
Shop Online for a Wide Variety of Quality Luxury Watches & Save Now!
Save on Luxury Watches at LuxuryWatchClearance.com
Report this image
In the process of figuring out what to do with a bent output shaft, I discovered that Liberty can straighten them and have since sent them the one that I bent.
I talked to Paul (Liberty's toploader specialist) several times and he always took the time to answer my numerous questions to my full satisfaction. Although they are somewhat slow (6 weeks in this case), I am very impressed with their workmanship and attention to detail.
e: Liberty Faceplated and Proshifted Toploader An update. Liberty called and told me that when they tested the output shaft for cracks, they found one where #3 gear is. They asked me what I wanted to do with the shaft and I decided that they could keep it since there was no charges involved. Since then I received a new output shaft from David Kee. This one is just as nice as the first one that I bought from him. The unmachined areas are a larger diameter than the Ford offering.
I spent most of the week trying to install the new guts into the case. At first it couldn't be done as the input shaft needed installed from inside the case and that left inadequate room for the output shaft to be installed behind it. A quick
This image has been resized. Click this bar to view the full image.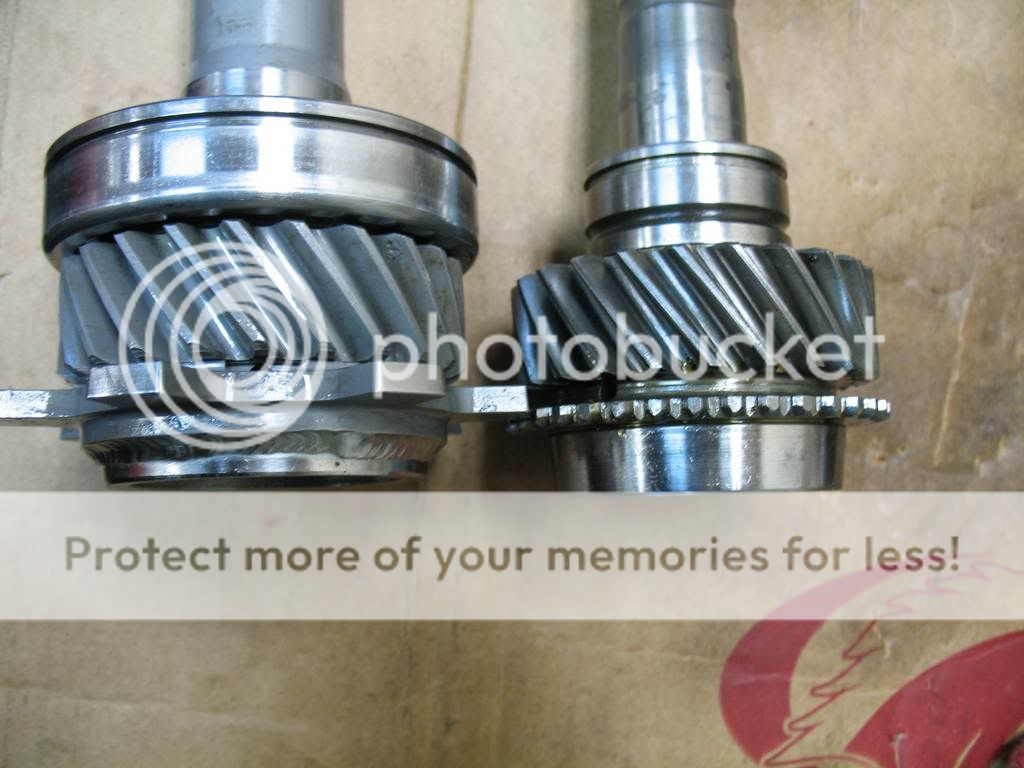
Report this image
This gave me adequate clearance and I was able to assemble the transmission. Once it was all together I realized that if the input shaft was tilted upward, there was a slight grinding noise coming from the lower front of the tranny. Grrrr, that meant the tranny had to come apart again.
A closer examination revealed the newly added faceplated input shaft assembly had inadequate clearance with the counter gear and it made light contact. Liberty told me that there would be no such issues. Anyways, that meant another trip to work's machine shop where I ground the counter gear at an angle for additional clearance, similar to what Liberty does for their proshifted transmission. Here is both a stock and the modified countershaft:
This image has been resized. Click this bar to view the full image.
Report this image
This image has been resized. Click this bar to view the full image.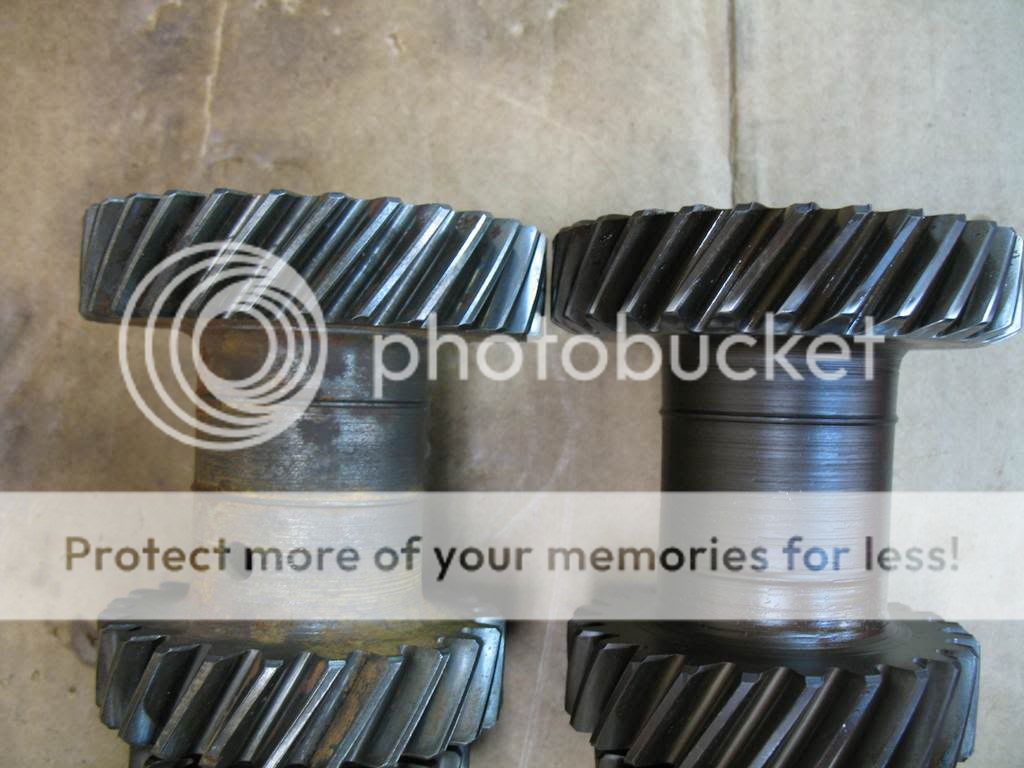
Report this image
I then reassembled the toploader and am now satisfied that it was done right for racing. Here is what the tranny looked like before I put the cover on:
This image has been resized. Click this bar to view the full image.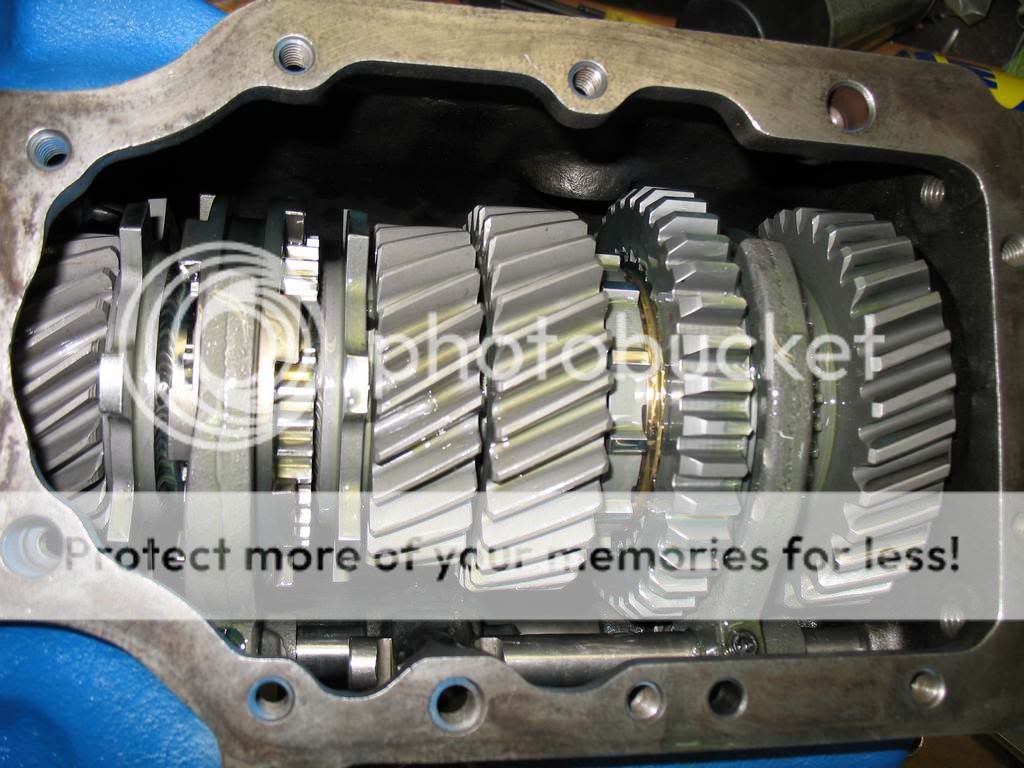
Report this image
2nd gear was proshifted and first gear retains a brass blocking ring for my convenience so I don't have to come to a full stop to downshift. Here is a close up of this area:
This image has been resized. Click this bar to view the full image.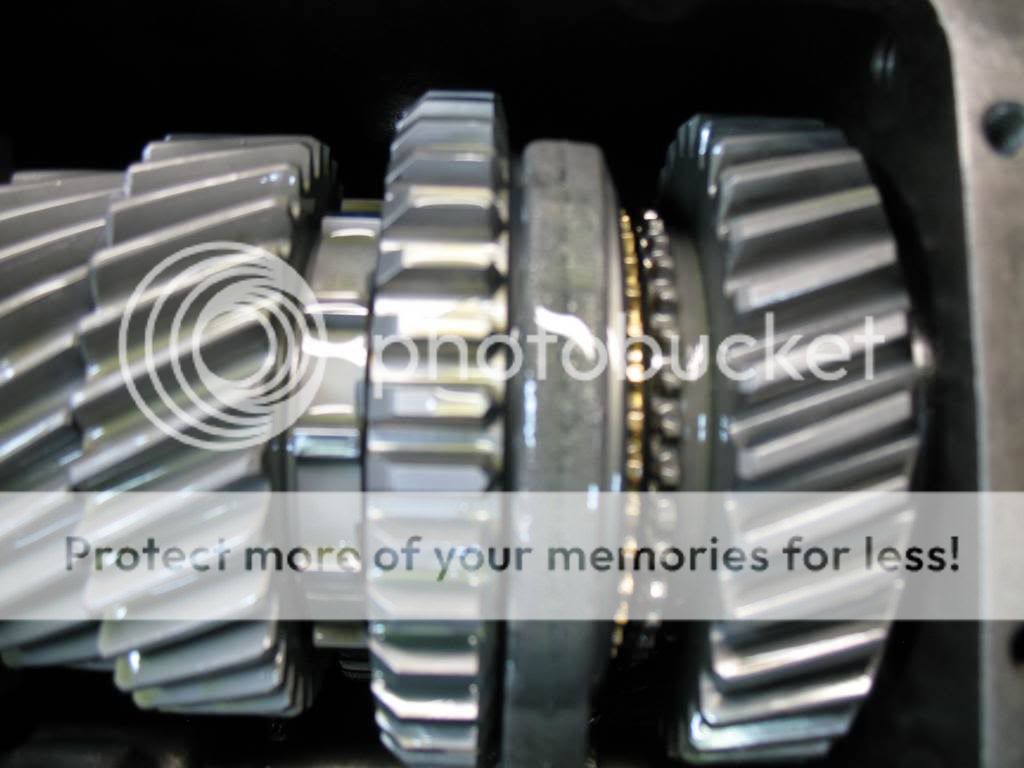
Report this image
3rd and 4th gears were both faceplated (which is not offered for a toploader's 2nd gear.) Here is a close up:
This image has been resized. Click this bar to view the full image.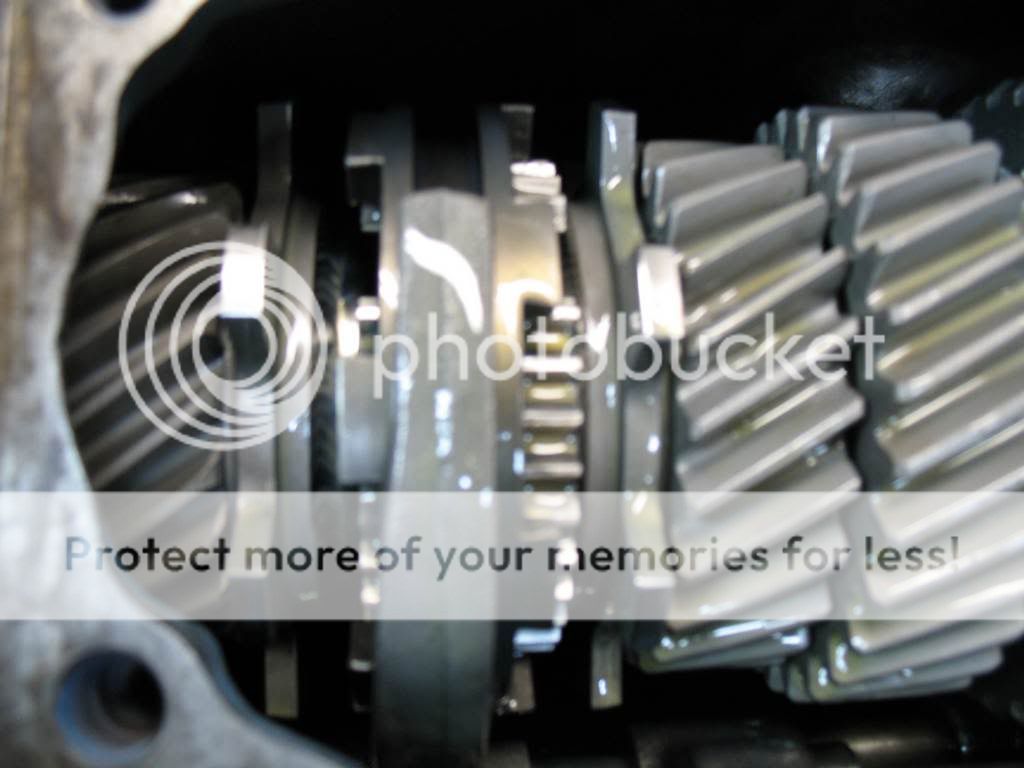
Report this image
4th gear engaged:
This image has been resized. Click this bar to view the full image.
Report this image
great post!!
now lets not get this thread derailed!!
You MF'er, is there a flip off pastie dude?

Found it cabron
Sent from my iPhone 6 while driving 100 mph on a dirt road
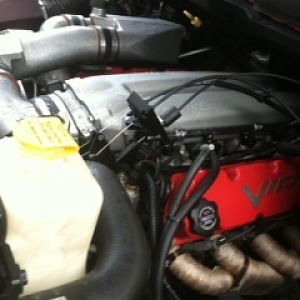
So the gen IV heads bolt up to our bottom end without any modifications?
Did the heads you got off of ebay have he machining done to the compression chamber area? I got a set and one head had the machining and one didn't. Got the correct replacement but sounded like the guy selling them had boh raw heads and machined ones. You might need to add another $1200 to your budget for valve covers and more for fuel rails and more for PCM/ignition control for the individual coil per plug. I will be following this thread as I have similar idea but with a supercharged setup.